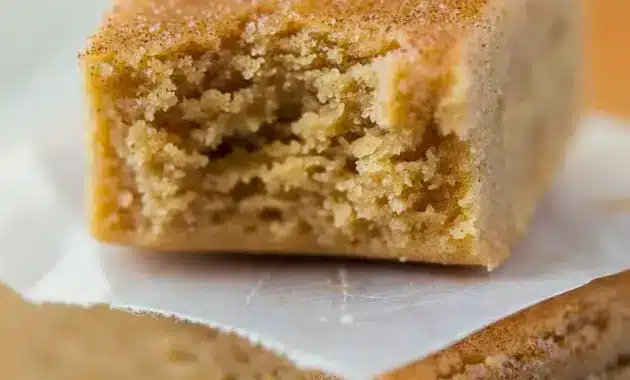
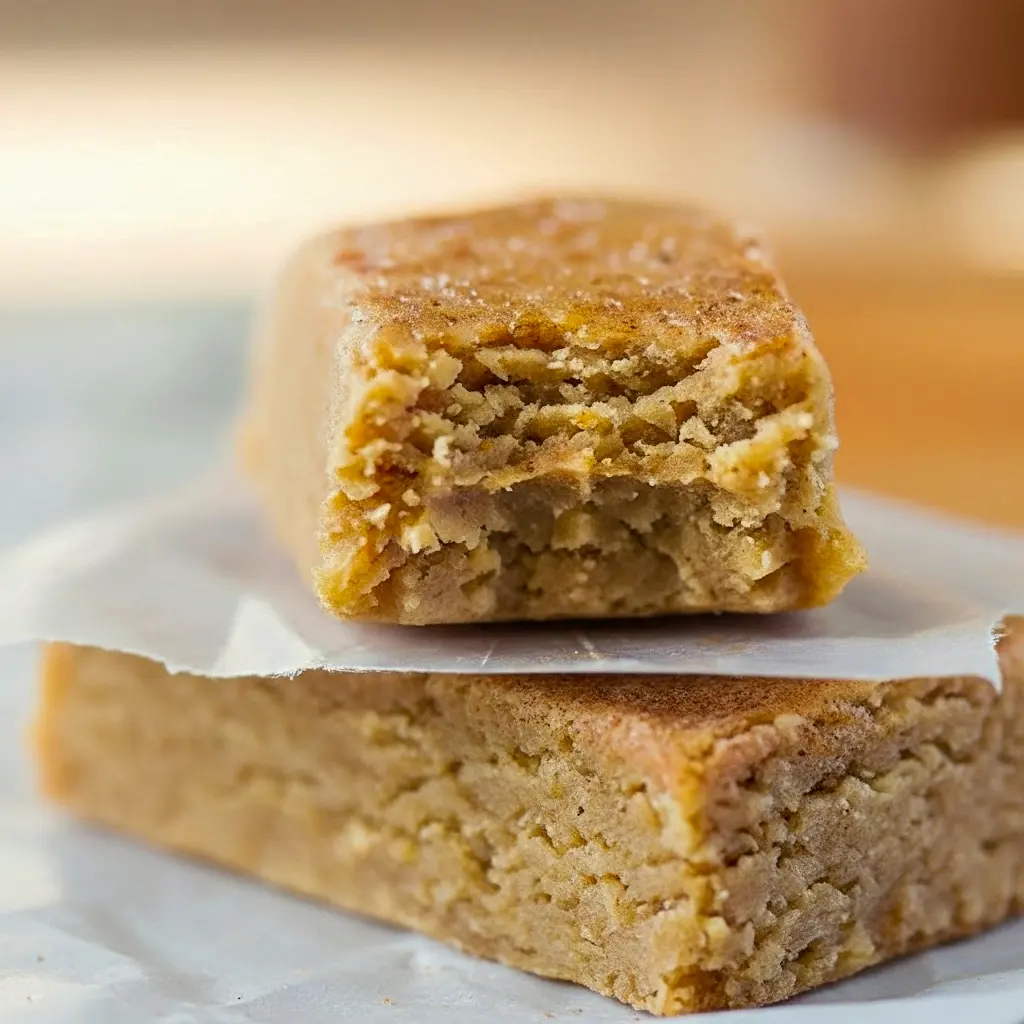
Apple Protein Bars are your new grab-and-go lifesaver: chewy, warmly spiced, and packed with protein so they actually keep you full. Made with applesauce, almond butter, and protein powder, these bars deliver apple-pie vibes without the sugar crash. Ready in minutes and no oven required? Yes please.
Why you’ll love these bars
Craving something sweet but hate the empty-calorie fallout of shop-bought bars? These hit the sweet spot.
- They taste like apple pie but act like a sensible snack.
- You’ll get a meaningful protein boost (about 12 grams per bar in my tests).
- They stay firm, portable, and perfectly spiced — ideal for morning commutes or gym bags.
- They’re no-bake, so cleanup is tiny and effort is minimal.
Bold tip: Use unsweetened applesauce to control sweetness and keep flavors clean.
Ever tried a store-bought bar that claimed “protein” but tasted like candy? Me too. That’s why I developed this Apple Protein Bar Recipe Easy — cleaner ingredients, actual texture, and no mystery sweeteners.
The Key Ingredients (and Why You Need Them)
Below I list the main ingredients (no amounts here — the printable card has those). I’ll explain what each does so you understand how and why to tweak things.
- Applesauce: The flavor anchor — brings natural sweetness and moisture. This makes these bars true Applesauce Protein Bars.
- Protein powder: Creates structure and delivers the protein punch. Vanilla works great; use the protein type you prefer (whey, plant, or blend).
- Almond butter: Adds richness, healthy fats, and helps bind the mix. Swap for peanut butter or sunflower seed butter if needed.
- Coconut and/or almond flour: Absorbs moisture and gives that cakey, chewy texture without grains — one reason these are Healthy Apple Pie Protein Bars.
- Maple syrup or honey: A touch of liquid sweetener to round flavors and help the batter stick together. Adjust to taste.
- Warm spices (cinnamon, nutmeg, apple pie spice): They turn simple apple into an Apple Pie Protein Bars experience. Don’t skip them.
- Milk of choice: Just a splash to get the batter to the right consistency — add gradually because protein powders vary.
- Optional mix-ins (dried apple, nuts, seeds, chocolate chips): Add texture and interest. I tested both dried apple bits and chopped walnuts — thumbs up.
Knowing each ingredient’s role makes swapping easy. Need gluten-free? Already there. Want vegan? Use plant protein and maple syrup. Simple.
How to Make It
Follow this step-by-step to create bars that hold together, slice nicely, and taste like a warm dessert disguised as a snack.
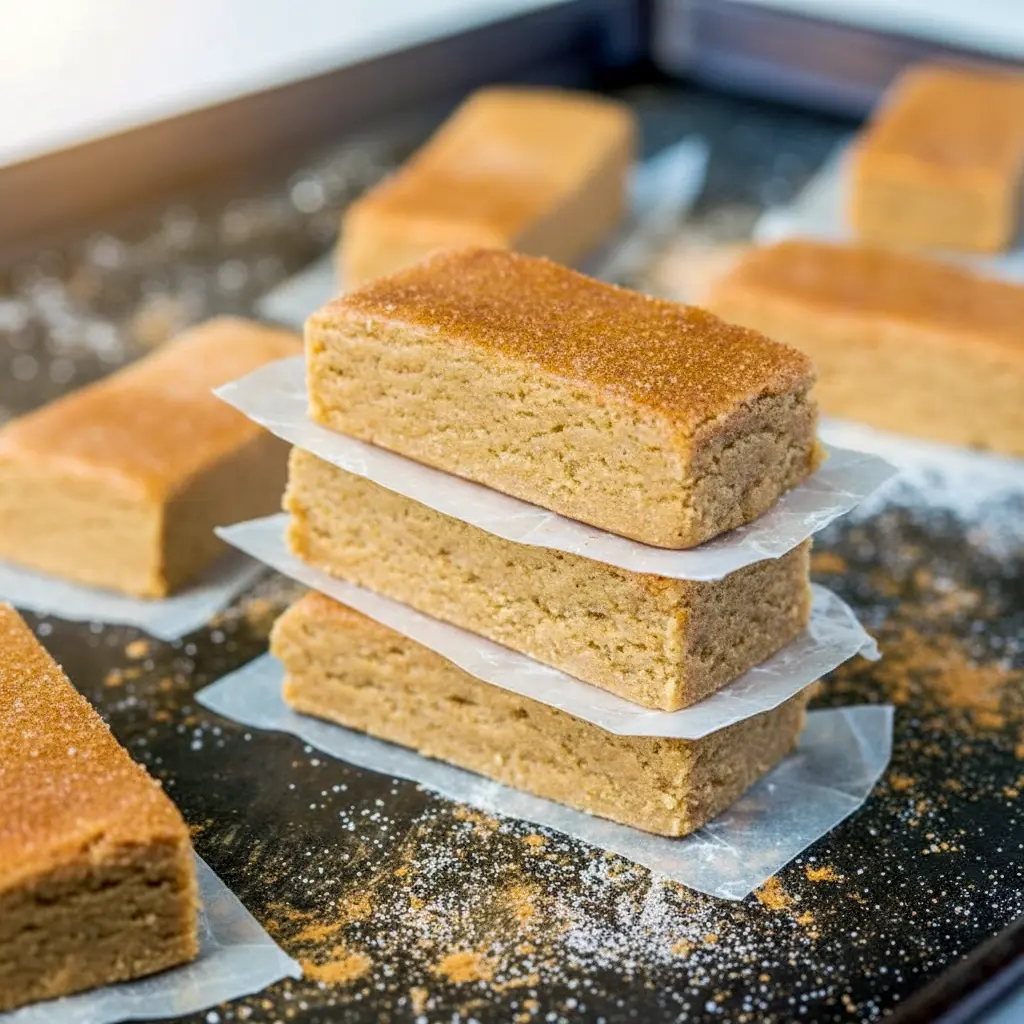
- Line your pan. Press a sheet of parchment into an 8×8 (or similar) baking dish so you can lift the set slab out easily.
- Mix dry ingredients. Combine protein powder, coconut/almond flour, spices, and a pinch of salt in a bowl. Whisk to remove lumps.
- Heat wet binder. Gently warm almond butter and maple syrup in a microwave-safe bowl or over low heat until pourable. This loosens the almond butter and helps incorporate it evenly.
- Combine wet + dry. Pour the warmed almond butter mixture into the dry mix, add applesauce, then fold gently. You’re looking for a crumbly dough that comes together when pressed; if it looks too dry, add a splash of milk. If it’s too wet, add a little more coconut flour.
- Adjust sweetness & texture. Taste the batter (yes, raw — it’s safe when using cooked ingredients) and add a touch more syrup if needed. If you want plain Apple Cinnamon Protein Bars, make cinnamon the star.
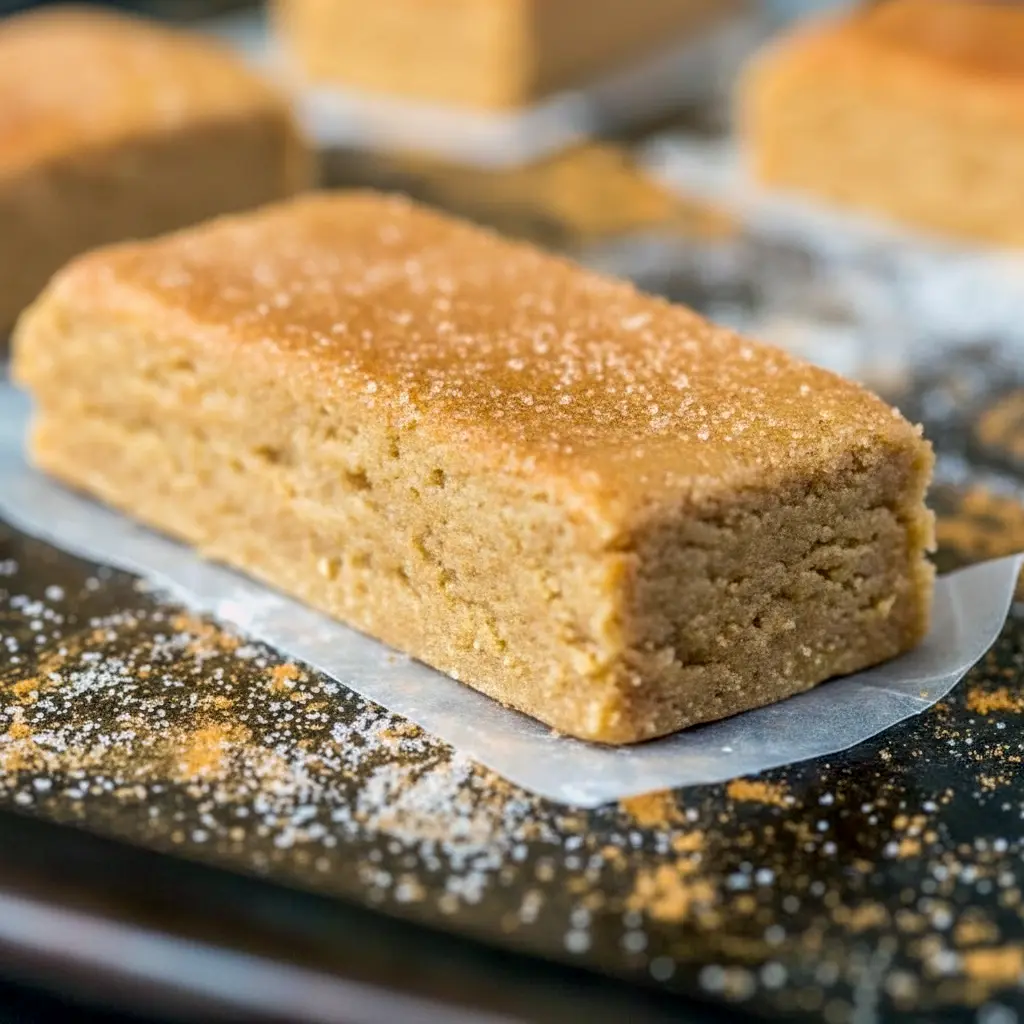
- Press firmly. Transfer the mix to your lined pan and press very firmly into an even slab — this step makes a huge difference in how cleanly the bars slice later. I press with the back of a measuring cup or the bottom of a small glass.
- Chill. Refrigerate for at least 30 minutes (longer is fine). No-bake bars firm up in the fridge so they’re portable and sliceable.
- Slice & store. Lift the slab out via parchment, slice into bars, and store in an airtight container in the fridge or freezer.
That’s it — the beauty here is the simplicity. Because these are No Bake Apple Pie Protein Bars, they require no oven time and minimal babysitting.
Pro tips for perfect results
- Press very firmly. The firmer you press before chilling, the less crumbly the bar will be.
- Start with less milk. Protein powders absorb liquids differently; add milk one teaspoon at a time until you reach a firm, not sloppy, dough.
- Use a food processor if you want a smoother, more uniform texture; mixing by hand yields a heartier, chewier bar. Both work.
- Taste for sweetness. If your protein powder is unflavored, the batter might taste bland — add a touch more maple or a pinch of stevia.
- Freeze for longer storage. These bars freeze beautifully. Thaw overnight in the fridge or grab frozen for a rock-solid on-the-go snack.
- If bars crumble, crumble them into yogurt bowls — instant parfait. No waste.
Bold tip: If your batter is too soft after chilling, add a tablespoon of coconut flour and re-press — it tightens the texture without killing flavor.
Variations to try
You can riff on this base a hundred ways. Here are crowd-pleasers that worked in my kitchen:
- Dried apple + walnut: Fold in finely chopped dried apples and toasted walnuts for crunch and apple bursts — basically upgraded Apple Pie Protein Bar Recipe energy.
- Chocolate drizzle: Melt dark chocolate and drizzle over chilled bars; freeze briefly to set for a dessert-like touch.
- Spiced oats: Mix a few tablespoons of rolled oats into the batter for chew (not grain-free anymore, but tasty).
- Vegan swap: Use plant protein powder and maple syrup; ensure your protein is neutral-flavored for best results.
- Lower sugar: Replace maple syrup with a monk-fruit syrup or a lighter sweetener, but watch texture — you may need slightly more binder.
- Cinnamon-forward: Double the cinnamon to make them proper Apple Cinnamon Protein Bars — cozy and breakfast-ready.
Want truly portable bars? Slice them, wrap individually in parchment, and stash in your bag. No soggy lunches here.
Best ways to serve
- Pre-workout: Half a bar 30 minutes before a sweat session provides gentle energy without digestive drama.
- Post-workout: A full bar with a glass of milk hits the protein goal nicely.
- Mid-afternoon: Swap chips for one bar and feel satisfied until dinner.
- As a mini-dessert: Warm briefly and top with a smidge of yogurt or nut butter for an indulgent, lower-sugar treat.
These are legit flexible — use them as a snack, a mini-meal, or a dessert substitute. Pretty cool for something no-bake.
Quick tips for storage and leftovers
- Fridge: Store bars in an airtight container for up to two weeks. They firm up and get chewier — in a good way.
- Freezer: Freeze in single layers (parchment between layers) for up to six months. Thaw overnight in the fridge.
- On the go: Freeze and grab a frozen bar — it thaws during your commute and stays firm longer in warm climates.
- If they dry out: Warm gently with a splash of milk and press back together — still tasty!
Bold tip: Label the container with date made; that freezer life goes fast and you’ll thank yourself when hunting snacks at 6 a.m.
FAQs
Can I skip protein powder?
Yes. Omit the powder and add extra coconut flour (start with two tablespoons) to firm the bars. They’ll lose the extra protein but still taste great.
Are these gluten-free?
Yep — when you use gluten-free protein powder and almond/coconut flours, these are naturally gluten-free.
Can I use real chopped apples?
Absolutely. Fold in finely diced apples, but eat within a week — fresh apple introduces moisture that shortens fridge life.
How much protein per bar?
Using my tested proportions, each bar averages ~12 grams of protein, but this varies by protein powder and portion size. Want more protein? add a scoop more powder and adjust liquid.
Is this recipe keto-friendly?
Not strictly — maple syrup and applesauce add carbs. To approach keto, substitute applesauce with mashed avocado or pumpkin and use a low-carb sweetener, but note the flavor changes.
Why these beat store-bought bars
Store bars often hide sugar, gums, and fillers. With this DIY approach you:
- Control sweeteners and fat sources.
- Pick your protein type and quality.
- Avoid weird preservatives and prioritize whole-food ingredients.
And honestly? They taste fresher. You also save money when you batch-make and freeze — win-win.
Final thoughts — wrap-up
If you want a snack that tastes like dessert but behaves like fuel, these Apple Protein Bars deliver. They’re simple, adaptable, and genuinely satisfying. Whether you call them Applesauce Protein Bars, No Bake Apple Pie Protein Bars, or just your new pantry staple, they’ll earn their place in your weekly meal-prep routine.
Follow me on Pinterest for daily new recipes.

Quick Apple Protein Bars — Simple Bars for Busy Mornings
- Prep Time: 10 minutes
- Total Time: 10 minutes
- Yield: 12 servings 1x
- Category: Snack
- Cuisine: American
- Diet: Gluten-Free, Paleo, Vegan
Description
These quick apple-pie inspired protein bars come together in about ten minutes and still pack roughly 12 g of protein per bar. They set in the fridge (no baking) and slice into portable snack bars.
Ingredients
- 1 cup coconut flour
- 1/2 cup almond flour
- 1 cup protein powder (vanilla works great)
- 1/2 tsp ground cinnamon
- 1 tsp apple-pie spice
- 1/2 tsp ground nutmeg
- 1/4 cup almond butter (or any nut/seed butter you prefer)
- 1/2 cup pure maple syrup
- 1/2 cup unsweetened applesauce
- 1 tbsp milk (add more as needed — see notes)
Instructions
- Line an 8×8 (or similar) pan with parchment, leaving an overhang for easy removal, and set it aside.
- In a large bowl whisk together the coconut flour, almond flour, protein powder, cinnamon, nutmeg, and apple-pie spice until evenly combined.
- In a small microwave-safe bowl (or in a saucepan over low heat) warm the almond butter and maple syrup just until pourable. Stir them together.
- Pour the warmed almond butter mixture into the dry ingredients and stir until the mixture looks crumbly and mostly incorporated.
- Fold in the applesauce. The mixture will be a coarse, slightly dry crumble at this stage.
- Add the milk a teaspoon or tablespoon at a time, mixing until the mixture holds together when pressed — you want a thick, moldable batter, not a loose batter.
- Transfer the mixture to the prepared pan and press it down very firmly and evenly (use the bottom of a measuring cup for best results).
- Chill in the refrigerator for at least 30 minutes to firm up. Lift out on the parchment, slice into bars, and store chilled.
Notes
- Notes & tips
- Apple-pie spice: If you don’t have a premixed blend, combine 1/2 tsp cinnamon + 1/4 tsp nutmeg + 1/4 tsp allspice.
- Milk amount varies: Start with one tablespoon, but some protein powders (especially casein) soak up more liquid — you may need more to reach the right consistency. Add gradually.
- Substitutions: Swap almond butter for peanut, cashew, tahini, or sunflower seed butter if needed.
- Storage: Keep refrigerated in an airtight container for up to two weeks, or freeze for longer storage.
Nutrition
- Serving Size: 1 serving
- Calories: 179kcal
- Sugar: 9g
- Sodium: 38mg
- Fat: 7g
- Carbohydrates: 19g
- Fiber: 5g
- Protein: 12g


