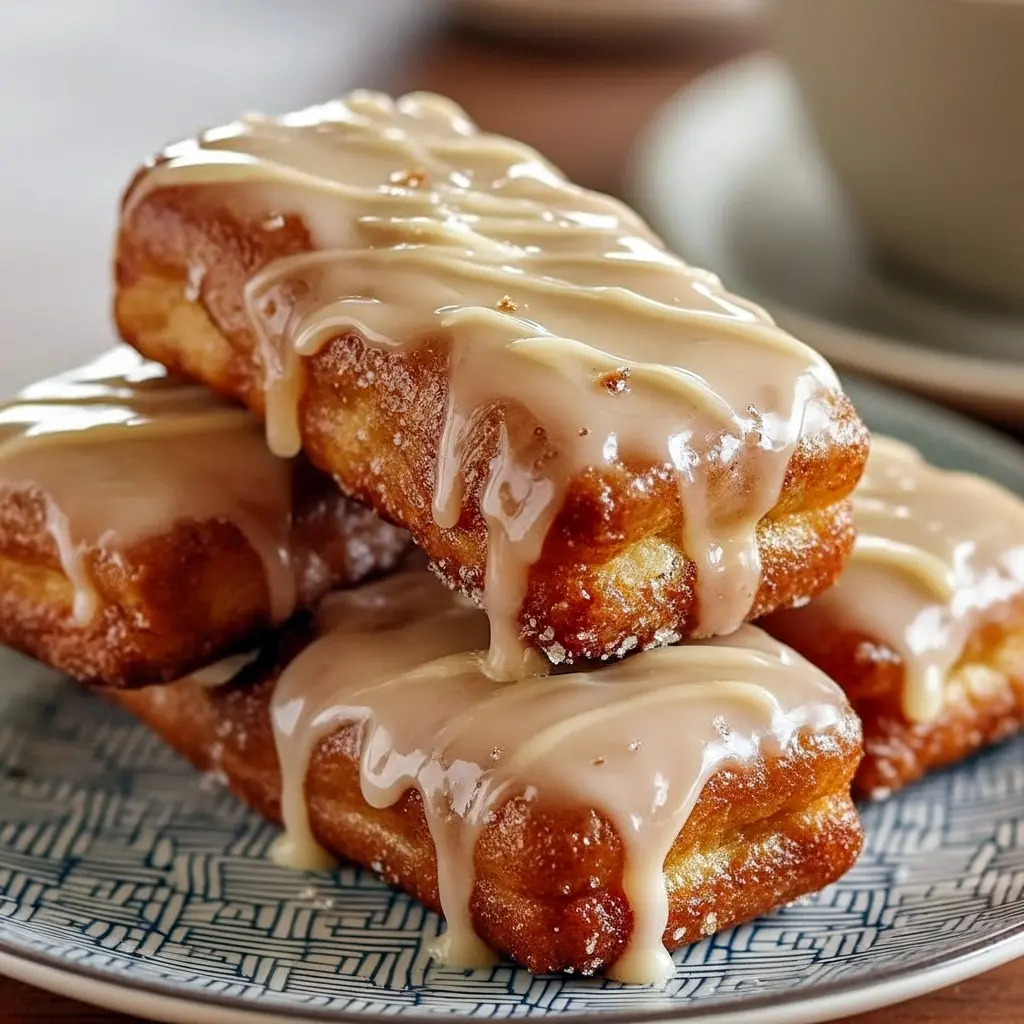
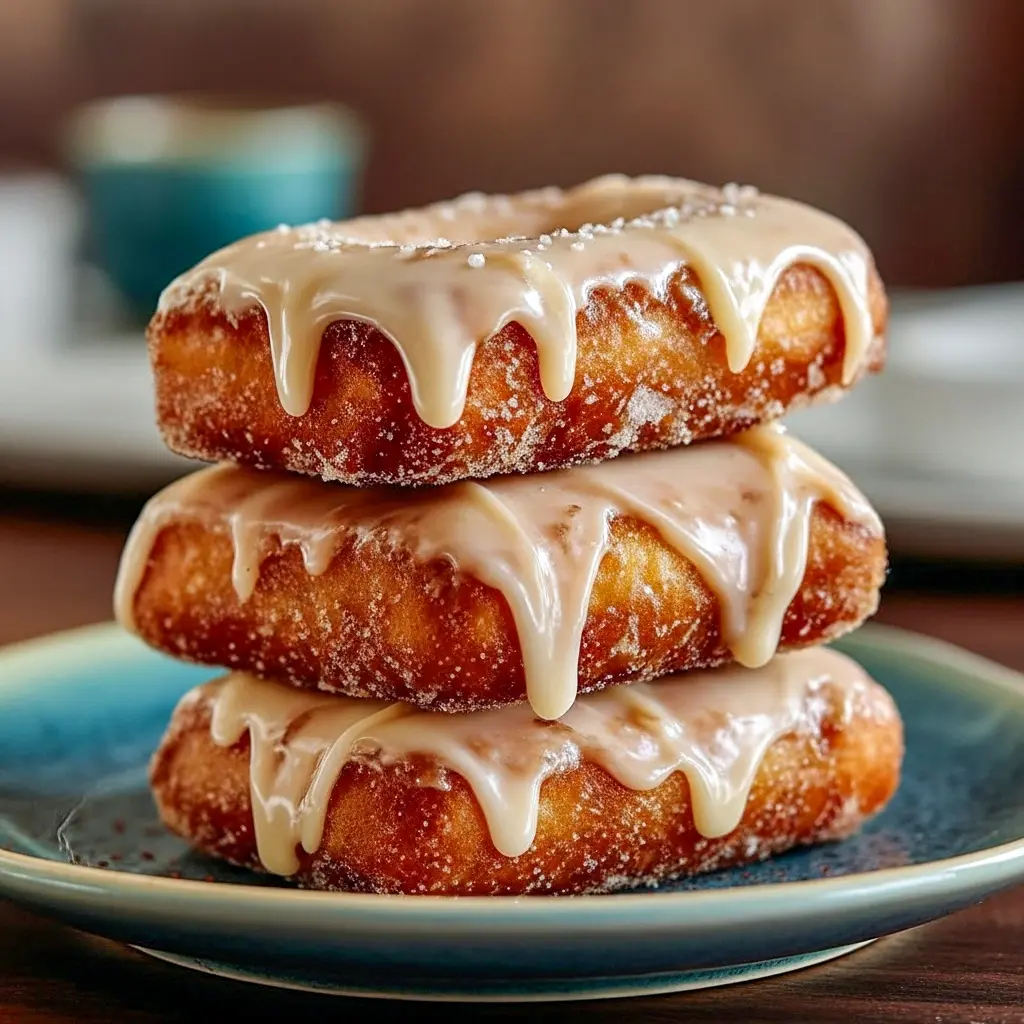
Donut Bars Recipe — that’s what you want, and yes, you can totally make bakery-level Maple Bar Donuts at home. These are the soft, slightly chewy, maple-glazed bars you dip in coffee and immediately forgive the world for being a little messy. Let’s dig in.
Welcome, Bold Bakers — this is a long, chatty, fun guide that walks you through why these are irresistible, what you need, a straightforward how-to, the backstory, my pro tips, tasty variations, serving ideas, storage hacks, and an FAQ to cover the things you’ll wonder about while your oil (or oven) does its thing.
Why these Donut Bars Recipe hit different
You know that first warm bite from a freshly-made donut? This recipe chases that joy. The secret combo: a tender, slightly chewy yeast dough, a quick fry to puff and seal in crumbs, and a shiny, crackly maple glaze that snaps a little on top. Together? Pure nostalgia + next-level yum.
What makes them irresistible: fluffy crumb, gently sweet maple topping, and the contrast of a soft interior with a tiny exterior crunch. Plus—if you love the idea of Parlor Donuts Recipe vibes at home, this delivers.
(Also, FYI — if frying isn’t your jam, scroll to the variations for a baked option that still slaps. IMO, frying just tastes more like the real deal, but baked is easier.)
What you’ll need (ingredients with quick notes)
Here’s a compact ingredient list so you can shop or raid your pantry.
- Flour (bread flour preferred) — gives that slightly chewy, springy texture. All-purpose works too.
- Active dry yeast — the spark of life for the dough.
- Warm milk — hydrates and adds tenderness.
- Granulated sugar — for sweetness and to feed the yeast a bit.
- Eggs — enrich and bind the dough.
- Butter (room temp) — flavor and tenderness.
- Salt — balances sweetness and strengthens gluten.
- Vegetable or peanut oil — for frying; high smoke point required.
- Powdered sugar + pure maple syrup + a pinch of salt — for the maple glaze.
- Optional: vanilla extract in glaze; cinnamon in dough for a twist.
Short description: yeast dough → proof → shape into bars → fry → glaze.
And here’s that baked alternative crew — if you love Doughnuts Recipe Baked or want something tidier, you can bake these as bars or rings and finish with the same maple glaze. They’ll be softer and less greasy, but still dreamy.
Simple how-to (overview — clear & direct)
- Make the dough: Warm milk (not hot), sprinkle yeast + a pinch of sugar, let bloom ~5–10 min. Mix flour, sugar, salt; add eggs, butter, milk-yeast mix. Knead until smooth and elastic (about 6–8 minutes by stand mixer).
- First rise: Cover, let double in a warm place ~1–1.5 hours.
- Shape: Roll out to ~¾-inch thick. Cut into bars (classic maple bars are rectangular) or into rounds for donut shapes.
- Second rise: Lightly proof shaped pieces ~30–45 minutes until puffy.
- Fry: Heat oil to 350°F (180°C). Fry donuts/bars 1–2 minutes per side until golden. Drain on wire rack over paper towels.
- Glaze: Whisk powdered sugar + maple syrup + tiny splash of milk and optional vanilla until smooth. Dip warm bars, let glaze set.
- Enjoy: Bite. Repeat.
This is the core. If you want step-by-step dough recipe amounts, I can drop a full recipe next — but this keeps things high-level and approachable.
The story behind making them at home
Maple bars are the kind of donut I chased as a kid: big, flat, willing to host a glossy pool of glaze. I used to stand at shop counters, watching glaze drip slowly into the paper bag like precious cargo. Making them at home? It’s a small rebellion against store hours and seasonal shortages.
I learned to fry at home because I wanted that exact moment when the glaze cracks and the inside still steams. After a few trial runs and lots of oil-temp tuning, I landed the soft-chewy texture and that satisfyingly crackly maple top. Pro tip: it’s a little practice — but once you get the oil temp and dough rhythm, it’s repetitive joy.
Pro tips & chef-level tricks (read these — they matter)
- Use a thermometer. A candy/kitchen thermometer clipped to the pot is essential. Keep oil at ~350°F (180°C). Too cool = greasy donuts; too hot = burned exterior, raw interior.
- Don’t overfill your pot. Fry in shallow but tall pots; one or two donuts at a time for even cooking. Don’t leave oil unattended.
- Bloom your yeast. If it doesn’t get foamy, your yeast might be dead — start again. This is critical.
- Cold butter vs. melted butter: Use softened butter for kneading. Too much melted fat will change dough texture.
- Rest the glaze: Let glazed bars sit on a wire rack to set; glaze firms to that classic thin crackle.
- Drain properly: After frying, rest on a rack — not directly on paper. Paper traps steam and softens the crust.
- One-at-a-time frying: These donuts are big. Fry just one at a time for best control.
- If oil smokes: Turn off heat, carefully remove pot from burner, and allow to cool a bit. Safety first.
- For filled donuts: Pipe in pastry cream or jam after frying and cooling slightly. Glaze afterwards.
Bold pro tip: Always keep a lid nearby when frying; if oil ignites, smother it — never water it. Safety > snacks.
Variations to try (because creativity rules)
- Baked Maple Bars: If you prefer Doughnuts Recipe Baked or want less mess, press the dough into a lined sheet pan, bake, and slice into bars—glaze as usual. These are more like Baked Maple Bars but still delicious.
- Yeast-Free Shortcut: Use a doughnut batter (baking powder) for a quicker treat, but texture changes.
- Filled Bars: Make a slit and fill with vanilla pastry cream or maple custard before glazing.
- Cinnamon-maple twist: Add a small pinch of cinnamon to your glaze or dough.
- Savory-sweet: Sprinkle flaky sea salt on half the glazed bars for a grown-up finish.
- Mini versions: Cut smaller to make bite-sized Doughnut Bars for parties.
And if you’re into the world of Yeast Baked Goods and Yeast Baking Recipes, this is a great entry point. The process teaches scoring, timing, and proofing — fundamentals that translate to breads and other enriched dough treats.
Frying vs baking: pros & cons
- Frying = classic texture, richer flavor, crisp exterior with soft inside. Best for authentic Parlor Donuts Recipe vibes. Messier and needs oil control.
- Baking = easier cleanup, lower fat, still tasty. Great for weeknight baking or when you need Doughnuts Recipe Baked convenience.
Both work. Choose what fits your kitchen comfort level.
Best way to serve & pairings
- Hot with coffee (obvious) — strong coffee cuts the sugar.
- With milk for kids — classic combo.
- As part of a brunch spread: stack on a platter, dust with powdered sugar.
- For dessert: add a scoop of vanilla ice cream and a drizzle of warm maple syrup.
- For gifting: once set, pack in parchment-lined boxes — they travel surprisingly well.
Serving tip: Glaze while the bars are warm for a shiny finish that sets to a crackly surface — the textural contrast is everything.
Storage, reheating, and make-ahead
- Short-term: Store in an airtight container at room temp for 1–2 days. The glaze may soften a bit.
- Longer: Freeze unglazed bars individually on a baking sheet, then bag. Reheat from frozen in a 350°F oven 5–7 minutes, then glaze.
- Reheating: Warm gently in the oven (350°F for a few minutes) to revive interior softness. Microwave briefly for 10–15 seconds for a quick warm bite, but the glaze may melt.
Make-ahead: You can make the dough the day before and refrigerate after the first rise (slow overnight proof). Pull out, shape, proof briefly, then fry/bake.
Common mistakes & how to avoid them
- Greasy donuts: Oil too cool. Raise heat to 350°F and maintain it between batches.
- Dense crumb: Underproofed dough. Let the dough double properly.
- Burned exterior, raw inside: Oil too hot; reduce temp.
- Flat donuts: Overhandled dough or overproofed beyond elasticity. Be gentle with shaping.
FAQs — quick answers you’ll want
Can I use all-purpose flour?
Yes. Bread flour gives more chew; AP gives a softer crumb. Both work.
Do I have to fry?
Nope — baked versions work great. They’ll be less greasy and slightly different in texture.
What oil is best?
Neutral, high-smoke oils: vegetable, canola, or peanut oil. They won’t add off-flavors.
How long should I proof?
First rise ~1–1.5 hours (until doubled). Second rise ~30–45 minutes (puffy). Warmer kitchens = faster proofing.
How to make a crackly glaze?
Keep glaze on the thinner side and dip while the bars are warm. Let them cool uncovered to set into that thin shell.
Are maple bars the same as donut bars?
Maple bars are a classic type of Doughnut Bars — rectangle-shaped donuts with maple glaze. They’re essentially a beloved subcategory of donut bars.
Final thoughts — go bake (or fry) something glorious
Making Maple Bar Donuts at home is about chasing a small, delicious memory and reclaiming it any morning you choose. Whether you fry for that true parlor vibe or bake for lower-fuss goodness, the result is joy: warm, sweet, slightly nostalgic, and totally worth it.
If you loved this guide and want the full, tested recipe with exact measurements, temperature charts, and step-by-step photos, say the word and I’ll drop the full recipe card. Meanwhile, pick your oil (or oven), prep the yeast, and let’s make the house smell like a tiny donut shop today.
Baking/frying these is a vibe — and once you nail the rhythm, you’ll be sending boxes of Donut Bars to friends, or opening a weekend bakery in your own kitchen. Which version are you trying first? Fry or bake?
Follow me on Pinterest for daily new recipes.
Print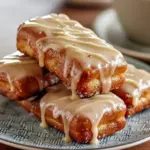
Maple Bar Donuts — A Simple Donut Bars Recipe For Weekend Baking
- Prep Time: 2 hours 20 minutes
- Cook Time: 30 minutes
- Total Time: 2 hours 50 minutes
- Yield: 12 doughnuts 1x
- Category: Dessert
Description
Maple Bar Donuts — homemade, soft, and gooey with a thick maple finish. Below is the same recipe rewritten in all-new words and steps so you can make bakery-style maple bars at home.
Ingredients
For the dough
- 1 cup (240 ml) lukewarm water
- ½ cup (115 g) granulated sugar
- ¼ cup (57 g) unsalted butter, softened
- 3 large egg yolks
- 1 tablespoon instant (rapid-rise) yeast
- 1¼ teaspoons fine salt
- 1 teaspoon vanilla extract
- 3½ cups (497 g) bread flour, plus extra for dusting
- ½ teaspoon baking powder
- Neutral oil (vegetable, canola, or peanut) for frying
For the thick maple glaze
- 2 cups (230 g) confectioners’ (powdered) sugar
- ½ cup pure maple syrup
- 1 tablespoon unsalted butter, melted
- ½ teaspoon maple extract (optional — boosts maple flavor)
Instructions
Make the dough
-
In a mixing bowl (stand mixer with dough hook or a large bowl if mixing by hand), combine the lukewarm water, sugar, softened butter, egg yolks, yeast, salt, and vanilla. Stir on low until everything starts to come together.
-
Whisk the flour and baking powder in a separate bowl. Gradually add the flour mixture into the wet ingredients while mixing, until a soft, slightly sticky dough forms. If the dough is excessively wet, add flour a tablespoon at a time until it holds together but still feels tender.
-
Knead the dough about 5–8 minutes in the mixer on low-medium speed (or 10 minutes by hand) until it’s smooth and elastic. The dough will remain fairly soft.
-
Oil a large bowl, place the dough inside, cover tightly with plastic wrap or a damp towel, and let it proof in a warm spot until doubled in size (about 1 hour).
Shape the bars
-
Gently turn the risen dough onto a lightly floured surface. Roll it into a rectangle roughly 10 × 12 inches (25 × 30 cm).
-
Trim edges if needed, then cut the rectangle in half lengthwise into two 5 × 12-inch strips. Cut each strip into six equal bars for a total of 12 pieces.
-
Transfer the bars to parchment-lined baking sheets dusted with flour. Lightly cover (use a second sheet pan or a tent of plastic wrap — avoid anything that will stick to the dough). Let them rise again in a warm place until noticeably puffed, about 45–60 minutes.
Fry the donuts
-
Set a wire rack over a baking sheet for draining. Pour oil into a heavy-bottomed pot to a depth of about 2 inches (5 cm). Clip in a candy or deep-fry thermometer.
-
Heat the oil to 350°F (180°C) and maintain that temperature while frying. Work carefully and never leave hot oil unattended.
-
Fry the bars one at a time (they’re large) for about 1 minute per side, or until both sides turn deep golden brown. Transfer cooked bars to the wire rack to cool completely before glazing.
Make the maple glaze & finish
-
Whisk the powdered sugar, maple syrup, melted butter, and maple extract (if using) in a shallow bowl until completely smooth. The glaze should be thick but pourable — adjust with a teaspoon of water or powdered sugar to reach the right consistency.
-
Dip the top of each cooled bar into the glaze, allowing excess to drip back into the bowl. Return glazed bars to the wire rack and let the coating set for a few minutes.
-
Serve once the glaze has firmed slightly. Best eaten the day they’re made.
Notes
- Storage & reheating
- Room temp: Keep in an airtight container for up to 24 hours (they’re best fresh).
- Freezing: Unfrosted bars can be frozen on a tray, then bagged for up to 1 month. Thaw and re-fry or warm, then glaze.
- Reheat: Warm gently in a 325°F (160°C) oven for a few minutes to refresh texture.
- Quick tips
- Thermometer = sanity. Keeping oil at 350°F prevents greasy or undercooked centers.
- Don’t overcrowd the pot. Fry one or two bars at a time so oil temperature recovers quickly.
- Let them cool before glazing. If the bars are too hot the glaze will run off completely.
- Glaze texture: If your glaze is too thin, add a little more powdered sugar. Too thick? Splash in a tiny bit of maple syrup or water.