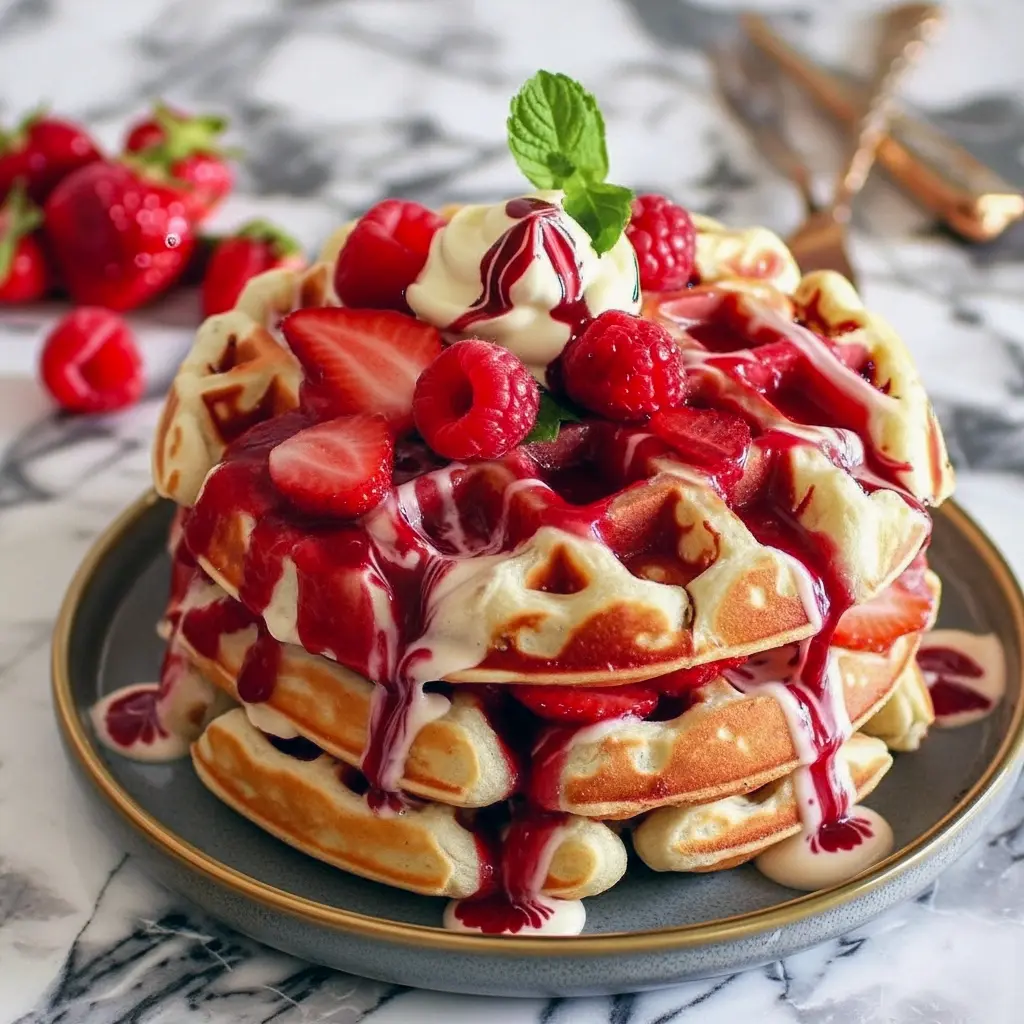
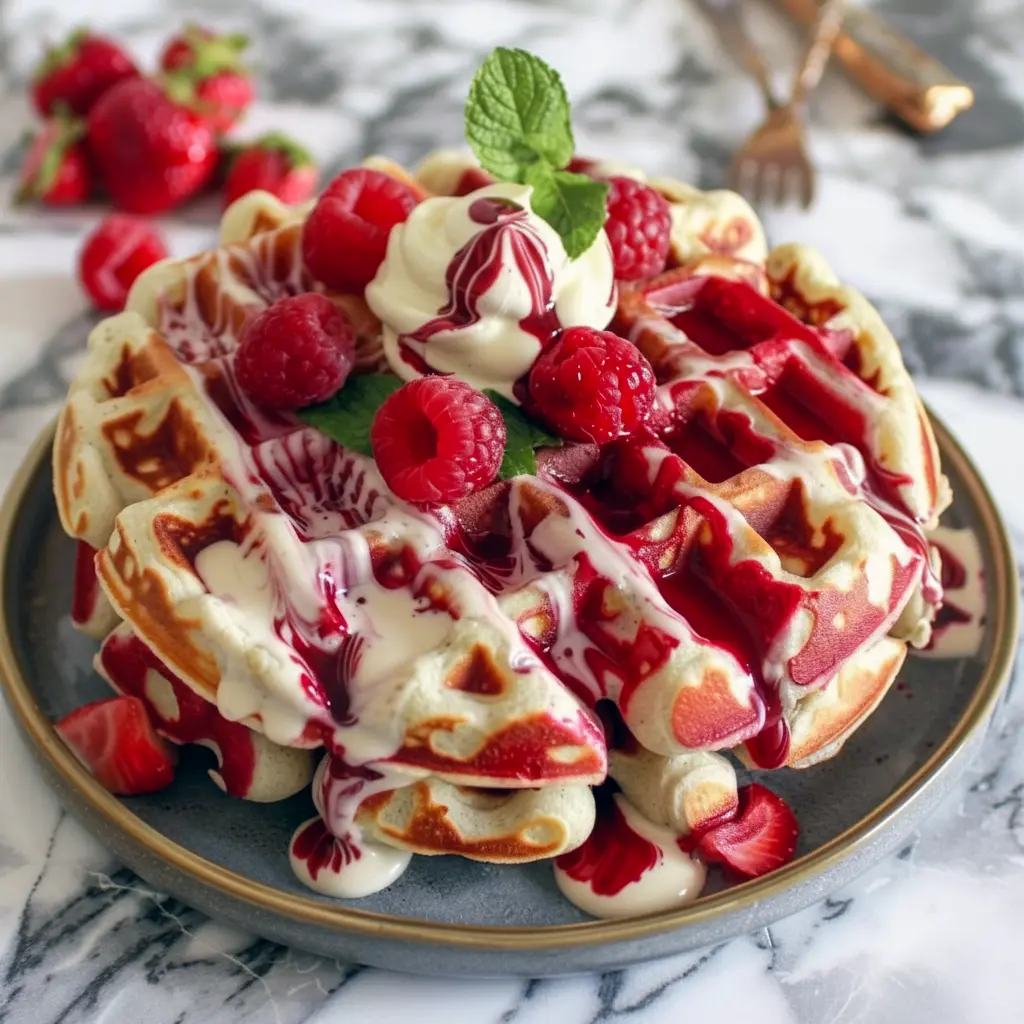
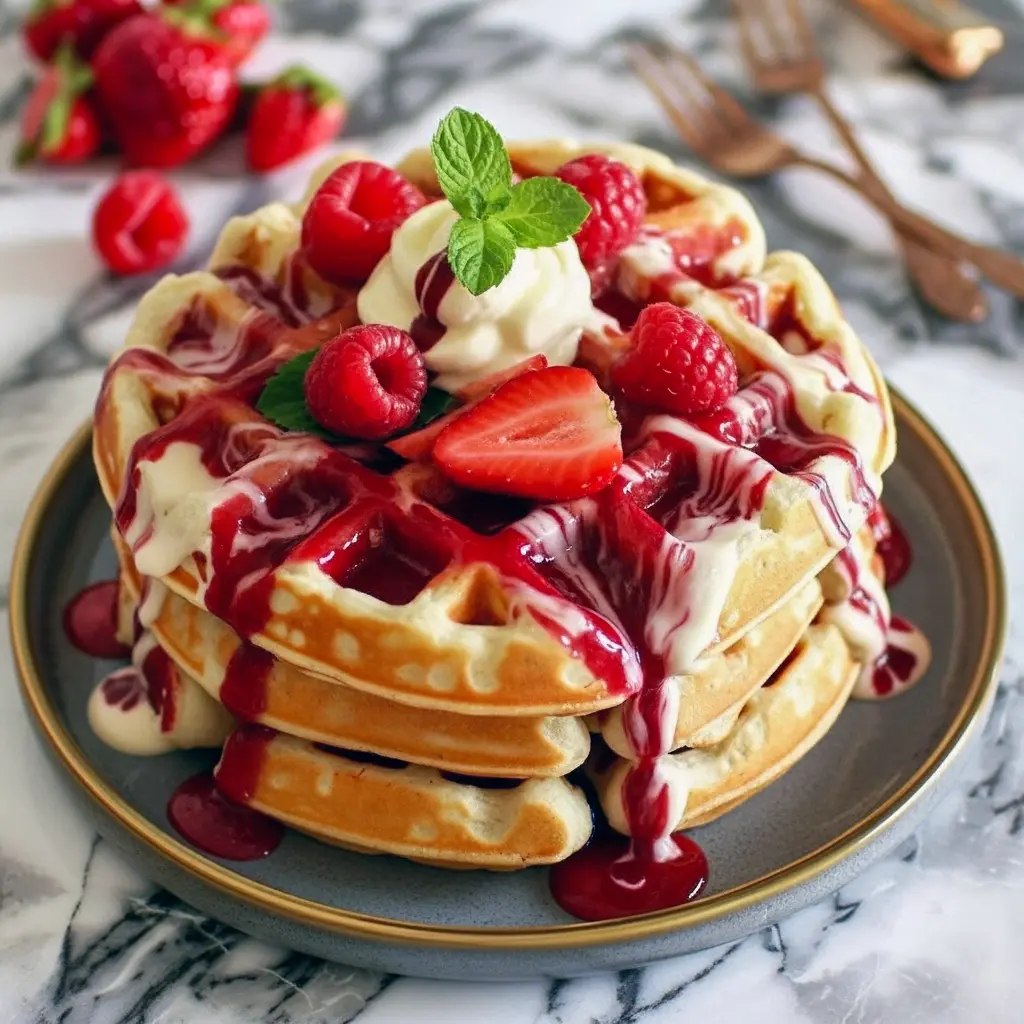
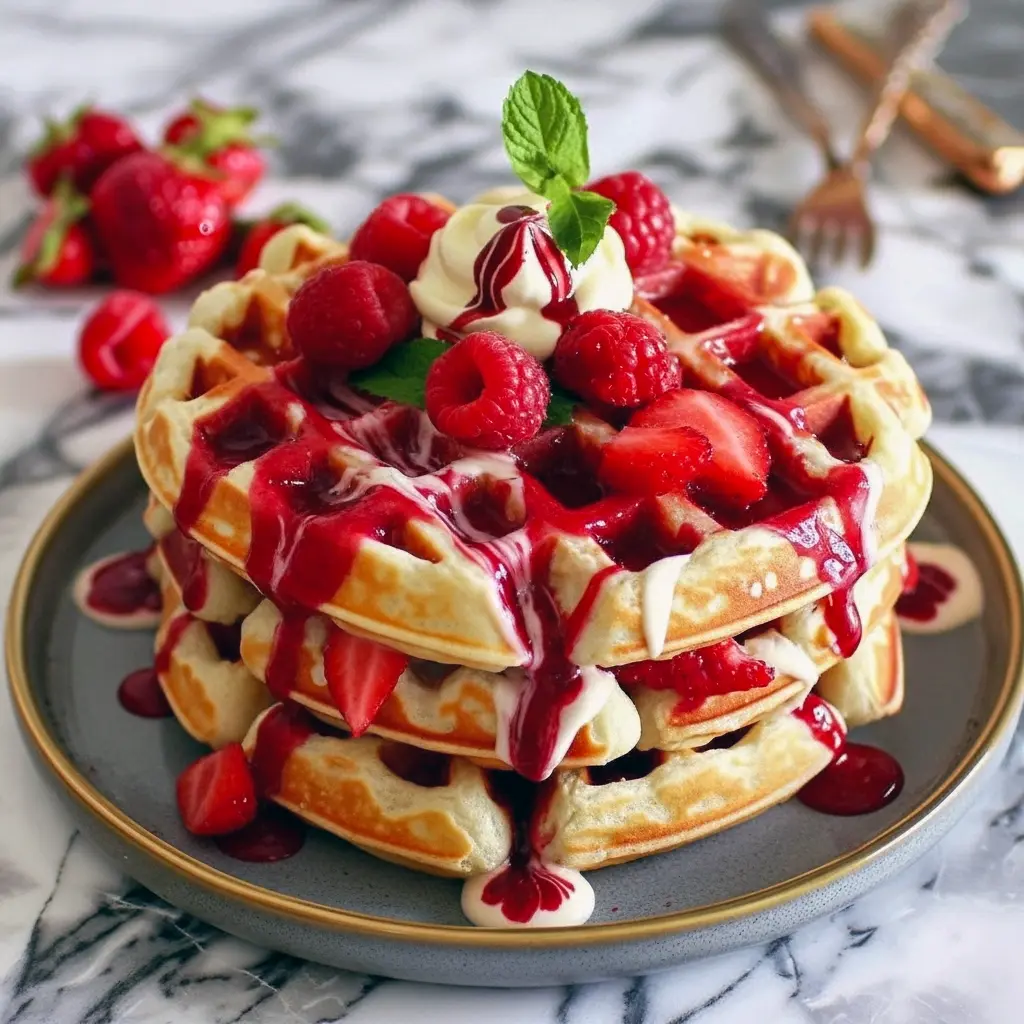
If you’re hunting for standout Waffle Recipes, these Red Velvet Marble Waffles deserve a spot on your brunch menu. They pair classic fluffy waffles with a streak of rich red velvet batter for a gorgeous marbled finish that tastes as good as it looks. Light, airy, and not too sweet—perfect for special mornings or when you just want to impress.
Why you’ll love this recipe
Who doesn’t love waffles that look like a party? These waffles balance tender classic batter with a velvety cocoa-red swirl. They’re fun to make, customizable, and deliver that “wow” on the plate without a ton of effort. Want brunch guests to gasp? Serve these with fresh berries and whipped cream. Want a cozy breakfast for two? Make a single batch and savor every bite.
The story behind the waffle
I first tried a marbled waffle years ago at a tiny brunch spot that did seasonal spins. I loved the texture but wanted more red velvet flavor and less sugar. After playing with batter ratios and coloring tricks, I landed on this version: two easy batters, a simple swirl technique, and waffles that stay light while still showing off a dramatic red streak. It’s now my go-to for holidays and weekend treats.
Ingredients breakdown — what each thing does
Keep your pantry organized—here’s why each ingredient matters.
Classic Waffle Batter (keeps waffles tender and airy)
- All-purpose flour — structure.
- Sugar — light sweetness and browning.
- Baking powder & baking soda — lift and lightness.
- Salt — balances flavors.
- Buttermilk — tang and tender crumb.
- Eggs — structure and richness.
- Melted butter — flavor and crisp edges.
- Vanilla — warm, homey notes.
Red Velvet Batter (adds cocoa depth and that signature color)
- Flour — structure, same base as classic.
- Cocoa powder — subtle chocolate flavor.
- Sugar — balances cocoa.
- Baking agents & salt — same leavening and balance.
- Buttermilk, egg, melted butter — mirrors classic batter for matched texture.
- Red food coloring — visual drama.
Small moves, big payoff: buttermilk in both batters creates a light, tangy waffle that pairs beautifully with sweet toppings.
Kitchen equipment you’ll need
- Waffle iron (electric) — choose your pattern (Belgian or classic).
- Mixing bowls — at least two for separate batters.
- Whisk — or fork if you’re low-tech.
- Ladle or measuring cup — for even pours.
- Toothpick or butter knife — for marbling.
- Cooling rack — keeps waffles crisp while you finish the batch.
Step-by-step — how to make Red Velvet Marble Waffles
Follow these concise steps for consistent results.
- Make the classic batter. Whisk the dry ingredients (flour, sugar, baking powder, baking soda, salt) in one bowl. In another, combine buttermilk, eggs, melted butter, and vanilla. Pour wet into dry and stir until just combined. Do not overmix. A few lumps are fine.
- Make the red velvet batter. Repeat the process: whisk flour, cocoa, sugar, baking agents, salt. Mix the wet ingredients (buttermilk, egg, melted butter, vanilla, red food coloring) and fold into the dry. Stop when everything blends—don’t overwork it.
- Preheat the waffle iron. Follow the manufacturer’s directions—this matters for browning and crispness. Lightly grease if needed.
- Create the marble. Spoon a small pool of classic batter onto the iron, then a dollop of red velvet batter. Use a toothpick or knife to swirl gently—one or two broad swirls does the trick. Over-swizzling creates a muddy color, so keep it graceful.
- Cook until golden. Close the lid and follow your waffle iron’s timing. Look for a golden edge and steam reduction. Remove carefully and transfer the waffle to a cooling rack to keep it crisp.
- Repeat. Continue until all batter’s used. Serve warm with toppings.
Bold tip: don’t stack waffles on a plate—they steam and lose crispness. Use a rack.
Pro tips for perfect waffles every time
- Preheat the iron fully. A properly hot iron gives a crisp exterior and tender interior.
- Measure your batter. Use the same ladle or cup for each waffle to keep cooking times consistent.
- Resist overmixing. Overworked batter yields tough waffles. Mix until the flour disappears.
- Let the iron stop steaming before you peak—steam means it’s still cooking.
- Use melted butter, not oil, for better flavor and more pleasing browning.
- Keep waffles warm in a low oven (200°F / 95°C) on a rack while you finish the batch. This keeps them crisp—no soggy stacks.
- For deeper red velvet color, use gel food coloring. It’s more vibrant and won’t thin your batter like liquid dyes.
Swirls & styling — how to marble like a pro
Don’t overdo the twirl. Drop two batters in alternating spoonfuls, then drag a toothpick through once or twice. Aim for a loose, elegant marble—think marbled cake, not tie-dye. Too much mixing blends the colors; too little won’t show a pattern. Practice on one waffle and you’ll get the rhythm.
Variations — make it yours
- Chocolate lovers: add a handful of mini chocolate chips to the red velvet batter for melty pockets.
- Vegan twist: swap buttermilk for plant milk + vinegar, use flax eggs, and vegan butter. Texture shifts slightly but still delicious.
- Healthier swap: use half whole-wheat pastry flour and reduce sugar a touch. Not identical, but still cozy.
- Citrus lift: fold a teaspoon of orange zest into the classic batter for a bright counterpoint to cocoa.
- Holiday spark: add a pinch of cinnamon or nutmeg to the red velvet for a warm seasonal note.
Toppings that turn great into unforgettable
What you pile on matters. Here are my go-tos.
- Classic maple syrup and a pat of butter.
- Mascarpone or whipped cream and a dusting of cocoa.
- Fresh berries (strawberries, raspberries) and a squeeze of lemon.
- Cream cheese glaze (cream cheese + powdered sugar + splash of milk)—goes perfectly with red velvet.
- Toasted nuts and a drizzle of honey.
- Ice cream and hot espresso for a decadent dessert waffle.
Best ways to serve — brunch, dessert, or snack
These waffles flex. Make them for:
- Breakfast Brunch Recipes that win on looks and flavor—think holiday mornings or Sunday hosting.
- Breakfast Treats for kids’ parties—add sprinkles for smiles.
- Delicious Snacks Recipes when you need a luxe bite between meals.
- Crowd-pleasing dessert: top with mascarpone and berries and call it a day.
Timing and batch cooking — feed a crowd smoothly
Want to serve 8? Double the batter and use a second person on waffle duty. Keep finished waffles warm on a rack in a 200°F oven. If you need more hands-off time, make the waffles ahead, freeze them between parchment layers, and re-toast lightly in a toaster or oven before serving—restores crispness.
Storage & reheating — quick tips
- Fridge: store leftover waffles in an airtight container up to 2 days. They’ll soften.
- Freeze: cool completely, then freeze in single layers with parchment between. Freeze up to 2 months.
- Reheat: toaster or oven (350°F for 6–8 minutes) yields the best crunch. Microwave only if you must—texture suffers.
Bold tip: re-toasting frozen waffles restores crisp edges better than microwaving.
Common mistakes and how to avoid them
- Overmixed batter → dense waffles. Mix just until combined.
- Underheated iron → pale, limp waffles. Wait until it’s very hot.
- Stacking hot waffles → soggy bottoms. Use a cooling rack or serve immediately.
- Too much food coloring → bitter dye taste. Use gel color sparingly.
FAQ — quick answers
Can I use a Belgian waffle maker?
Yes—reduce batter per waffle and watch cook time; Belgian irons often need a little longer.
Can I make batter ahead?
You can mix dry and wet separately and combine just before cooking. Make-ahead batter sits okay for a short while but may lose some lift.
Is food coloring necessary?
No—the cocoa gives a slight red-brown hue; color makes it festive but flavor relies on cocoa and vanilla.
Can I skip cocoa in the red batter?
You could, but it wouldn’t be red velvet—cocoa gives that subtle chocolate note that balances the tang.
How do I get deep red without altering texture?
Use gel color—small amount, big color payoff.
Why these count as Fun Baking Recipes and Interesting Food Recipes
This recipe gives you a playful hands-on moment: the swirl technique feels creative and the result looks professional. It’s a small baking experiment with a high visual reward—exactly the kind of kitchen play that makes cooking fun. People love to share photos of marbled waffles—hello, social media fodder.
Pairing suggestions — drinks and sides
- Coffee: a bright medium roast balances sweet batter.
- Tea: Earl Grey or chai pairs elegantly with red velvet notes.
- Fruit: berry compote or fresh citrus slices lighten the plate.
- Savory: pair with bacon or smoked sausage for sweet-salty balance—classic brunch energy.
Final thoughts — short and warm wrap-up
These Red Velvet Marble Waffles hit the sweet spot between dramatic and doable. They shine on brunch menus, look great in photos, and taste genuinely delicious. Whether you want a new Waffle Iron Recipes trick, a creative Waffle Maker Recipes idea, or just a fresh Breakfast Brunch Recipes centerpiece, this one delivers. Try it this weekend—swirl boldly, top generously, and enjoy the applause.
Follow me on Pinterest for daily new recipes.

Festive Red Velvet Marble Waffles — Fun Waffle Recipes
- Prep Time: 20 minutes
- Cook Time: 15 minutes
- Total Time: 35 minutes
- Yield: 8 waffles 1x
- Category: Breakfast
Description
A pair of complementary waffle batters — one classic, one red velvet — combined on the griddle to produce lightly crisp, tender waffles with a pretty marbled finish.
Ingredients
Classic Waffle Mix
- 1½ cups all-purpose flour
- 1 tablespoon granulated sugar
- 1 teaspoon baking powder
- ½ teaspoon baking soda
- ¼ teaspoon salt
- 1 cup buttermilk
- 2 large eggs
- ¼ cup melted butter
- 1 teaspoon vanilla extract
Red Velvet Waffle Mix
- 1 cup all-purpose flour
- 2 tablespoons unsweetened cocoa powder
- ¼ cup granulated sugar
- 1 teaspoon baking powder
- ½ teaspoon baking soda
- ¼ teaspoon salt
- ¾ cup buttermilk
- 1 large egg
- ¼ cup melted butter
- 1 teaspoon vanilla extract
- 1 tablespoon red food coloring
Instructions
Make the classic batter
-
In a medium bowl, combine the flour, sugar, baking powder, baking soda, and salt with a whisk.
-
In a separate bowl, whisk together the buttermilk, eggs, melted butter, and vanilla.
-
Pour the wet mix into the dry ingredients and stir just until the mixture comes together — small lumps are fine.
Make the red velvet batter
4. In another bowl, sift or whisk the flour, cocoa, sugar, baking powder, baking soda, and salt.
5. In a second container, mix the buttermilk, egg, melted butter, vanilla, and food coloring.
6. Add the wet ingredients to the dry and fold until just combined; avoid overmixing to keep waffles light.
Heat the waffle iron
7. Preheat your iron following the maker’s guidelines and brush or spray lightly with oil if needed.
Form the marble pattern & cook
8. Spoon a portion of the classic batter onto the hot waffle plates, then add a smaller scoop of the red velvet batter beside or on top.
9. Drag a toothpick, skewer, or butter knife through the two batters a couple of times to create a gentle swirl — don’t overwork it.
10. Close the iron and cook according to your appliance’s instructions until the waffle is golden and set.
Finish and serve
11. Remove the waffle and repeat until both batters are used.
12. Serve while warm with toppings such as whipped cream, berries, or maple syrup.
Waffle Recipes, Waffle Iron Recipes, Waffle Maker Recipes, Fun Baking Recipes, Breakfast Brunch Recipes, Delicious Snacks Recipes, Breakfast Dishes, Breakfast Treats, Interesting Food Recipes