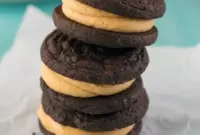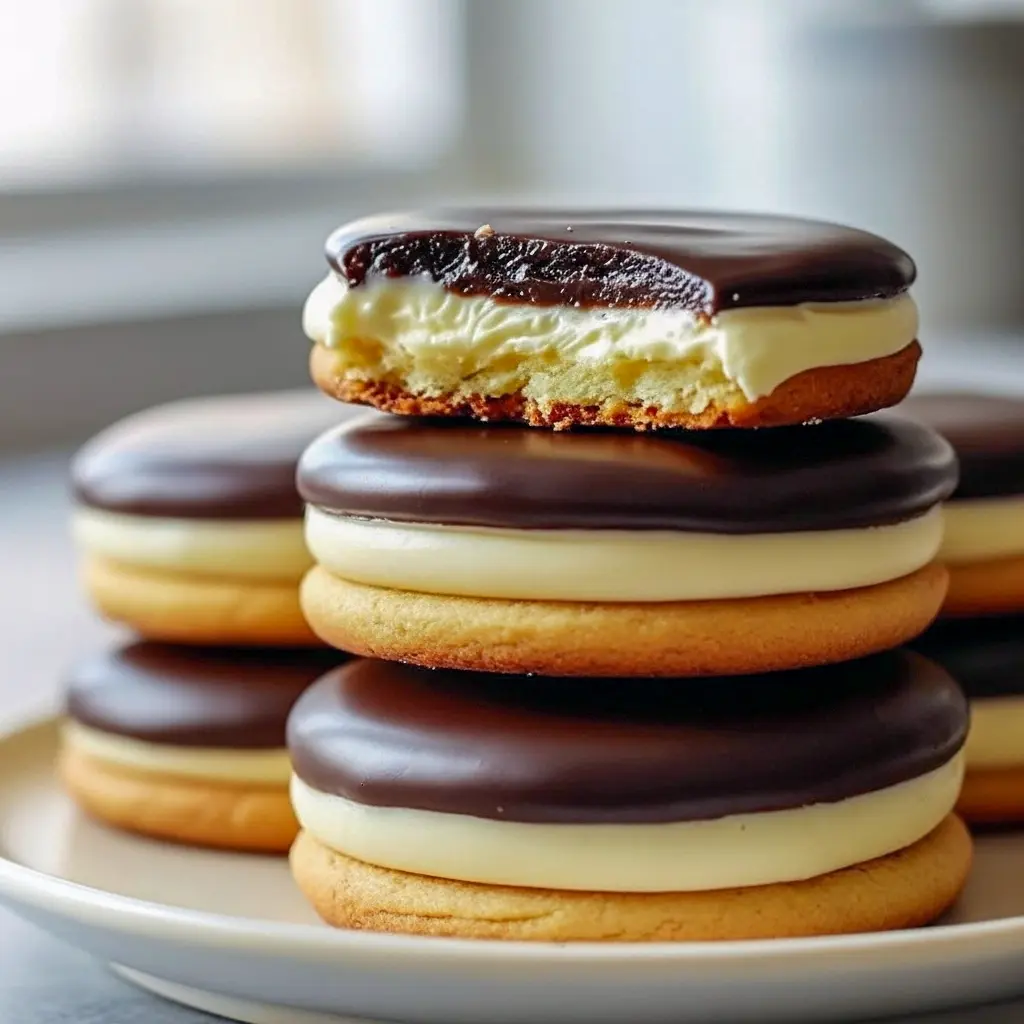
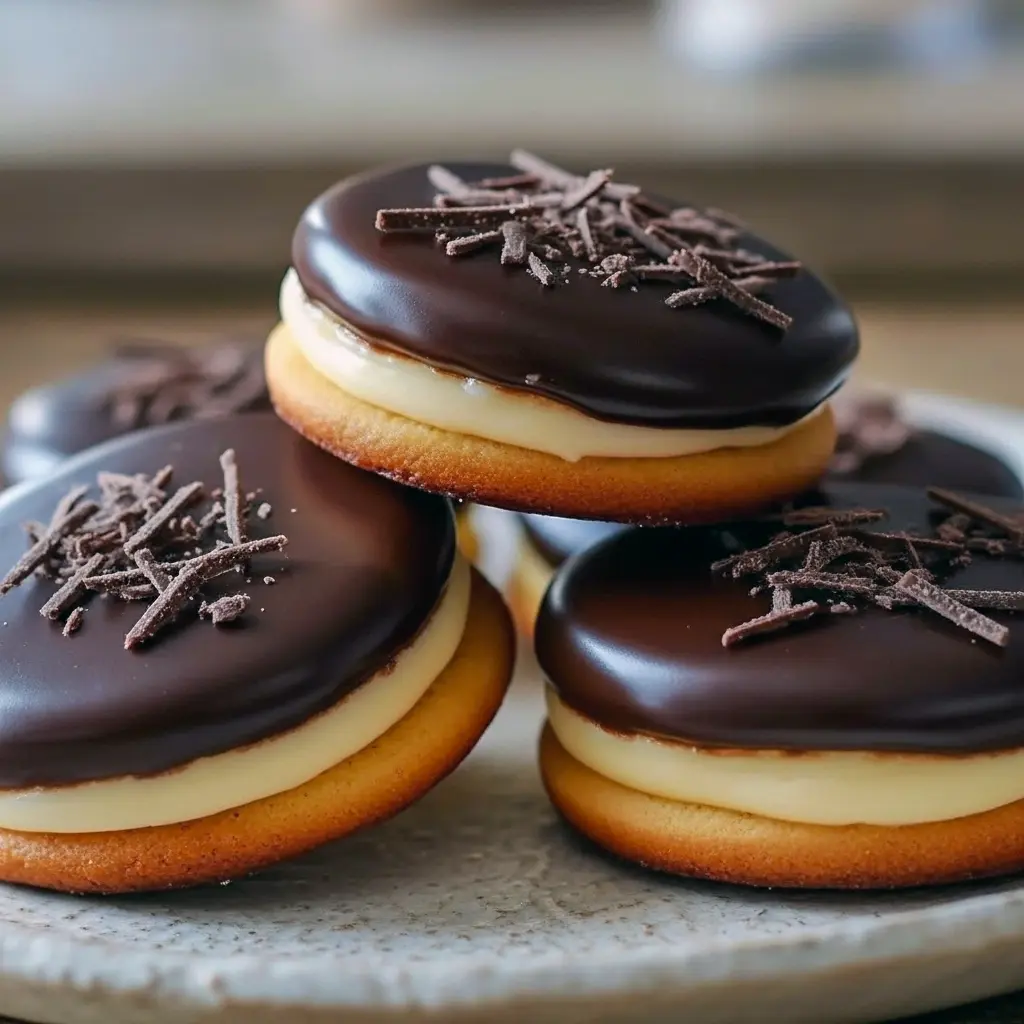
Boston Cream Pie Cookies are a genius little mash-up: soft, cake-like cookie layers sandwiching a lush pastry cream, finished with a shiny chocolate glaze. If you love the classic pie but want something handheld and party-ready, this is your jam. Ready to make a dessert that feels fancy without a ton of fuss?
Introduction to the recipe
Boston Cream Pie Cookies deliver the flavors of the iconic Boston Cream Desserts in a snackable format. Think tender cookie “cakes,” pillowy pastry cream, and a mirror-like chocolate topper — all in a neat sandwich you can hold in one hand. They work for bake sales, tea time, or the exact moment you decide to treat yourself after a long day. Why mess with forks when the classics fit in your palm?
What makes this recipe so irresistible?
Why do these cookies disappear first at parties? A few reasons:
- Contrast of textures: soft cookie + silky custard + glossy chocolate — every bite feels layered and complete.
- Flavor balance: rich vanilla pastry cream and bittersweet chocolate balance the buttery cookie.
- Nostalgia factor: you get the childhood comfort of Boston Crème Cookies with grown-up polish.
- Portability: they’re the ultimate Easy Handheld Desserts — no plate, no problem.
Bold tip: Chill the custard until firm but still pipeable — it makes assembly cleaner and the texture perfect.
Ingredients — short & sweet descriptions
Here’s the shopping list with quick notes so you know what each part does:
- Unsalted butter — gives the cookie base that tender, rich mouthfeel.
- Granulated sugar — sweetens and helps the cookie brown.
- Eggs — bind and give lift to the cookie.
- Vanilla extract — essential for authentic custard flavor.
- All-purpose flour + baking powder + baking soda + salt — structure and lightness for the cookie layers.
- Heavy cream + powdered sugar — for whipping the cream topping or to enrich the custard if you want a lighter filling.
- Milk, egg yolks, sugar, cornstarch — the classic pastry cream elements (or use instant pudding for a shortcut).
- Semi-sweet chocolate + a touch of oil or butter — for the glossy chocolate glaze.
- Optional: a splash of rum or brandy for adult vibes.
This mix of pantry-friendly items gives you control: make the filling classic (rich custard) or speed it up (instant custard or stabilized whipped cream).
The simple how-to (step-by-step, easy to follow)
- Make the cookie bases: Cream butter and sugar until light. Add eggs and vanilla. Mix dry ingredients separately, then fold into the wet just until combined. Chill the dough 30 minutes — cold dough spreads less and bakes prettier.
- Bake small cake rounds: Drop spoonfuls or pipe rounds onto a sheet and bake until edges set and tops look slightly domed. Let cool completely. These resemble tiny cake layers rather than flat cookies.
- Prepare the pastry cream: Whisk egg yolks with sugar and cornstarch. Heat milk until steaming, temper hot milk into yolks, then return to the stove and cook until thick. Remove from heat, stir in vanilla and a pat of butter, then chill until set. (Shortcut: whisk instant vanilla pudding with milk for a quicker filling.)
- Assemble: Pipe or spoon pastry cream onto one cookie layer, top with a second layer, press gently.
- Glaze: Melt chocolate with a touch of oil or butter for sheen, spoon over the sandwich tops, and let set. For diner-style shine, temper the chocolate or add a bit more fat.
- Chill briefly so the cream firms and the glaze sets, then serve.
Bold tip: Use a piping bag for neat filling — less mess, more photogenic cookies.
The story behind the cookie
The classic Boston Cream Pie dates back to the 19th century; it’s basically cake filled with custard and covered in chocolate. I wanted the essence of that dessert but in a single bite. I swapped layers of cake for cookie-like rounds that bake faster and travel better. The first test batch? A glorious, slightly messy kitchen victory — friends declared them the best handheld tribute to Boston Cream Recipes they’d tasted. That moment turned a nostalgic idea into a staple recipe.
Pro tips for the best outcome
- Chill components: Cold pastry cream pipes cleaner and tastes firmer. Chill your cookie rounds if your kitchen’s warm.
- Avoid overbaking: Pull cookies when the edges set and the tops still look slightly soft — they firm as they cool. Overbaked cookies lose the tender cake-like texture.
- Fresh vanilla matters: Use real vanilla extract or scrape a vanilla bean for the custard — it makes a noticeable difference.
- Stabilize whipped cream (if using) with gelatin or powdered sugar for fillings that won’t weep on hot days.
- Glaze like a pro: Add a teaspoon of neutral oil or a pat of butter to the melted chocolate for a mirror finish.
- Assembly line: Pipe all centers, then sandwich, then glaze — assembly in stages makes the process faster and tidier.
Bold tip: If you want bakery-style cookies, pipe the dough into uniform rounds using a template under your parchment.
Variations to try (playful spins)
- Classic custard: Stick to a true pastry cream for authentic Boston Cream Desserts vibes.
- Quick vanilla pudding filling: Use instant pudding mixed with a little whipped cream for speed.
- Chocolate custard: Add cocoa to the custard for double chocolate indulgence.
- Coffee-kissed: Stir espresso into the glaze for a mocha finish.
- Savory twist: For a cheeky Savory And Sweet Recipes moment, add citrus zest to the cream or a pinch of smoked salt to the chocolate. Yes, it works.
- Mini version: Make bite-sized Cream Pie Cookies for party trays and easier eating.
Best ways to serve these cookies
- Tea time: Plate them next to a pot of black tea or a cappuccino.
- Party platter: Arrange on tiered trays — they look like petit fours and travel well.
- Dessert course: Serve two per person with a raspberry coulis drizzle for contrast.
- Gift-ready: Stack in parchment-lined boxes with a ribbon — they scream homemade luxe.
Serving tip: Warm the glaze slightly before spooning for a silky finish; cool completely before stacking.
Quick tips for storage and leftovers
- Fridge: Store in an airtight container for up to 3 days. Custard shortens shelf life, so plan to eat within a few days.
- Freeze: Freeze unglazed cookie layers and freeze custard in a separate container; assemble after thawing for better texture. Assembled cookies don’t freeze as well because of the cream.
- Transport: Keep chilled in a cooler bag for picnics or potlucks — heat turns the cream runny and the glaze sticky.
Bold reminder: Assembled cookies fare best fresh but still taste amazing within a couple of days if refrigerated.
FAQs — fast answers to common questions
Can I use whipped cream instead of pastry cream?
Yes. Stabilize whipped cream with a small amount of gelatin or powdered sugar for a firmer filling. It’s lighter and faster but less traditional.
How can I speed up the pastry cream?
Use instant pudding mix or a premade custard as a shortcut. It won’t be identical, but it still taste-delicious.
Can I make these dairy-free?
Swap butter for plant-based butter, use coconut milk for the custard, and choose dairy-free chocolate. The texture shifts slightly but stays tasty.
Do I have to temper the chocolate?
No. Tempering gives the glossiest finish and snap, but adding a bit of oil or butter to melted chocolate gives a shiny glaze without the tempering step.
Can I prepare parts ahead?
Absolutely. Bake cookie layers and make custard the day before. Assemble and glaze on the serving day for the freshest result.
Why these belong in your recipe box
These Cream Pie Cookies check a lot of boxes: they bring nostalgia, they play well for crowds, and they feel fancy with minimal drama. They qualify as one of the Best Baking Recipes Desserts you’ll actually make on a weeknight — yes, really. You get a dessert that reads high-end without an all-day commitment.
Final thoughts
If you love the creamy-chocolate combo of a classic Boston cream pie but want something portable and picture-perfect, these Boston Crème Cookies answer the call. They satisfy the craving for Boston Cream Recipes while giving you the convenience of a cookie. Make them for guests, gifts, or when you need a dessert that looks like you tried — even when you nailed it in under two hours.
Bold last tip: Practice makes perfect — once you master one tray, you’ll find a dozen reasons to make them again.
Ready to bake? Grab your mixing bowl, chill that custard, and prepare to introduce your friends to a cookie that tastes like a hug from a classic dessert.
Follow me on Pinterest for daily new recipes.
Print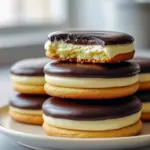
Boston Cream Pie Cookies — Pastries Recipes Easy for Home Bakers
- Prep Time: 30 minutes
- Cook Time: 12 minutes
- Total Time: 1 hour
- Yield: 24 cookies 1x
- Category: Dessert
Description
Soft buttery rounds sandwiched around a cloud of sweet cream and finished with a glossy chocolate coat. These handheld Boston Cream-inspired cookies are perfect for parties or an indulgent snack.
Ingredients
- 1 cup (226 g) unsalted butter, softened
- 1 cup granulated sugar
- 2 large eggs
- 1 teaspoon vanilla extract
- 2 cups (240 g) all-purpose flour
- 1 teaspoon baking powder
- 1/2 teaspoon baking soda
- 1/4 teaspoon fine salt
- 1 cup heavy (whipping) cream
- 1/2 cup powdered (confectioners’) sugar
- 1 teaspoon vanilla extract (for the filling)
- 1 cup semisweet chocolate chips
- 1 tablespoon neutral oil (vegetable or canola)
Instructions
Make the cookie dough
In a mixing bowl, beat the softened butter and granulated sugar with a hand or stand mixer until the mixture lightens and becomes airy — about 3–4 minutes. Add the eggs one at a time, beating after each addition, then stir in the vanilla.
In a separate bowl, whisk together the flour, baking powder, baking soda, and salt. Add the dry mix to the butter mixture on low speed and mix just until the dough comes together. Chill the dough, covered, for at least 30 minutes to firm up.
Whip the filling
Pour the heavy cream into a chilled bowl, add the powdered sugar and the filling vanilla, and whip on medium-high speed until stiff peaks form (about 3–5 minutes). Don’t overdo it — you want stable peaks but not butter. Keep the whipped cream in the fridge until you’re ready to assemble.
Bake the cookie layers
Preheat the oven to 350°F (175°C). Line two baking sheets with parchment. Using a scoop or spoon, drop rounded tablespoons of dough onto the sheets about 2 inches apart. Bake for 10–12 minutes, until the edges are just turning golden while the centers still look tender. Let the cookies cool on the sheet for 5 minutes, then transfer to a rack to cool completely.
Prepare the chocolate glaze
Combine the chocolate chips and oil in a microwave-safe bowl. Heat in 20–30 second bursts, stirring between, until the chocolate is smooth. Let it rest a minute so it thickens slightly but remains pourable.
Assemble the cookies
Turn one cooled cookie over (flat side up) and pipe or spoon a generous dollop of whipped cream onto it. Top with a second cookie, pressing gently so the filling spreads to the edges. Repeat until all sandwiches are built.
Dip the top of each sandwich into the melted chocolate or spoon the glaze over the top; let excess drip off. Place the glazed cookies on a rack to let the chocolate set.
Notes
- Notes & tips
- Use room-temperature butter for easy creaming and a light cookie texture.
- Chill the dough — cold dough keeps shapes neat and prevents excess spreading.
- Don’t overwhip the cream. Stop when you see firm peaks to avoid a grainy texture.
- If you want a quicker filling, swap the pastry cream with stabilized whipped cream (add a pinch of gelatin) or instant vanilla pudding mixed with whipped cream.
- Storage: Keep assembled cookies refrigerated in an airtight container for up to 3 days. Unassembled cookie rounds store in a sealed tin at room temp for several days; stash the filling separately until ready to build.
- For a pretty finish, sprinkle shaved chocolate or cocoa nibs onto the glaze before it firms.
- Serving idea: Try these with an espresso or a scoop of vanilla ice cream for extra indulgence. FYI: they travel well in a lined box if you’re gifting them.