A brownie pan that disappears fast
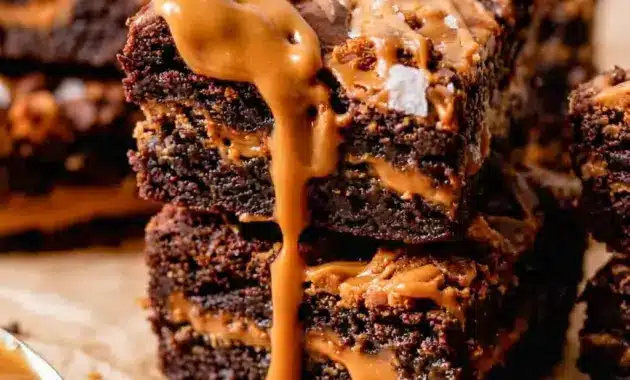
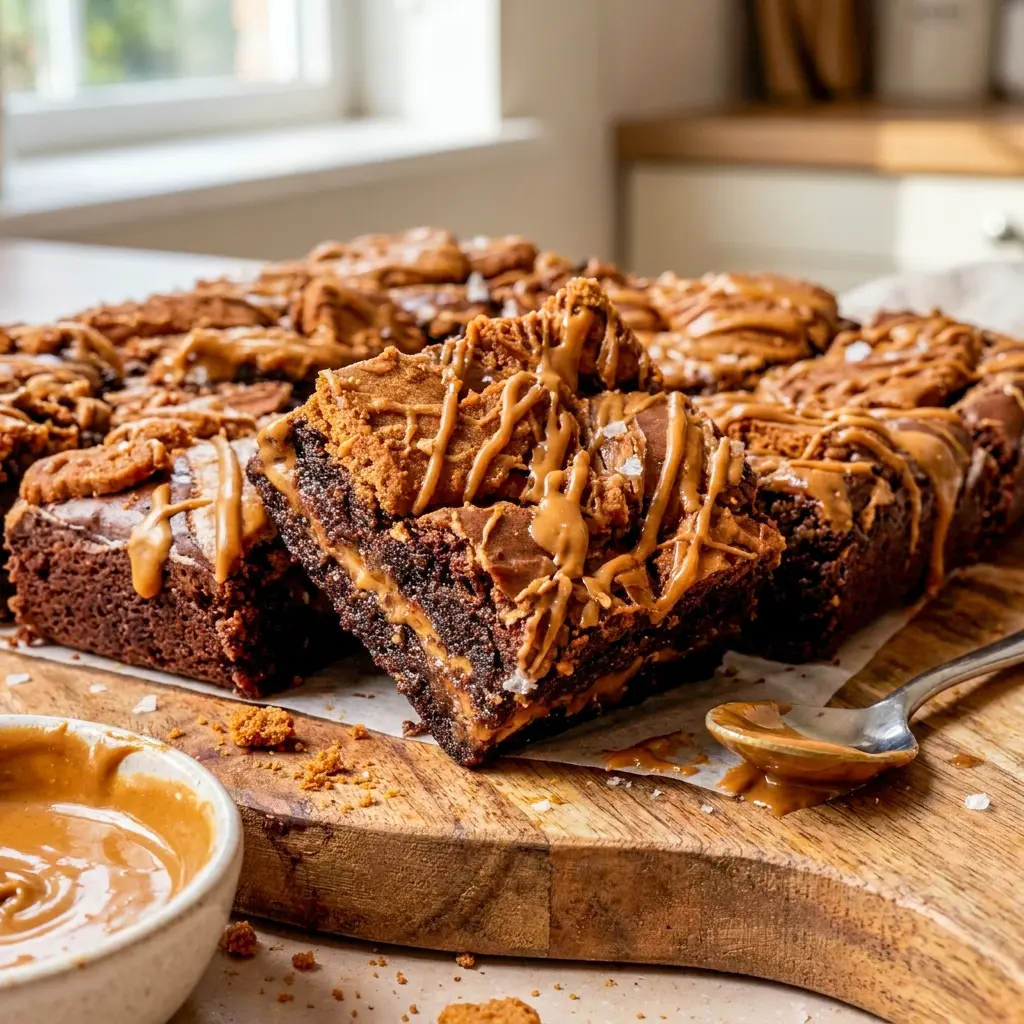
Biscoff Brownies do not act like ordinary brownies. They arrive with a deep chocolate base, a thick layer of cookie butter tucked right through the middle, and that unmistakable spiced-cookie flavor that turns a simple tray bake into something people remember. The first bite gives you fudgy chocolate, then a buttery Biscoff center, then a little crunch from the cookies on top. It is a full dessert experience in one square.
The beauty of Biscoff Brownies is how dramatic they taste without becoming complicated. You get that bakery-style payoff, but the process stays straightforward and reliable. The brownie base uses familiar ingredients, the cookie butter layer adds a gooey surprise, and the top finishes with crushed Biscoff cookies and a drizzle of melted spread. Every part earns its place.
I love desserts like Biscoff Brownies because they bring a clear flavor identity. You know exactly what you are getting: rich chocolate, warm caramel-like spice, and that signature cookie butter flavor that keeps pulling you back for one more bite. These are not brownies that fade into the background. They show up with personality.
That is also why Biscoff Brownies have such strong repeat-bake potential. They fit the sweet spot between easy and impressive. They work for bake sales, holidays, potlucks, late-night cravings, and casual weekends when you just want something undeniably good on the counter. A pan of Biscoff Brownies never seems to last long enough to cool fully.
For anyone who already loves Biscoff Brownie Recipe searches, this version gives you everything you want in one place: gooey center, intense chocolate flavor, and a clean method that does not ask for special equipment beyond a basic pan and a mixing bowl. It is also a strong fit for people looking for Biscoff Brownies Recipe ideas that feel rich and bakery-worthy without becoming fussy.
Table of Contents
Why you will love these Biscoff Brownies
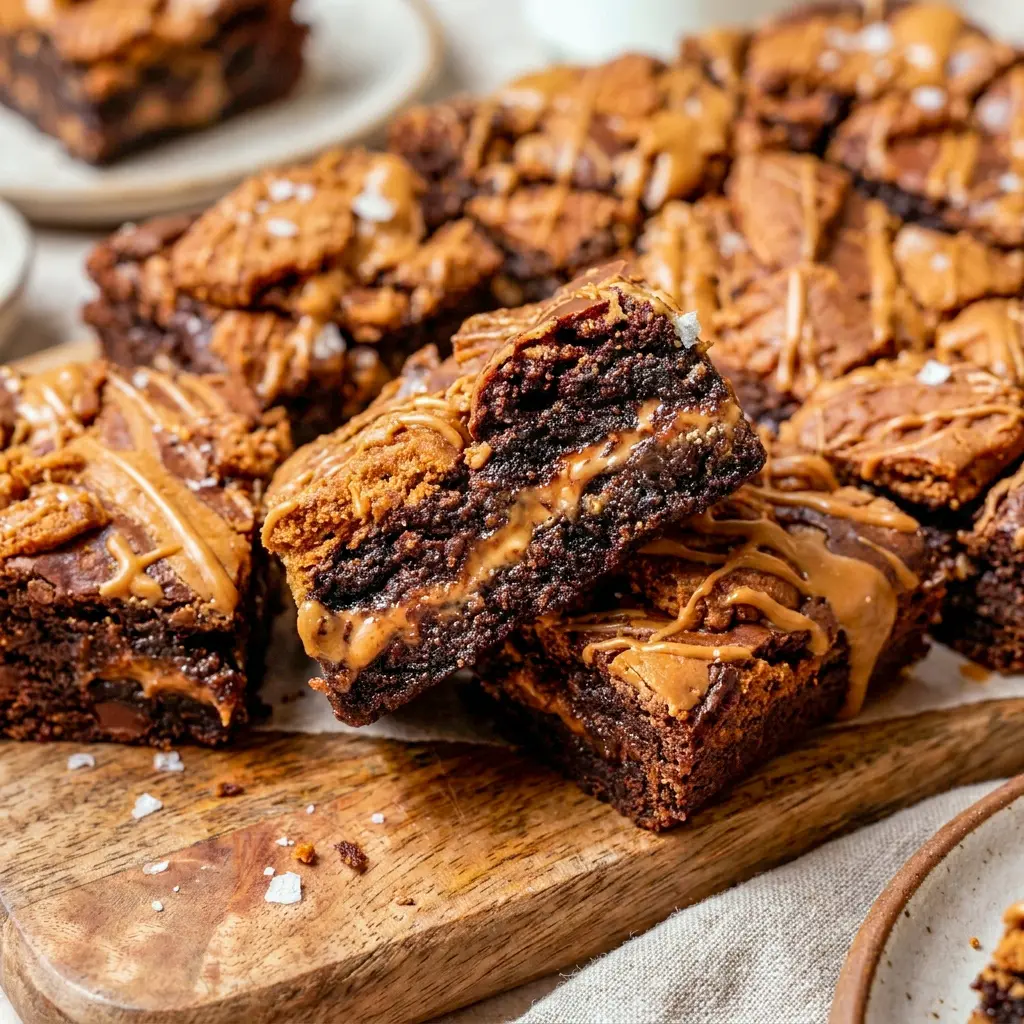
Biscoff Brownies deliver the kind of texture contrast that makes dessert exciting. The brownie base stays dense and fudgy. The frozen cookie butter middle melts into a soft, gooey layer. The Biscoff cookies on top add a little crunch. That combination keeps each bite interesting.
You will love Biscoff Brownies because they feel indulgent without being overly sweet. The chocolate keeps the dessert grounded, while the cookie butter adds that warm spiced note that makes Biscoff so addictive. The two flavors play off each other beautifully.
You will also love how dependable this recipe is. The brownie batter has the same reliable structure as a good fudgy brownie should, so you are not gambling on a dry or cakey result. That matters a lot in Biscoff Cookie Butter Brownies, where the gooey center needs a solid chocolate base to support it.
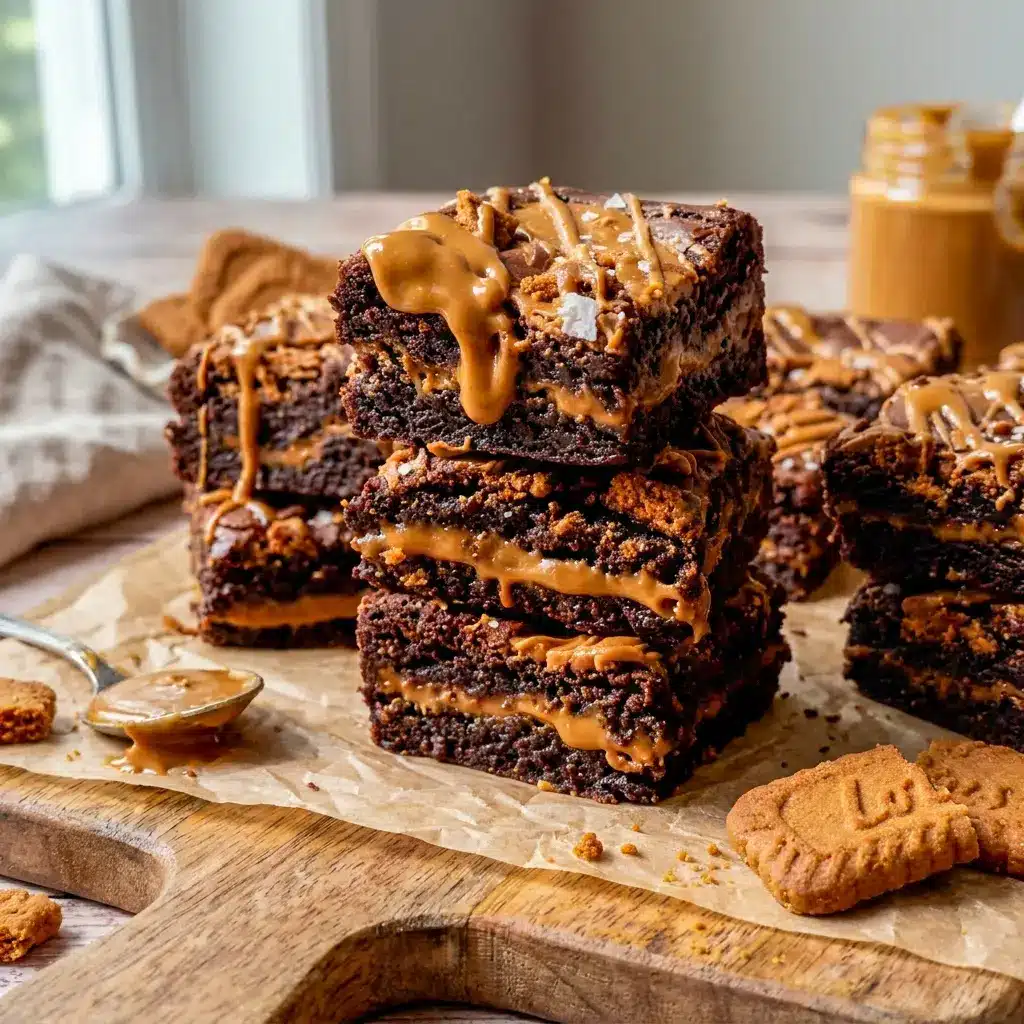
Another reason Biscoff Brownies stand out is the surprise factor. People see a brownie, expect a brownie, and then hit the cookie butter layer in the middle. That little reveal always gets attention. It makes the brownies feel special without requiring decoration that takes forever.
And honestly, the flavor just works. Biscoff Brownies taste like the dessert version of a cozy coffee break. The espresso powder deepens the chocolate. The cocoa adds intensity. The cookie butter brings spice and sweetness. It all lands in that sweet spot where Cookie Butter Brownies become more than a novelty and turn into a genuinely great dessert.
The Key Ingredients (and Why You Need Them)
Below I list the main ingredients without the exact amounts, because the printable recipe card already handles that. This section explains what each ingredient does so you can understand the structure of the brownies and tweak them with confidence.
- Biscoff cookie butter — This is the signature layer. It creates the gooey center and gives Biscoff Brownies their unmistakable flavor.
- Brown sugar — Adds moisture, depth, and a subtle caramel note.
- Granulated sugar — Helps build structure and creates that classic brownie sweetness.
- Eggs and egg yolk — The eggs bind everything, while the extra yolk adds richness and fudginess.
- Vanilla extract — Rounds out the chocolate and cookie butter flavors.
- Unsalted butter — Provides a rich base and helps the brownies bake up dense and smooth.
- Semi-sweet chocolate chips — These melt into the batter and create deep chocolate flavor.
- Unsweetened Dutch cocoa powder — Essential for a rich, fudgy texture and a bold chocolate taste.
- All-purpose flour — Gives the brownies enough structure to hold the cookie butter layer.
- Espresso powder — Optional, but highly recommended. It intensifies the chocolate flavor without making the brownies taste like coffee.
- Fine sea salt — Balances the sweetness and sharpens the chocolate.
- Biscoff cookies — These add crunch on top and reinforce the cookie butter flavor.
- Extra cookie butter — Drizzled on top, it finishes the brownies with a glossy, gooey look.
That ingredient list is what makes Biscoff Brownies feel so layered. You are not just baking brownies. You are building a dessert with texture, depth, and a clear flavor story. That is exactly what makes Biscoff Cookie Butter Brownies such a strong crowd-pleaser.
How to Make It
The process for Biscoff Brownies is simple, but the details matter. Each step helps protect the texture and create that gooey middle.
- Freeze the Biscoff layer first.
Press a sheet of parchment paper into an 8×8 metal pan, letting the edges crease so you can see the size of the square. Spread the cookie butter evenly inside that outline. Then place it in the freezer until it is completely firm. Do not rush this part. A solid layer makes the brownies much easier to assemble. - Prep the pan and oven.
Line the same 8×8 baking pan with parchment paper so it hangs over all four sides. That extra overhang makes lifting the brownies out much easier later. Set the oven to 350°F / 180°C so it can fully preheat while you finish the batter. - Whisk the sugars, eggs, and vanilla.
In a large mixing bowl, whisk the brown sugar, granulated sugar, eggs, egg yolk, and vanilla until the mixture turns thicker and lighter in color. You want it to look pale and well blended. This step gives Biscoff Brownies their signature fudgy texture. - Melt the butter and chocolate.
Melt the butter with the chocolate chips until smooth. You can do this in the microwave or over gentle heat on the stove. Once the mixture is glossy, whisk in the cocoa powder until everything looks fully combined and deep chocolate brown. - Add the chocolate mixture to the eggs.
Slowly stream the warm chocolate mixture into the egg mixture while whisking. Keep going until the batter just comes together. You want it smooth, rich, and unified, but not overworked. - Fold in the dry ingredients.
Add the flour, espresso powder, and salt. Use a spatula to fold everything in until you no longer see dry streaks. Stop mixing as soon as the batter comes together. Overmixing can make Biscoff Brownies too dense in the wrong way. - Build the first brownie layer.
Pour about half of the brownie batter into the prepared pan and spread it to the edges. Try to make the layer even so the filling sits neatly on top. - Add the frozen cookie butter.
Remove the frozen cookie butter sheet from the parchment and place it directly over the brownie batter. This frozen layer is what creates the gooey center that makes Biscoff Brownies so memorable. - Cover with the remaining batter.
Pour the rest of the brownie batter over the cookie butter layer. Gently spread it out so it reaches the corners and fully covers the filling. - Finish the top and bake.
Break the Biscoff cookies into pieces and press them over the surface. Warm a little extra cookie butter until it becomes pourable, then drizzle it over the top. Bake the brownies until the center is set with a few moist crumbs on the tester. Let them cool completely before slicing. That cool-down time matters a lot for clean squares and the best Biscoff Brownies texture.
Pro tips for perfect Biscoff Brownies
Use a kitchen scale.
This is the single best way to keep brownie texture consistent. Baking with weight gives you much better control than measuring cups alone.
Freeze the cookie butter layer until completely firm.
Half-frozen cookie butter can stick to the parchment and smear into the batter too early. A solid layer helps the brownies bake with a clear center.
Use a metal pan.
Metal conducts heat more evenly than glass or ceramic. That helps Biscoff Brownies bake through without overbrowning the edges.
Do not overmix the batter.
Once the flour goes in, fold just until combined. That keeps the brownie base dense and fudgy instead of tough.
Pull them when the tester shows moist crumbs.
A few crumbs on the toothpick mean the brownies are done. A completely clean tester often means overbaked brownies.
Let them cool fully before slicing.
This step matters more than people think. Warm Biscoff Brownies look tempting, but cool brownies cut far cleaner and hold the gooey center better.
Variations to try
The base recipe for Biscoff Brownies already brings a lot to the table, but it also leaves room for small twists.
Add chopped toasted pecans to the top if you want extra crunch. That gives the brownies more contrast and a slightly nuttier profile.
Swap a portion of the chocolate chips for dark chocolate if you want a deeper, less sweet brownie base. That works especially well if you prefer a stronger chocolate presence in your Cookie Butter Brownies.
Add a pinch of cinnamon to the batter if you want to echo the spice profile in the cookie butter. It is subtle, but it reinforces the warm flavor.
Turn them into brownie bars for a party tray by baking in a slightly larger pan and adjusting the time. The flavor stays the same, but the texture gets a little thinner and more snackable.
Drizzle a little melted white chocolate on top if you want a more decorative finish. That makes Biscoff Brownies look extra polished for holidays or gifting.
Best ways to serve Biscoff Brownies
These brownies are excellent on their own, but they also pair well with simple additions.
Serve Biscoff Brownies slightly warm with vanilla ice cream for a full dessert moment. The ice cream softens the chocolate and makes the cookie butter center even more luscious.
Serve them at room temperature if you want the cleanest texture and the most defined layers. That is usually the best choice for parties or lunchboxes.
Add a little extra cookie butter drizzle right before serving for a glossy finish. That small detail makes the brownies look bakery-level.
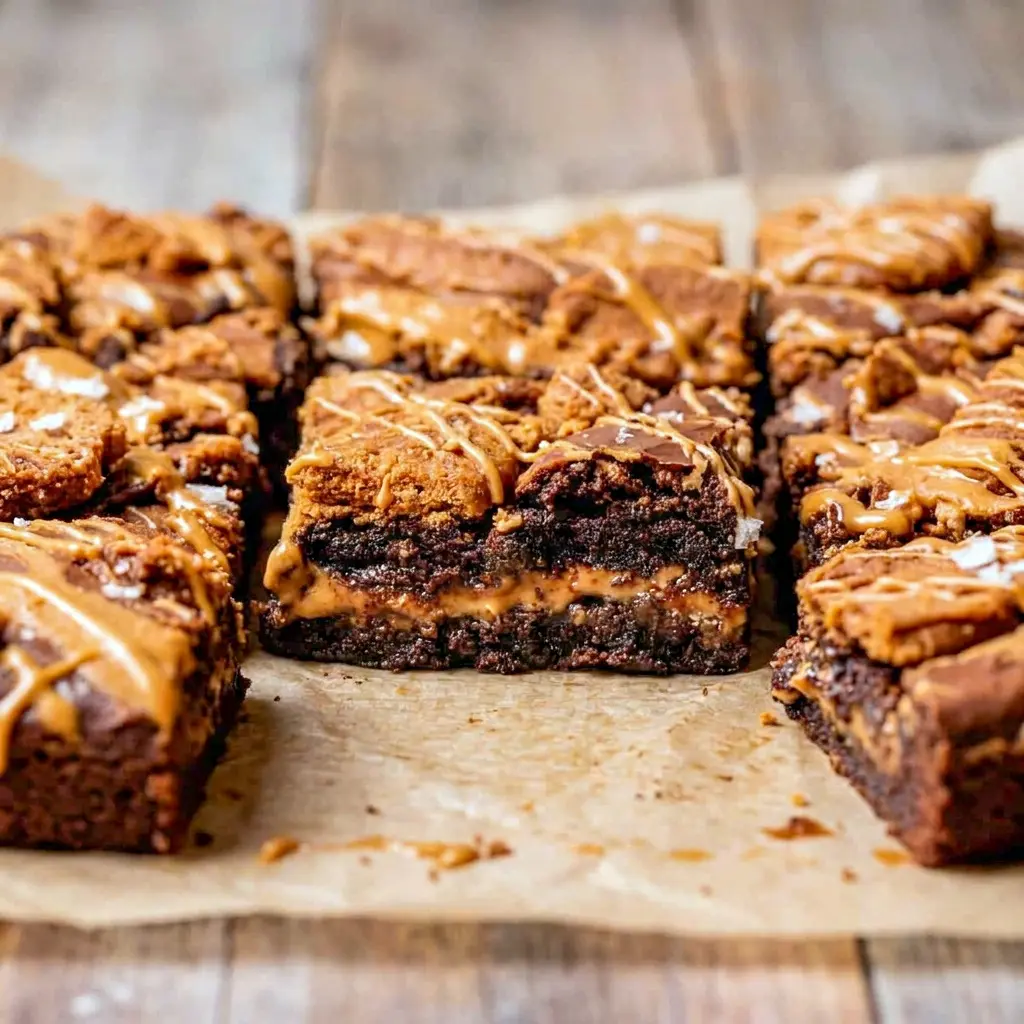
If you are serving them for a gathering, cut them into neat squares and arrange them on a platter with extra crushed Biscoff cookies around the edges. It gives the dessert a finished, intentional look without much work.
Storage and leftovers
Store leftover Biscoff Brownies in an airtight container at room temperature for 2 to 3 days. They stay soft and fudgy during that time.
For longer storage, freeze the cut brownies in a freezer-safe container or bag for up to 1 month. Let them thaw at room temperature before serving.
If you want the top to look fresh again, warm the brownie slightly and add a tiny drizzle of cookie butter after thawing. That gives the brownies their glossy finish back quickly.
FAQ
Can I make these ahead of time?
Yes. Biscoff Brownies actually slice better after they cool completely, so they work well as a make-ahead dessert.
Do I have to use espresso powder?
No, but it helps. Espresso powder deepens the chocolate flavor without making the brownies taste like coffee.
Can I use a different pan?
A metal 8×8 pan gives the best result. Glass or ceramic pans usually bake more slowly and can change the texture of Biscoff Brownies.
What if I cannot find Biscoff cookie butter?
Look for Speculoos spread or another cookie butter-style spread. The flavor will stay close enough for a good result.
Why freeze the cookie butter layer?
Freezing makes it easier to layer inside the brownie batter. It keeps the center distinct and helps the brownies bake with that gooey middle people love.
Final thoughts
Biscoff Brownies hit that rare dessert sweet spot where easy, rich, and memorable all meet in one pan. The chocolate base gives you depth, the cookie butter center brings the surprise, and the Biscoff topping adds the final layer of flavor and texture. The result feels special enough for celebrations but simple enough for an ordinary craving.
That is what makes Biscoff Brownies such a strong dessert to keep in your back pocket. They deliver big flavor, they look impressive, and they slice into generous squares that people actually get excited about. They also sit comfortably alongside other favorites like Biscoff Brownies Recipe searches and classic Cookie Butter Brownies ideas because they do the one thing every great brownie should do: disappear fast.
Follow me on Pinterest for daily new recipes.

Biscoff Cookie Butter Brownies | Easy Fudgy Biscoff Brownies
- Prep Time: 20 minutes
- Cook Time: 35 minutes
- Total Time: 55 minutes
- Yield: 16 Servings 1x
- Category: Dessert
Description
These Biscoff Brownies combine a rich fudgy chocolate base with a frozen cookie butter center and a topping of crushed Biscoff cookies plus a cookie butter drizzle. They bake into thick, gooey squares with a bold cookie butter flavor in every bite.
Ingredients
- 3/4 cup Biscoff cookie butter
- 1/2 cup packed light or dark brown sugar
- 1/2 cup granulated sugar
- 2 large eggs
- 1 large egg yolk
- 1 tablespoon vanilla extract
- 10 tablespoons unsalted butter
- 2/3 cup plus 1/4 cup semi-sweet chocolate chips
- 1/4 cup unsweetened Dutch cocoa powder
- 2/3 cup plus 1 tablespoon all-purpose flour
- 1 teaspoon espresso powder
- 1/2 teaspoon fine sea salt
- 4 to 5 Biscoff cookies, broken into pieces, for the top
- Extra cookie butter, for drizzling
Instructions
- Make the cookie butter insert.
Lay a large sheet of parchment paper into a square 8×8 metal baking pan. Press it down so it fits the bottom and sides, then crease the paper along the pan’s edges so you can see the square shape clearly when you lift it out later. Spread the Biscoff cookie butter into the center of the parchment, keeping it inside the creased outline. Smooth it into an even layer. Transfer the pan to the freezer and let the cookie butter firm up completely. This needs to be fully solid before you move on. - Prepare the pan and oven.
Line the same 8×8 pan with parchment paper again, this time letting the paper hang over all four sides so you can lift the brownies out easily after baking. Preheat the oven to 350°F / 180°C. - Whisk the sugar mixture.
In a mixing bowl, combine the brown sugar, granulated sugar, eggs, egg yolk, and vanilla extract. Whisk until the mixture looks smooth, thick, and lighter in color. Keep whisking until it becomes glossy and well blended. - Melt the chocolate and butter.
Place the butter and semi-sweet chocolate chips together in a microwave-safe bowl or a saucepan. Heat gently until everything melts and becomes smooth. Stir until fully combined, then whisk in the Dutch cocoa powder until the mixture looks rich and uniform. - Combine the wet mixtures.
Slowly pour the melted chocolate mixture into the egg mixture while whisking constantly. Keep whisking just until the batter comes together. The mixture should look glossy and deeply chocolatey. - Add the dry ingredients.
Sprinkle in the flour, espresso powder, and salt. Fold the dry ingredients into the batter with a spatula until no flour streaks remain. Do not overmix. Stop as soon as the batter looks evenly combined. - Assemble the first layer.
Pour half of the brownie batter into the prepared pan and spread it into an even layer that reaches the corners. A portion of the batter will be enough to create a solid base under the filling. - Add the frozen cookie butter sheet.
Remove the frozen Biscoff layer from the parchment and place it carefully over the brownie batter. Peel away the parchment from the top and center the cookie butter layer over the base. - Top with the remaining batter.
Spoon the rest of the brownie batter over the cookie butter layer and spread it evenly. Make sure the filling is fully covered. - Finish the top.
Scatter the broken Biscoff cookie pieces over the surface. Warm a little extra cookie butter in the microwave for 15 to 20 seconds until it becomes loose and drizzly, then spoon it over the top in ribbons. - Bake.
Place the pan in the preheated oven and bake for 30 to 40 minutes. Check for doneness with a toothpick inserted into the center. It should come out with a few moist crumbs attached, not wet batter. The brownies should look set around the edges and slightly soft in the center. - Cool completely.
Set the pan on a wire rack and let the brownies cool all the way before removing them. Do not cut them while warm. Cooling helps the layers set and makes slicing much cleaner. - Slice and serve.
Once fully cool, lift the brownies out using the parchment overhang. If you want, drizzle a little more warm cookie butter over the top before cutting into squares.
Notes
Notes
Store leftovers in an airtight container at room temperature for 2 to 3 days. For longer keeping, freeze the baked brownies in an airtight container or freezer bag for up to 1 month.
Measuring the flour correctly matters.
Use the spoon-and-level method instead of scooping directly from the bag. For the best result, weigh the flour with a kitchen scale.
For cleaner cuts, wait until the brownies are completely cool.
Run a sharp knife under hot water, wipe it dry, and clean it between slices for neater squares.


