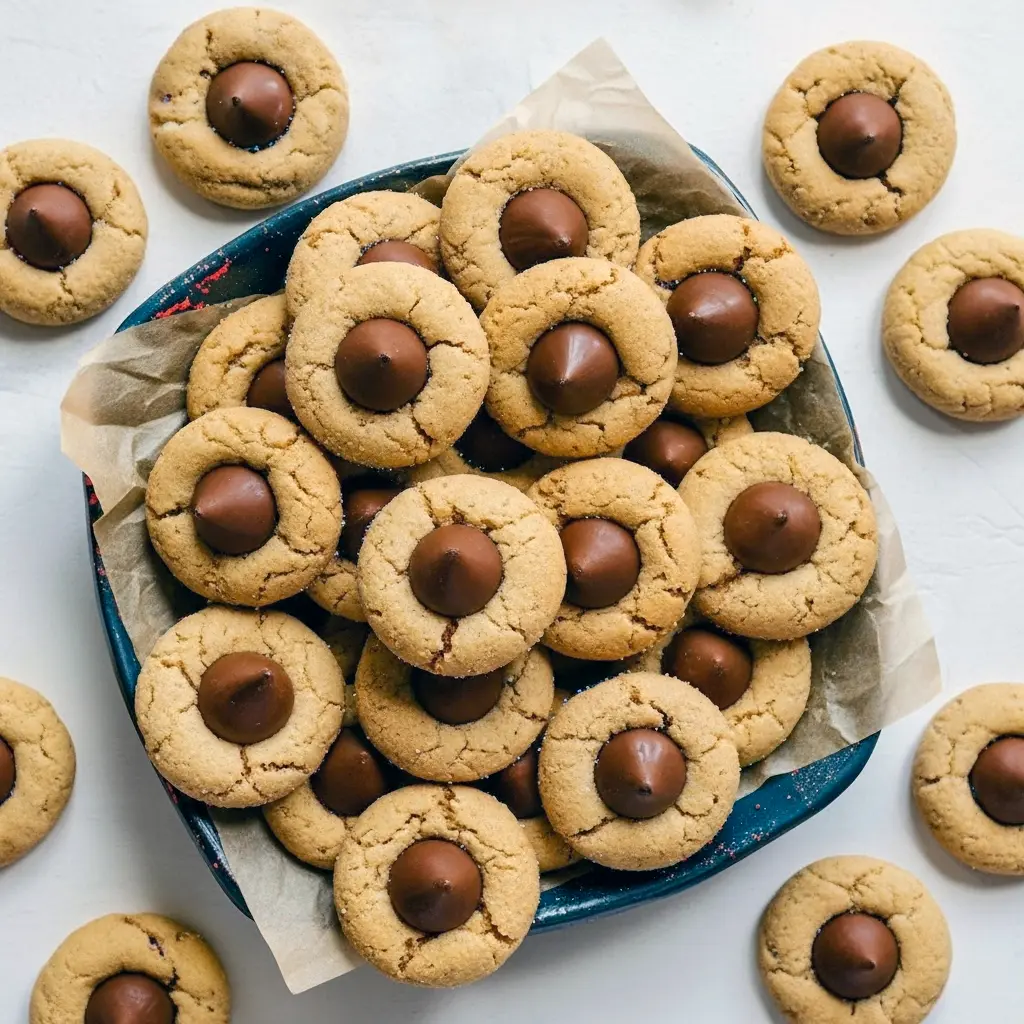
Easy Peanut Butter Blossoms: the holiday cookie that never lets you down
Easy Peanut Butter Blossoms show up every December like that one friend who’s always on time, always cheerful, and always brings snacks. You know the one. Soft centers, chewy edges, a sugary crackle on top, and that iconic milk chocolate kiss sitting proudly in the middle. One bite in and boom—instant holiday mode. 🎄
These cookies aren’t flashy. They don’t need sprinkles shaped like reindeer or six types of chocolate drizzle. They win hearts by being reliably amazing, year after year. And honestly? That’s a superpower.
If you’re building a holiday baking list and wondering which cookie deserves a guaranteed spot, spoiler alert: it’s this one.
Why you’ll love these Easy Peanut Butter Blossoms
Let’s get straight to the good stuff.
These cookies are:
- Soft and chewy, not crumbly or dry (no sad cookies here)
- Rolled in sugar for that sweet, crackly crust
- A dream combo for chocolate + peanut butter lovers
- Ridiculously easy to make, even during peak holiday chaos
- A true classic that’s been winning since the 1950s
- A total crowd favorite for cookie swaps and gifting
IMO, these are the cookies that disappear first from the platter. You set them down, turn around to grab a napkin, and suddenly half of them are gone. Coincidence? Absolutely not.
The story behind the cookie (aka: why nostalgia tastes so good)
Here’s a confession: for most of my life, I didn’t know these were officially called peanut butter blossoms.
To me, they were always “Hershey Kiss cookies.”
That’s what my Grammy called them. That’s what everyone in my family called them. And honestly, that name made perfect sense—because the chocolate kiss is clearly the star of the show.
Every holiday season, Grammy’s kitchen smelled like peanut butter, sugar, and pure happiness. She’d line up trays of these cookies, unwrapping chocolate kisses like it was her full-time job. As a kid, I thought that part was magic. As an adult, I now realize it was strategy. 😂
These cookies feel familiar for a reason. They’ve been passed down, shared, tweaked, and loved for generations. That’s why Peanut Butter Blossoms Christmas baking just feels right.
What makes these the Best Peanut Butter Blossoms?
A lot of cookies claim to be the best. These actually earn it.
Here’s why this recipe works so well:
- Balanced sweetness – Not cloying, not bland
- Proper chilling time – Prevents spreading and keeps them thick
- Sugar coating – Creates texture and sparkle
- Milk chocolate kiss – Melts just enough without turning into soup
The result? Moist Peanut Butter Blossom Cookies with that classic look and bakery-style texture. The kind people ask about. The kind they request “again next year.”
Ingredient breakdown (and why each one matters)
Let’s talk ingredients—but keep it simple.
- All-purpose flour
Gives structure without making the cookies dense. - Baking soda
Helps the cookies rise slightly and keeps them tender. - Salt
Balances the sweetness and makes the peanut butter pop. - Creamy peanut butter
The flavor base. Stick with creamy for classic texture. - Unsalted butter (room temp)
Adds richness and helps create that soft crumb. - Granulated sugar + light brown sugar
White sugar gives crisp edges; brown sugar brings moisture and chew. - Egg
Binds everything together. - Milk
Keeps the dough soft and smooth. - Vanilla extract
Enhances all the cozy flavors. - Extra sugar for rolling
Non-negotiable. This is how you get that signature crackle. - Milk chocolate kisses
The crown jewel. Unwrap them early—trust me.
Do you really need to chill the dough?
Short answer: Yes. Absolutely. No skipping.
Longer answer: chilling the dough keeps the cookies from spreading into sad, flat discs. It also improves flavor and texture.
Here’s the deal:
- Chill for at least 1 hour
- Overnight is even better if you have time
- Keep the dough tightly covered
Bold truth: warm dough = cookie chaos.
FYI, this step alone can make the difference between “meh” cookies and the Original Peanut Butter Blossom Cookies vibe everyone remembers.
Step-by-step: how to make them without stress
Let’s break it down in a way that actually makes sense.
1. Mix the dry ingredients
Whisk the flour, baking soda, and salt in a medium bowl. No sifting needed. A good whisk does the job just fine.
2. Cream the wet ingredients
In a large bowl, beat the peanut butter, butter, granulated sugar, and brown sugar until smooth and fluffy. Use a hand mixer or stand mixer with a paddle attachment.
Key tip: Butter should be room temp—not melted, not rock hard.
3. Add egg, milk, and vanilla
Mix until fully combined. Scrape the bowl so nothing gets left behind.
4. Combine wet and dry
Lower the mixer speed and slowly add the dry ingredients. Mix just until the dough comes together.
Important: Overmixing = tough cookies. Stop when combined.
5. Chill the dough
Cover tightly and refrigerate for a minimum of 1 hour.
Yes, we’re repeating this. It matters.
Shaping, rolling, and baking like a pro
Once the dough is chilled, the fun part starts.
- Scoop or spoon out 1-inch portions
- Roll into balls using clean hands
- Roll each ball in granulated sugar
- Place 1½–2 inches apart on lined baking sheets
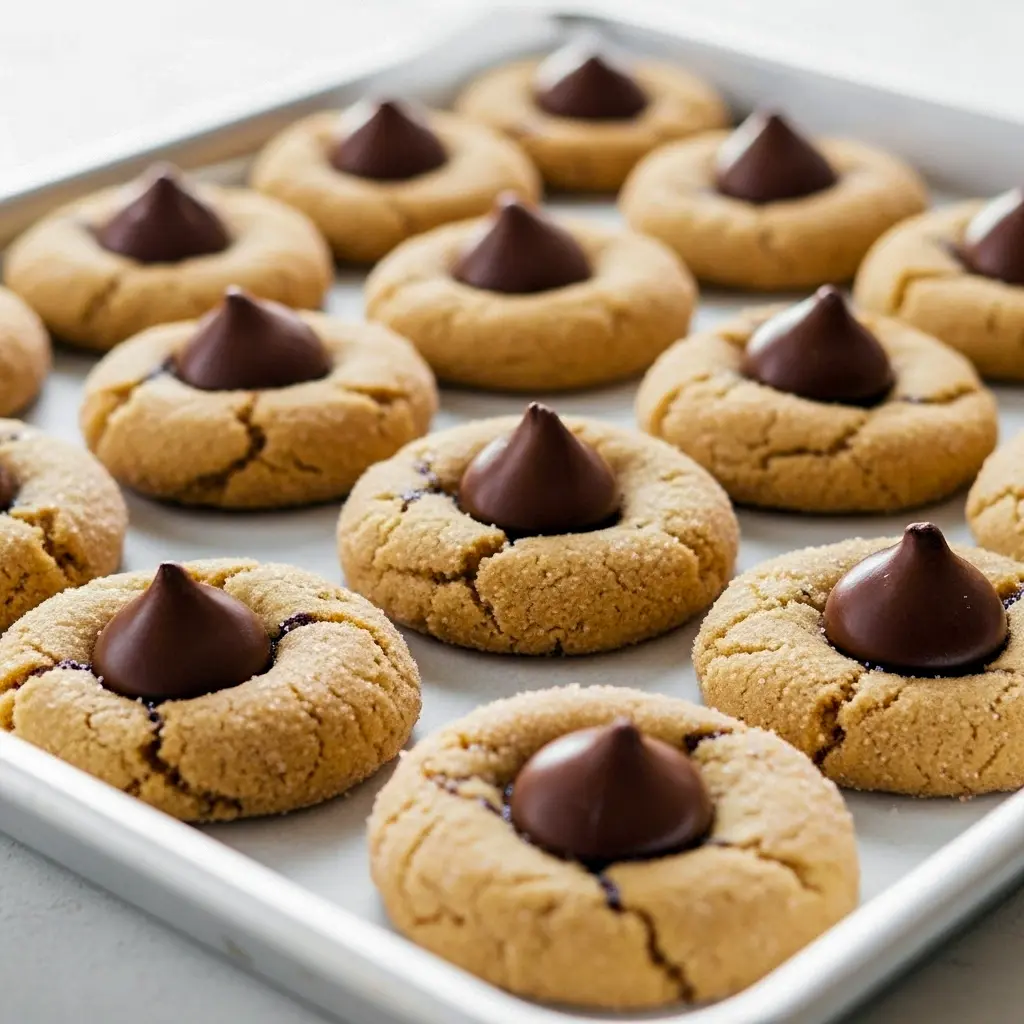
Bake at 375°F for 7–8 minutes.
The cookies should look set but still soft in the center. Don’t wait for browning.
The chocolate kiss moment (aka the best part)
Pull the cookies from the oven and work quickly.
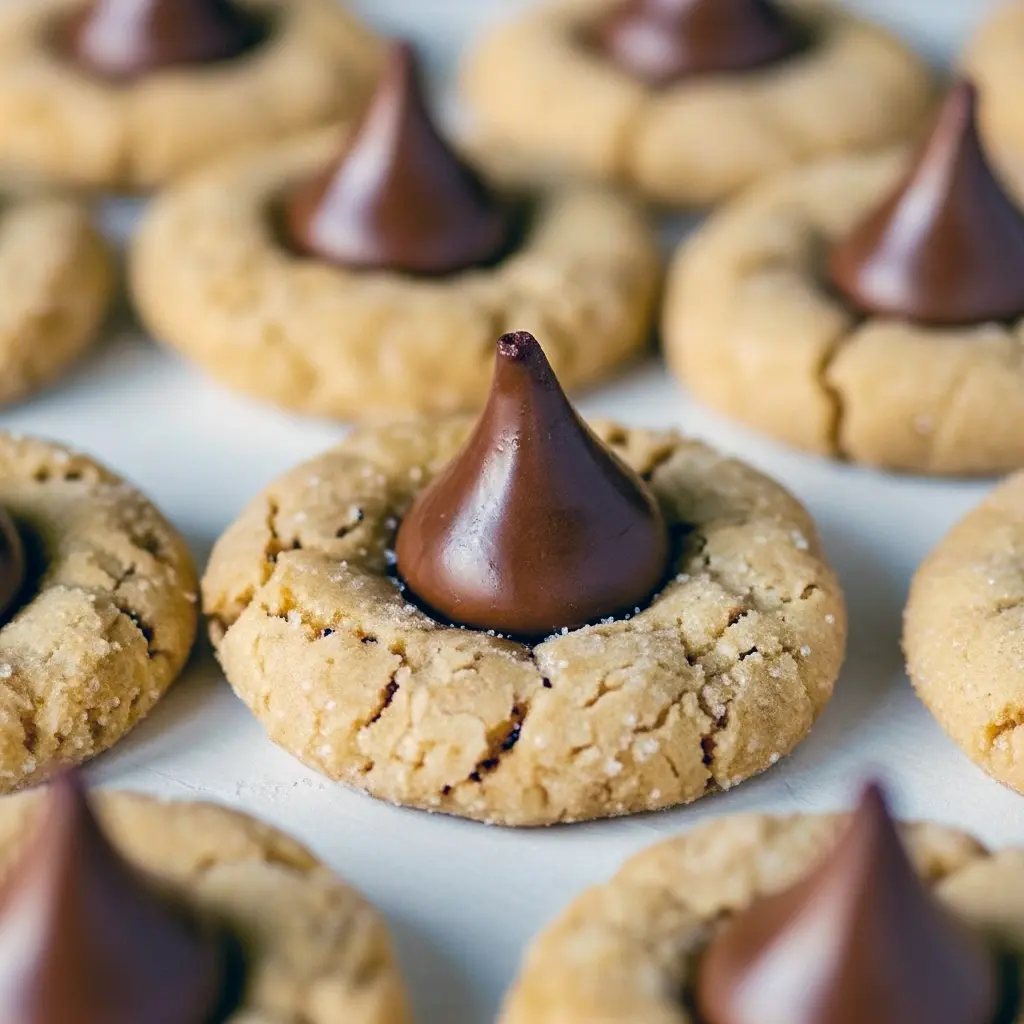
Place one milk chocolate kiss on top of each cookie and gently press down. The edges will crack naturally—this is exactly what you want.
Pop them back in the oven for 2 more minutes.
That’s it. Magic achieved.
Cooling without heartbreak
Let the cookies rest on the baking sheet for 5–10 minutes. They’re delicate at first.
Then transfer them to a wire rack to cool completely.
Use a spatula. Fingers are tempting. Fingers are a mistake.
Pro tips for perfect results every time
Let’s level you up.
- Unwrap chocolate kisses before baking so you’re not scrambling
- Measure dough balls consistently for even baking
- Use parchment or silicone mats to prevent sticking
- Don’t overbake—they firm up as they cool
- Store with a slice of bread to keep them soft
Yes, the bread trick works. No, the cookies won’t taste like bread.
Variations to try (if you’re feeling wild)
Classic is king, but options are fun.
- Swap milk chocolate for dark chocolate kisses
- Use mini peanut butter cups instead of kisses
- Add a pinch of flaky sea salt on top
- Try cinnamon sugar for rolling instead of plain sugar
Still easy. Still festive. Still gone in minutes.
Best ways to serve these cookies
These cookies shine everywhere:
- Holiday cookie swaps
- Gift boxes tied with ribbon
- Dessert platters
- Late-night snack plates (no judgment)
They pair beautifully with coffee, hot chocolate, or sneaking one straight from the container.
Storage and leftovers (if there are any)
Store cookies in an airtight container at room temperature.
Add half a slice of bread to the container to keep them soft.
They’ll stay fresh for up to one week—but realistically? Good luck testing that.
Can you freeze the dough?
Absolutely yes.
Here’s how:
- Roll dough into balls (don’t coat in sugar yet)
- Freeze on a lined baking sheet until solid
- Transfer to a freezer bag
When ready to bake:
- Roll frozen dough in sugar
- Bake for 9–11 minutes
- Add chocolate kiss, bake 2 minutes more
No thawing required.
FAQs (because everyone asks)
Can I make these ahead of time?
Yes. Dough and baked cookies both work great in advance.
Why did my cookies spread too much?
The dough likely wasn’t cold enough.
Are these kid-friendly to make?
Absolutely. Rolling dough and placing kisses is peak kid joy.
Are these the same as Peanut Butter Blossom Cookies Recipe Allrecipes?
They’re very similar in spirit—classic, reliable, and timeless—but this version leans extra cozy and soft.
Final thoughts: why this recipe deserves a spot in your holiday baking
These cookies are everything holiday baking should be.
They’re familiar without being boring. Easy without being basic. Nostalgic without trying too hard. Whether you call them blossoms, kiss cookies, or just “those peanut butter ones,” they deliver every single time.
If you’re searching for Simple Peanut Butter Blossom Cookies, Pb Blossom Cookies Easy, or scrolling through Peanut Butter Blossom Cookies Yummly inspiration, stop right here. This is the one.
Make them once, and they’ll become part of your tradition. That’s how cookies like this stick around for decades.
And honestly? That’s the best compliment a recipe can get. 🍪✨
Follow me on Pinterest for daily new recipes.

Holiday-Ready Classic Peanut Butter Blossoms — Easy Peanut Butter Blossoms
- Prep Time: 20 minutes
- Cook Time: 10 minutes
- Total Time: 30 minutes
- Yield: 48 cookies 1x
- Category: Dessert
Description
Soft, chewy peanut-butter cookies rolled in sugar with a milk chocolate kiss pressed in the center — holiday-perfect and totally irresistible.
Ingredients
- 1 ¾ cups all-purpose flour
- 1 teaspoon baking soda
- ½ teaspoon salt
- ½ cup creamy peanut butter
- ½ cup (1 stick) unsalted butter, softened to room temperature
- ½ cup granulated sugar
- ½ cup light brown sugar, lightly packed
- 1 large egg
- 2 tablespoons milk
- 1 teaspoon vanilla extract
- About ½ cup extra granulated sugar for rolling the dough balls
- 11 oz bag milk chocolate kisses (or your favorite wrapped chocolate)
Instructions
Make the dough
-
In a medium bowl, whisk the flour, baking soda, and salt until evenly blended. Set that aside.
-
In a large bowl, beat the peanut butter, softened butter, granulated sugar, and brown sugar on medium speed until smooth and slightly fluffy (about 1–2 minutes).
-
Add the egg, milk, and vanilla; beat until everything looks uniform, scraping the bowl as needed.
-
Reduce the mixer speed and add the dry mix in two additions, stirring just until the dough comes together. Don’t overmix — that keeps the cookies tender.
-
Cover the dough tightly (bowl wrapped or in a sealed container) and chill for at least 1 hour. Chilling is key to control spread and get that perfect texture.
Shape and bake
6. Preheat the oven to 375°F (190°C) and line baking sheets with parchment paper or silicone mats.
7. Roll the chilled dough into 1-inch balls (a small scoop or clean hands work great). Roll each ball in the extra granulated sugar so they’re well coated.
8. Place the sugared balls on the prepared sheets, leaving 1½–2 inches between each.
9. Bake for 7–8 minutes — the tops should look set but still soft. Don’t wait for them to brown.
10. As soon as the cookies come out, press one unwrapped milk chocolate kiss into the center of each cookie. Gently press down to create that classic crackled surface.
11. Return the pan to the oven for 2 more minutes to slightly soften the chocolate so it adheres and gets glossy.
12. Let the cookies cool on the baking sheet for 5–10 minutes, then transfer to a wire rack to finish cooling. Use a spatula — warm cookies are fragile.
Notes
- Storage & make-ahead tips
- Store cooled cookies in an airtight container at room temperature. Place a slice of bread inside to help keep them soft for several days — seriously, it works.
- Cookies will generally keep up to a week using the bread trick, though they rarely last that long.
- Freezing the dough (handy shortcut)
- Roll the dough into 1-inch balls but don’t coat in sugar yet. Arrange them on a parchment-lined sheet and freeze until firm (about 1–2 hours).
- Transfer the frozen balls to a freezer bag. When you’re ready to bake, roll them in granulated sugar straight from the freezer and bake for 9–11 minutes. Immediately press on the chocolate kisses and return to the oven for 2 minutes. Do not thaw before baking.
- Extra tips for smooth baking
- Unwrap the kisses before you start baking. It speeds things up and prevents burns.
- For uniform cookies, measure dough balls consistently. A small scoop or scale helps.
- Use parchment or silicone mats to prevent sticking and promote even browning.
- If you like slightly chewier centers, err on the shorter baking time. They’ll firm up while cooling.
Nutrition
- Calories: 107kcal
- Sugar: 10g
- Sodium: 66mg
- Fat: 5g
- Carbohydrates: 14g
- Fiber: 0.4g
- Protein: 2g
- Cholesterol: 10mg
Easy Peanut Butter Blossoms, Simple Peanut Butter Blossom Cookies, Pb Blossom Cookies Easy, Best Peanut Butter Blossoms, Moist Peanut Butter Blossom Cookies, Peanut Butter Blossom Cookies Yummly, Peanut Butter Blossoms Christmas, Original Peanut Butter Blossom Cookies, Peanut Butter Blossom Cookies Recipe Allrecipes


