
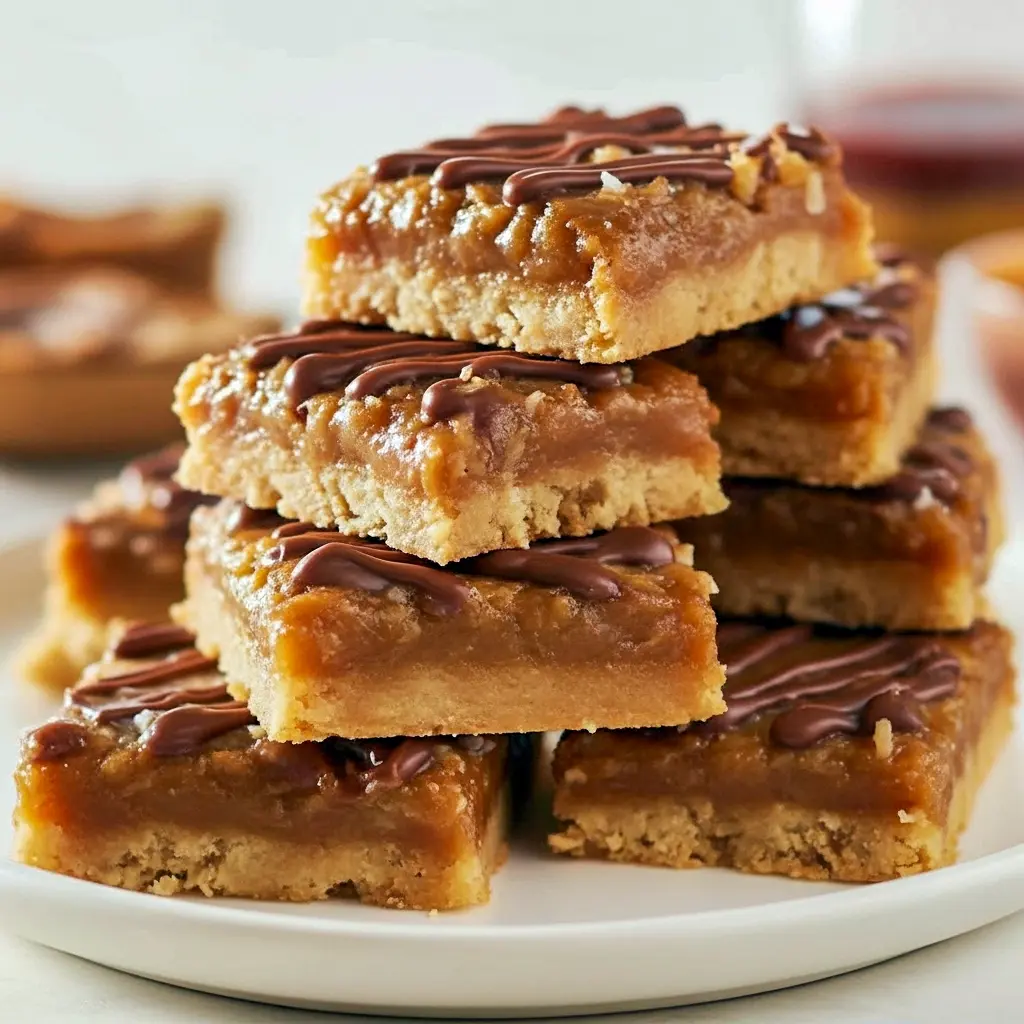
Easy Coconut Dream Bars start this whole story: sweet, chewy, and dangerously simple. If you love Samoas vibes but want bars (fewer crumbs, more cutting), you’re in the right place. These three-layer beauties—shortbread crust, sticky Coconut Caramel center, and a milk chocolate drizzle—deliver big fall energy without a lot of fuss.
Introduction to the Easy Coconut Dream Bars recipe
You know those recipes that make you feel clever just by pulling them out of the oven? This is one. The base bakes into a buttery shortbread. The middle turns into a luscious blend of brown sugar, cream, honey, and shredded coconut. Top with melted chocolate and a sprinkle of flaky salt and you’ve created something guests will ask for by name. This is an easy crowd-pleaser and an excellent party hack.
What makes these bars so irresistible?
Why do people lose their minds over these bars? Three words: texture, balance, comfort.
- Texture contrast: crisp shortbread + gooey coconut caramel + silky chocolate.
- Sweet-salty balance: a hint of salt keeps the caramel from tasting cloying.
- Nostalgia factor: they channel those beloved Girl Scout cookies but dial up the ooze and butter.
Want specifics? The brown-sugar caramel binds with shredded coconut, making the middle chewy and slightly sticky—exactly what you crave when you want something indulgent but still classy. Also, they store well and travel well. Win-win.
Ingredients (with short descriptions)
Here’s what you need to make one 8×8 pan of magic. Simple pantry items for max payoff.
For the shortbread crust
- Unsalted butter: gives richness and that tender, flaky bite.
- Brown sugar: adds moisture and caramel depth.
- Salt: balances sweetness—don’t skip it.
- All-purpose flour: the base that holds it together.
For the caramel-coconut filling
- Unsalted butter: for buttery body.
- Brown sugar: the caramel backbone.
- Heavy cream: makes the caramel smooth and luscious.
- Honey: adds depth and sticky chew.
- Vanilla extract: brightens flavors.
- Shredded coconut (sweetened or unsweetened): the star that gives chew and coconut flavor—use what you like.
For the topping
- Milk chocolate (or your favorite chocolate): melts into a glossy drizzle.
- Flaky finishing salt (optional): elevates the whole thing with contrast.
Simple how-to (quick & clear)
This recipe breaks down into three straightforward steps: bake the crust, simmer the filling, assemble + finish. No tempering chocolate skills required.
- Make the crust: Beat butter, brown sugar, and a pinch of salt until combined. Stir in flour until the mixture looks sandy, then press firmly into a lined 8×8 pan. Bake until the edges begin to color—about 15 minutes. This forms that buttery shortbread base.
- Cook the filling: In a saucepan, combine butter, brown sugar, cream, honey, and salt. Bring to a simmer and cook for about 2 minutes to thicken slightly. Remove from heat, stir in vanilla and shredded coconut. Pour this mixture over the hot crust and return to the oven for ~12 minutes so it sets and bubbles a little.
- Finish with chocolate: Cool the pan completely on a wire rack (this can take hours—this is a make-ahead dream). Melt chocolate and drizzle over the cooled bars; let the chocolate set, then cut into squares. Sprinkle flaky salt if desired.
Pro tip: Press the crust firmly into the pan so it bakes up sturdy and supports the gooey filling. If it’s loose, the bars will be messy.
The story behind the recipe
I love Girl Scout Samoas as much as the next person, but I wanted something bigger, butterier, and bar-shaped—less fiddly than cookies, more theatrical on the dessert table. I swapped cookie dough for a shortbread-like crust, pumped up the coconut-caramel ratio, and tested chocolate finishes (milk won the popularity contest). The result? Bars that keep the spirit of the cookie but deliver ooze in every forkable bite. FYI: turning cookies into bars is one of life’s simplest upgrades.
Pro tips for best results
- Use real dairy (butter + cream) for the richest caramel flavor. You can swap to non-dairy, but the texture shifts.
- Don’t skimp on salt. A small pinch in both crust and filling makes flavors pop.
- Cool completely before slicing. These bars need time to firm; otherwise, you’ll have a caramel pool and sticky fingers. Patience = perfect squares.
- Use fresh shredded coconut. If it tastes stale in the bag, the bars won’t taste fresh. Toast the coconut lightly for added depth if you like.
- Try milk chocolate. I tested semisweet, bittersweet, and milk—milk won by popular demand for its nostalgic pairing with caramel. But go with your taste.
- Want a thin bottom chocolate layer? Melt chocolate, spread on the cooled crust before pouring filling, chill to set, then add filling and bake. (This makes cleanup harder but gives you “dipped” bar vibes.)
Variations to try
Get playful—these layers are versatile.
- Coconut Toffee Bars: Add chopped toffee bits into the filling for crunchy pockets. (Fans of Coconut Toffee Bars will love this twist.)
- Chocolate-dipped bottoms: As above, give the bottom a chocolate base for extra richness.
- Salted Caramel Coconut: Stir a tablespoon of sea salt into the caramel or sprinkle flakes on top for a savory-sweet finish.
- Nutty upgrade: Fold in chopped pecans or macadamias into the caramel layer for crunch.
- No-bake shortcut: Use a pre-made shortbread crust and microwave the filling to thicken—skip the oven if you’re pressed. That’s for Fun Baking Recipes emergency mode.
- Cookie form: Press the crust thin and cut into cookie shapes before baking to mimic Caramel Coconut Fudge Cookies texture.
Best way to serve
These bars shine at room temperature or slightly chilled. If you serve warm, the caramel becomes molten and delightful—just expect a messy but rewarding eating experience. Pair with coffee, a bold black tea, or a scoop of vanilla ice cream for dessert-level showmanship.
If you want to present them like a pro: dust with powdered sugar, drizzle extra warm chocolate, and add a light flaky salt finish. Place on a wooden board with a serrated knife for rustic charm.
Quick tips for storage & leftovers
- Room temp: Keep in an airtight container for up to 3 days. The filling stays soft but stable.
- Refrigerator: Store up to 1 week tightly sealed; pull out 30 minutes before serving to soften.
- Freezer: Wrap bars individually in plastic then foil; freeze up to 3 months. Thaw overnight in the fridge and bring to room temp before serving.
- Reheat hack: Microwave a single bar for 8–12 seconds to revive gooeyness—don’t overdo it or the chocolate will melt too much.
FAQs — quick answers you actually need
Can I make these without a mixer?
Yes. Use a bowl and a sturdy spatula or wooden spoon to mix the crust; press by hand.
Can I use unsweetened coconut?
Absolutely—adjust brown sugar slightly if you prefer less sweetness.
My filling separated—what happened?
You likely overcooked the caramel base or didn’t whisk well when adding vanilla. Keep a steady simmer and stir constantly.
Can I double the recipe?
Yes. Use a 9×13 pan and increase bake time slightly. Keep an eye on the crust edges.
Are these the same as Caramel Coconut Cookie Bars or Caramel Cookie Bars Cooking With Karli?
They share the same flavor family. These bars lean more into a buttery shortbread base and extra coconut caramel, while other recipes tweak proportions or chocolate treatment. Try them all—variety is the spice of life.
Where these fit into your baking lineup
If you enjoy testing Cookie Bar Recipes or love recreating cookie classics in bar form, this recipe belongs in your repertoire. It sits alongside other favorites like peanut-butter bars, lemon blueberry bars, and chocolate pecan bars as a reliable, sharable dessert. For those hunting new ideas for parties or holidays, add this to your Dessert Bar Recipe list—it doubles as a bake-ahead winner and a showstopper.
Final thoughts
These Easy Coconut Dream Bars pack a nostalgic punch with modern decadence. They borrow the best elements of beloved cookies—coconut, caramel, chocolate—and elevate them with a buttery shortbread crust and a gooey, chewy heart. Whether you call them Coconut Toffee Bars, riff off Caramel Coconut Fudge Cookies, or tag them under Caramel Coconut Cookie Bars, they deliver joy by the square.
So—ready to make the kitchen smell like a candy shop? Put on a playlist, line a pan, and get sticky. Trust me, this is one of those Fun Baking Recipes that pays off big time: simple steps, dramatic results, and a shelf-life long enough to earn you repeat compliments. Bake, slice, stash, and share. You’ll be glad you did.
Follow me on Pinterest for daily new recipes.
Print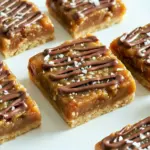
Caramel Coconut Bars — Easy Coconut Dream Bars for Busy Bakers
- Prep Time: 25 minutes
- Cook Time: 27 minutes
- Total Time: 52 minutes
- Yield: 16 Servings 1x
- Category: Dessert
Description
These gooey, three-layer bars combine a buttery shortbread base, a chewy caramel–coconut center, and a milk-chocolate drizzle. Inspired by Samoa cookies, they’re easier to make as bars and just as addictive.
Ingredients
For the base
- ½ cup (115 g) unsalted butter, softened
- ⅓ cup (70 g) packed brown sugar (light or dark)
- ¼ teaspoon fine salt
- 1¼ cups (157 g) all-purpose flour (measured by spooning into the cup and leveling)
For the caramel-coconut layer
- 6 tablespoons (86 g) unsalted butter, cut into pieces
- ¾ cup (156 g) packed brown sugar (light or dark)
- 2 tablespoons honey
- ¼ cup (60 g) heavy cream
- a scant ½ teaspoon fine salt
- 1¼ cups (105 g) sweetened shredded coconut*
- ½ teaspoon pure vanilla extract
For the chocolate finish
- ¾ cup (125 g) milk chocolate chips
- Flaky finishing salt, optional
Instructions
- Prep: Heat the oven to 350°F (175°C). Line an 8×8-inch metal baking pan with foil or parchment, leaving an overhang for easy removal, and grease the lining lightly.
- Make the crust: In a mixing bowl fitted with a paddle (or using a hand mixer), cream together the softened butter and brown sugar briefly. Add the salt and flour and beat until the mixture resembles coarse crumbs that hold together when pressed. Transfer the mixture to the prepared pan and press into an even layer (a measuring cup base works great for this). Bake the crust about 15 minutes while you prepare the filling.
- Prepare the filling: In a medium saucepan set over medium heat, combine the butter pieces, brown sugar, honey, heavy cream, and salt. Bring the mixture to a simmer, watching and stirring occasionally; once it reaches a simmer with bubbles throughout, let it cook for 2 minutes to thicken slightly. Remove the pan from the heat, stir in the vanilla, then fold in the shredded coconut.
- Assemble and bake: Pour the hot coconut-caramel mixture over the partially baked crust and spread it evenly. Return the pan to the oven and bake for approximately 12 minutes more. Pull the pan from the oven and set it on a wire rack to cool fully; cooling will help the filling set.
- Finish with chocolate: Melt the milk chocolate slowly (in short bursts in the microwave or over a double boiler) until smooth. Transfer the melted chocolate to a small piping bag or a resealable plastic bag and snip a tiny corner. If you prefer cleaner slices, cut the cooled slab into bars first, then drizzle the chocolate across the pieces in a zigzag pattern. Sprinkle with flaky salt if you like. Allow the chocolate to firm for a couple of hours before serving.
Notes
- Notes
- Coconut: For a nicer texture, roughly chop the shredded coconut so it isn’t stringy; this is optional based on preference.
- Watch the caramel carefully while it simmers—stir occasionally to prevent scorching.
- If you prefer a firmer bottom, press the crust extra firmly before the first bake.
- Storage & serving
- Serve these at room temperature or slightly chilled; they firm up as they cool. Keep leftovers refrigerated for up to 3 days, or freeze tightly wrapped for up to 3 months. Thaw in the fridge before serving. Enjoy!
Nutrition
- Calories: 279kcal
- Sugar: 25g
- Sodium: 134mg
- Fat: 16g
- Saturated Fat: 11g
- Trans Fat: 0.4g
- Carbohydrates: 33g
- Fiber: 1g
- Protein: 1g
- Cholesterol: 31mg


