Buckeye Graham Crackers are the no-bake peanut-butter-and-chocolate sandwich that hits nostalgia and party-ready dessert energy in one crunchy bite. If you love the classic buckeye candy, but want something faster, freezer-friendly, and perfect for school snacks or fundraiser bake tables, this recipe is your new go-to.
Introduction to the recipe
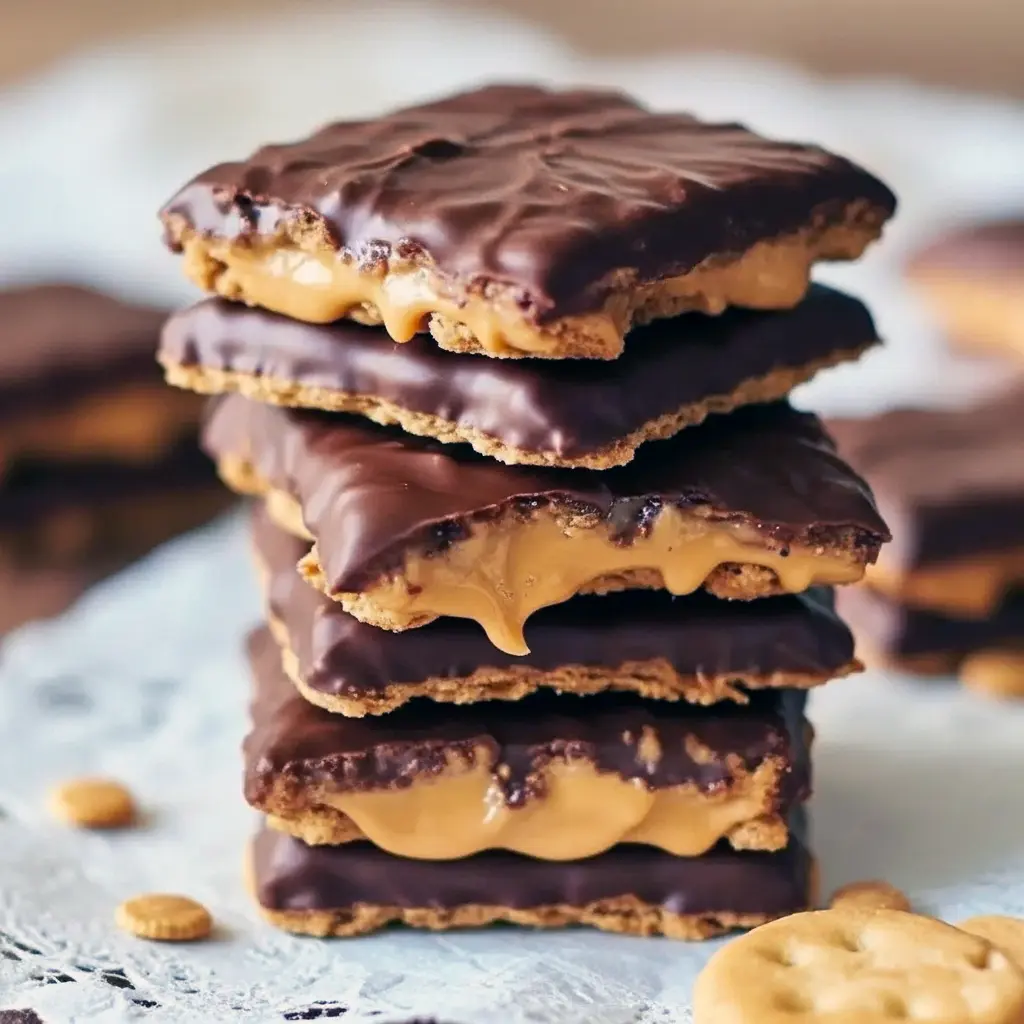
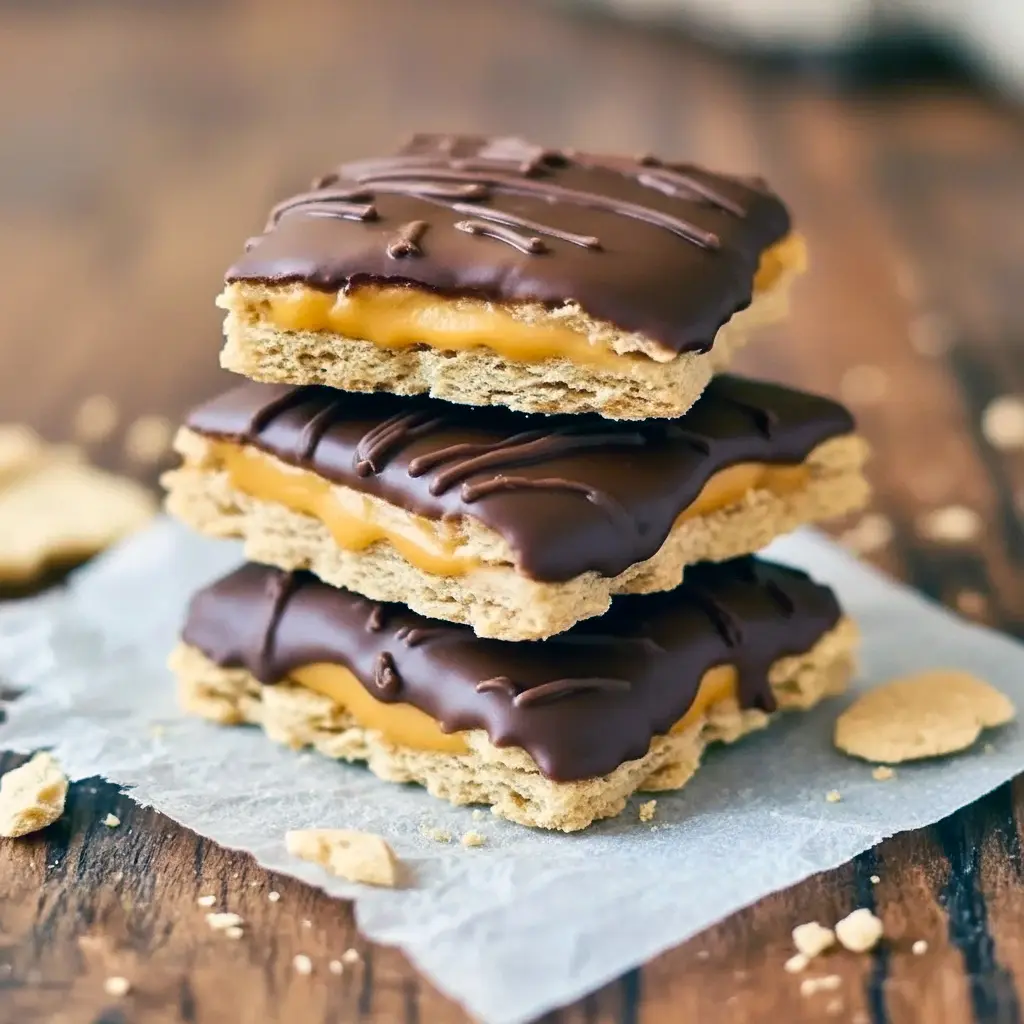
You’re one mixing bowl away from a tray of sweet, salty, crunchy bars that require zero oven time and very little fuss. Think peanut-butter filling piped or spread between graham cracker squares, dipped or drizzled with glossy chocolate, and finished with a pinch of flaky sea salt or crushed peanuts. It’s an ideal riff on the classic buckeye candy, adapted into easy Graham Cracker Recipes Desserts Simple format for busy bakers and snack-preppers alike.
What makes these so irresistible?
Three words: contrast, nostalgia, convenience.
- Contrast: crunchy graham crackers + creamy peanut butter + silky chocolate = a perfect mouthfeel trifecta.
- Nostalgia: the buckeye flavor combo (peanut butter + chocolate) delivers instant comfort and familiar joy.
- Convenience: no baking, no mess, minimal cleanup — yet they look and taste like something you’d pay for at a bakery.
Bold tip: Chill the peanut butter mixture briefly if it feels too soft — firm filling is easier to handle and dip. FYI, freezer-friendly treats = life-saver for last-minute hosting.
Ingredients (with quick notes)
- Graham crackers: the sturdy, crunchy base. Break full sheets into squares or use store-bought squares.
- 3/4 cup creamy peanut butter: creamy gives the classic buckeye texture; use natural if you thicken it a bit.
- 1/4 cup softened butter: smooths and stabilizes the filling.
- 1 cup powdered sugar: sweetens and firms the filling to a spreadable consistency.
- 1 tsp vanilla extract: simple flavor lift.
- 1 cup chocolate chips (semi-sweet or milk): for coating or drizzling — choose good quality for silky melt.
- 1 Tbsp coconut oil or butter: helps chocolate melt and set shiny.
- Optional: flaky sea salt, crushed peanuts, mini chocolate chips for topping.
Bold note: If you use natural peanut butter, stir off any separated oil and add a tablespoon more powdered sugar to help firm the filling.
Simple how-to (step-by-step, no-fail method)
- Make the peanut-butter filling. In a bowl, beat together the peanut butter, softened butter, powdered sugar, and vanilla until smooth. The mixture should be thick but spreadable. If it’s too soft, pop it in the fridge for 10–15 minutes.
- Assemble the sandwiches. Break graham sheets into squares. Spread about 1 tablespoon of filling onto one square, then top with another square to make a sandwich. Repeat and arrange on a parchment-lined tray.
- Melt the chocolate. Microwave chocolate chips with coconut oil in 20-second bursts, stirring between each, until fully melted and glossy. Or use a double boiler.
- Dip or drizzle. Dip each sandwich halfway into the chocolate, or spoon drizzle across the top. Set back on parchment. Sprinkle with crushed peanuts or flaky salt if desired.
- Chill to set. Refrigerate for 20–30 minutes or freeze briefly until the chocolate firms. Store chilled or at room temp (if your kitchen is cool).
Bold tip: Chill sandwiches before dipping to reduce sliding and messy drips during the dip step.
The story behind the recipe
I first played with this idea after a Halloween when my pantry was full of leftover graham crackers and the neighbor’s kid brought over a bag of peanut-butter cups. I thought, “Why not merge buckeye candy and graham cracker ease?” The first tray flew off the table at a potluck, and friends demanded the recipe. Over time I tweaked sugar ratios, tried different dunking techniques, and discovered that a light sprinkle of salt on top turns good into unforgettable.
If you love What To Make With Graham Crackers challenges, this is a must-try. It’s simple, scalable, and endlessly riffable — perfect for busy parents, bake-sale teams, and anyone who keeps a sleeve of crackers in the pantry “just in case.”
Pro tips for the best outcome
- Use creamy peanut butter unless you adjust for natural varieties — texture matters here.
- Chill the filling a little if it’s soft; firm filling makes neater sandwiches.
- Dip on a cool surface and work quickly — chocolate sets faster on cold trays.
- Stir, don’t overheat, your chocolate. Burnt chocolate tastes bitter. Use short bursts in the microwave and stir thoroughly.
- Add coconut oil for a shinier, smoother melt.
- Sprinkle right after dipping. If you wait until the chocolate sets, toppings won’t stick.
Bold pro tip: If you want perfect edges, use a fork to lift and tap off excess chocolate, then rest on parchment — no pooling, no mess.
Variations to try (fun riffs and friendly swaps)
- Buckeye Graham Crackers with banana: layer thin banana slices with peanut-butter filling for a banana-chocolate twist — a great Banana And Graham Cracker Recipes idea.
- Crunchy Buckeyes: fold chopped roasted peanuts or cereal into the filling for extra crunch.
- Pretzel swap: replace graham crackers with mini pretzel squares for a salty-sweet bite.
- Nut-butter swaps: try almond or cashew butter for a different flavor profile — great for guests who prefer other nuts.
- Mini cups: press filling into mini graham cups or edible cups, top with chocolate — party-ready.
- Teddy Graham treats: use teddy-shaped graham snacks and pipe mini buckeye filling on top for adorable Teddy Graham Snack Ideas.
Bold suggestion: For Graham Cracker Recipes Desserts Simple, keep a stash of pre-sliced fillings in the freezer to pop into sandwiches and dip on demand.
Common mistakes and how to avoid them
- Filling too loose: add a little more powdered sugar or chill before assembling.
- Chocolate seizing: if chocolate contacts water, it will seize; keep utensils dry and avoid steam.
- Sandwiches sliding: chill before dipping or use a thicker filling.
- Overheating chocolate: microwave in short bursts and stir between each.
Best way to serve
Arrange on a platter for parties, pack in small cellophane bags for gifting, or layer them between parchment in a tin for a show-stopping potluck contribution. These make fantastic lunchtime treats, bake-sale stars, or Chocolate Snack Ideas for movie night.
Serving tip: A light sprinkle of flaky sea salt after dipping transforms sweetness into sophisticated flavor contrast — try it.
Storage and make-ahead strategies
- Refrigerator: keep in an airtight container up to 1 week.
- Freezer: layer sandwiches between parchment and freeze up to 3 months. Thaw in the fridge or on the counter.
- Make-ahead: prepare the filling and assemble sandwiches a day ahead; dip just before serving for freshest chocolate sheen.
Bold storage tip: For best texture after freezing, thaw in the fridge overnight, then bring to room temp for 10–15 minutes before serving.
Creative uses — what to do with leftover crackers and sandwiches
- Crush leftover crackers and use as a crust for mini pies.
- Chop prepared sandwiches and scatter over ice cream as a crunchy mix-in.
- Use broken pieces as a base for layered parfaits or pudding cups.
If you’ve been asking What To Make With Graham Crackers, this recipe opens up a whole snack-and-dessert toolbox.
Party and fundraising-friendly ideas
These treats scale easily — multiply the filling and sandwich assembly for bake sales or charity fundraisers. They package well, hold their shape, and travel without drama if kept cool.
Bold fundraiser tip: Label ingredients clearly for nut allergies and consider a nut-free version using sunflower seed butter for school events.
FAQs (quick answers)
Can I use crunchy peanut butter?
Yes — it adds texture. Just make sure the filling stays spreadable; you may need to add a touch more butter or powdered sugar.
Is this recipe gluten-free?
Not with standard graham crackers. Use certified gluten-free graham crackers to make the whole recipe gluten-free.
Can I make dairy-free or vegan?
Swap butter for coconut oil or vegan butter, and use dairy-free chocolate chips. You’ll get slightly different texture but still delicious results.
What’s the best chocolate to use?
High-quality chocolate chips or chopped bars melt and set better. For the smoothest finish, use chocolate with balanced cocoa butter content.
Are these okay for school lunches?
They can be, but check your school’s nut policy. Try nut-free sunflower butter versions for safer school snacks.
Recipe variations that answer “what else can I do?”
- Graham Cracker Buckeye Bark: Spread filling into a thin layer, drizzle chocolate, chill, break into shards — an easy Graham Cracker Snack Ideas spin.
- Banana and graham cracker stacks: alternate graham, peanut butter, and banana slices for a no-bake parfait—great for quick breakfasts. Incorporates Banana And Graham Cracker Recipes thinking.
- Mini teddy graham bites: dollop filling onto Teddy Graham Snack Ideas for kid-friendly finger foods.
Final thoughts (why you’ll make these again and again)
This Buckeye Graham Cracker Recipe combines nostalgia, speed, and crowd-pleasing flavor in one tidy, no-bake package. Whether you’re hunting for Chocolate Snack Ideas for movie night, brainstorming Recipes With Graham Crackers for a classroom party, or hunting for easy potluck contributions, these hits all the marks: Graham Cracker Recipes Desserts Simple, widely loved, and endlessly adaptable.
Bold final tip: Keep a small baking kit in the pantry — graham crackers, peanut butter, powdered sugar, and chocolate — and you’ll always be 15 minutes away from a dessert that looks like you spent hours on it. IMO, that’s the real kitchen magic.
Follow me on Pinterest for daily new recipes.
Print
Buckeye Graham Crackers — Easy Buckeye Graham Cracker Recipe
- Prep Time: 15 minutes
- Cook Time: 30 minutes
- Total Time: 45 minutes
- Category: Dessert
Description
Craving a quick, nostalgic dessert with zero baking? These graham-cracker sandwiches bring all the peanut-butter + chocolate vibes of a buckeye, but in an easy, handheld form. Crunchy crackers, creamy peanut filling, and a glossy chocolate finish — done in about 30 minutes (mostly chilling time).
Ingredients
- 1 sleeve graham crackers (about 9 full sheets), snap each sheet in half
- ¾ cup creamy peanut butter
- ¼ cup (4 tbsp) unsalted butter, softened
- 1 cup powdered (confectioners’) sugar
- 1 tsp pure vanilla extract
- 1 cup chocolate chips (semi-sweet or milk)
- 1 tbsp coconut oil or a little extra butter (helps chocolate melt and set)
Instructions
-
Prepare the peanut-butter center
Place the peanut butter, softened butter, powdered sugar, and vanilla in a bowl. Beat or stir until the mixture becomes smooth and thick — spreadable but not runny. If it seems too soft, pop it into the fridge for 10 minutes to firm slightly. -
Build the graham sandwiches
Break each graham sheet into two squares. Spoon about 1 tablespoon of the peanut mixture onto one square, then top with a matching graham square to make a sandwich. Press gently so the filling spreads to the edges. Arrange finished sandwiches on a parchment-lined tray. -
Melt the chocolate
In short bursts (15–20 seconds) in the microwave, melt the chocolate chips with the coconut oil or butter, stirring well between bursts until silky. Alternatively, melt over a double boiler on the stove, stirring until smooth. -
Coat the sandwiches
Hold a sandwich by the edge and dip half of it into the melted chocolate, or drizzle chocolate over the top with a spoon. Tap off any excess and set back on the parchment. If you like, sprinkle a pinch of flaky sea salt, crushed peanuts, or mini chocolate chips on the wet chocolate. -
Chill to finish
Refrigerate the tray for about 20–30 minutes or until the chocolate is firm. Store completed sandwiches in an airtight container in the fridge, or freeze stacked with parchment between layers for longer storage.
Notes
- Tips & notes
- Use creamy peanut butter for the classic smooth texture; if you use natural peanut butter, stir it well and add a bit more powdered sugar if needed to thicken.
- Chill the filling briefly if it spreads too easily — firmer filling makes neater sandwiches and easier dipping.
- Don’t overheat chocolate. Heat in short intervals and stir to avoid burning or seizing. Adding coconut oil gives a glossy finish and sets firmly.
- Flavor add-ins: Mix chopped peanuts, a pinch of cinnamon, or mini chips into the filling for extra crunch.
- Allergy-friendly swap: Use sunflower-seed butter to make a nut-free version that still tastes great.
- Storage
- Fridge: Airtight container for up to 1 week.
- Freezer: Layer with parchment and freeze up to 3 months; thaw in the fridge before serving.


