Desserts To Make — Thin Mint Cheesecake (a fancy-but-easy crowd-pleaser)
Desserts To Make doesn’t get much more fun than a minty, chocolatey cheesecake that looks fancy but practically assembles itself. If you love the chocolate-mint vibe of those classic Girl Scout cookies, this Mint Chocolate Cake-inspired cheesecake brownie is going to be your new flex at parties.
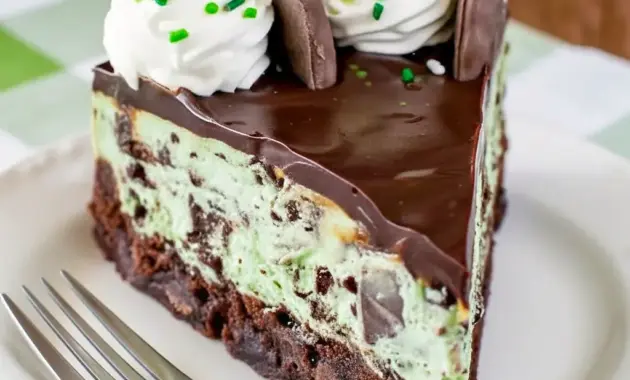
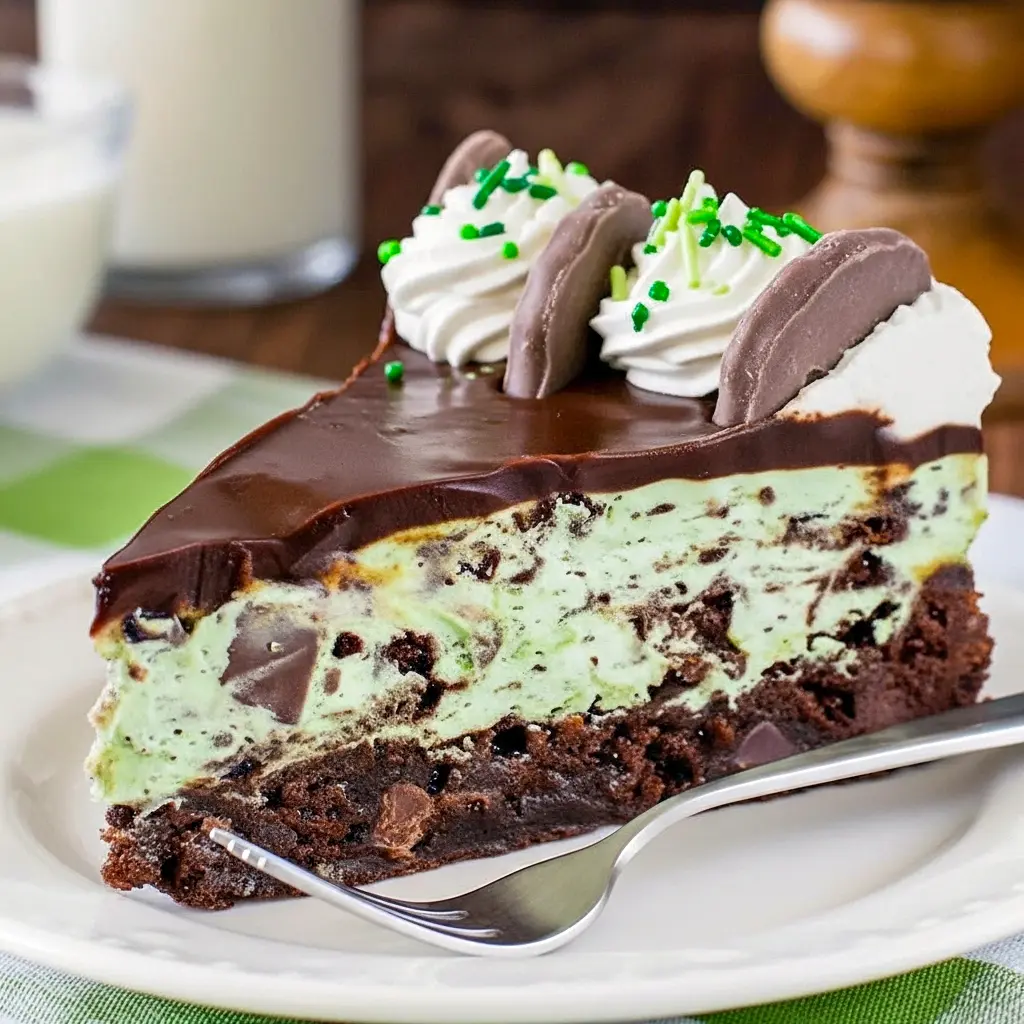
Short version: chewy brownie base + creamy mint cheesecake studded with cookies + glossy ganache = total crowd-pleaser. Ready? Let’s dig in.
Why you’ll fall for this dessert
This mash-up nails two cravings at once: brownie comfort and cheesecake silk. It’s one of those Sweet Treats Desserts that’s easy to transport, prettier than a box of store-bought sweets, and — crucially — easier to make than you think.
- It’s Quick Easy Desserts friendly: the cheesecake layer is a no-bake mix, so no water baths or scary baking math.
- It doubles as a show-stopper for holidays and a practical make-ahead for a potluck.
- Your chocolate-and-mint-loving friends will call it a better version of a Cookie Desserts fantasy.
Curious about what goes into it and why each element matters? I’ll walk you through it.
The Key Ingredients (and Why You Need Them)
Below I list the main ingredients (no amounts here — the printable card has those). I’ll explain what role each plays so you understand how and why to tweak things.
Brownie base — Provides chewy chocolate structure and a deep cocoa backbone. You can bake from scratch or use a boxed mix to save time. Either way, it anchors the cheesecake.
Cream cheese — The heart of the filling. Full-fat blocks give that silky, tang-forward texture that makes a true cheesecake.
Powdered sugar — Smooth sweetness that dissolves into the cream cheese for the perfect texture (granulated makes it grainy).
Mint extract + vanilla — Mint gives the dessert its signature note; vanilla tames the sharpness so it never tastes like toothpaste. Trust the balance.
Whipped topping (Cool Whip or stabilized whipped cream) — Lightens the filling so it’s fluffy, not dense. It also shortens chill time.
Mint cookies — Crushed Thin Mints, Mint Oreos, or similar cookies add chocolate crunch and true cookie flavor — the fun Cookie Desserts element.
Chocolate chips + heavy cream (for ganache) — A glossy ganache makes the slice look professional and adds a smooth, rich finish that pairs perfectly with mint.
Optional sprinkles or extra cookies for decoration — Because plating matters for first impressions.
Bold tip: let your cream cheese come to room temperature — skipping that step makes lumps and takes forever to smooth out.
How to Make It
This is the workflow I use every time — clean, predictable, and perfect for busy cooks.
- Prep the pan. Line a springform pan with parchment and spray the sides lightly so the brownie lifts out smoothly later. You can also use an 8×8 pan if you prefer squares.
- Bake the brownie crust. Mix your brownie batter (homemade or boxed). Press it into the pan and bake. Let it cool fully — don’t rush this step. A warm brownie plus cold filling = melty mess.
- Build the no-bake cheesecake filling. Beat room-temp cream cheese with powdered sugar and extracts until silky. Fold in the thawed whipped topping for a light, airy texture. Tint with a drop or two of green gel if you want classic mint color.
- Add cookie bits. Chop up mint cookies and gently stir them into the filling. These pockets of crunch are the point.
- Assemble and chill. Spread the filling over the cooled brownie and smooth. Refrigerate for 1–2 hours or until set. (Overnight is fine too.)
- Finish with ganache. Heat cream, pour over chopped chocolate, stir until glossy, cool slightly, then spread over the chilled cheesecake. Add cookie pieces and whipped swirls before the chocolate sets completely.
- Serve. Run a thin knife around the pan before unlatching, then slice with a hot, clean knife for perfect cuts.
Bold tip: cool the ganache just until it’s pourable but not piping hot — too hot and it will melt the cheesecake top.
Pro tips for perfect results
- Swap smart. Boxed brownie mix is fine, but use quality chocolate in the ganache — it makes a noticeable difference.
- Less mint is more. Start with less extract than you think; you can always add more but you can’t take it out. Mint overkill = toothpaste vibes.
- Chill time matters. The filling firms up faster if you make it the night before. This is a great Homemade Cakes hack.
- Clean cuts every time. Dip your knife in hot water and wipe between slices for clean edges.
- Decorate strategically. Press cookie halves into the ganache before it sets for an elegant look.
- Make it ahead. This dessert travels well — just keep ganache and delicate toppers separate until serving.
Bold tip: freeze slices for later — they thaw quickly and still taste fresh.
Variations worth trying
- Thin Mint Bars: Bake the filling in an 8×8 pan and cut into bars for portable Tasty Baking snacks.
- Chocolate-mint trifles: Layer brownie chunks, mint filling, and ganache in cups for individual servings. Great for parties.
- Vegan swap: Use vegan cream cheese, coconut whipped topping, and a dairy-free ganache. You’ll need to test stability but it’s doable.
- Coffee-chocolate twist: Add espresso powder to the brownie batter — the bitter notes deepen the chocolate and contrast the mint.
- Cookie mix-up: Use Mint Oreos for a sweeter, thicker cookie presence, or try crushed peppermint candies for festive crunch.
Best ways to serve
- Keep slices slightly chilled — room temp softens the ganache and alters the texture.
- Serve with lightly whipped cream on the side for guests who like it extra airy.
- Pair with a rich espresso or a minty liqueur for an adult-friendly finish.
- For a party, pre-slice and fan on a platter with cookie halves as garnish.
Want to be fancy? Plate each slice with a small quenelle of whipped cream and a thin drizzle of extra ganache.
Quick tips for storage and leftovers
- Refrigerator: Store in an airtight container for 3–4 days.
- Freezer: Freeze undecorated cake (wrap tightly) for up to 1 month. Thaw overnight in the fridge, then add ganache and toppings before serving.
- Transport: Chill fully before moving. Use a springform pan with a locking lid or box the slices with parchment.
Bold tip: store the sauce/ganache separately if traveling; add it at the destination for a photo-ready finish.
FAQs
Can I use whipped cream instead of Cool Whip?
Yes. Use stabilized whipped cream if you want longer shelf life and firmer texture. Stabilized whipped cream keeps the filling from weeping.
No springform pan—what then?
Bake the brownie in an 8×8 pan, assemble the layers right in the pan, and slice like bars. Slightly shorter bake time for smaller pans.
Will the mint taste like toothpaste?
Not if you use the mint extract sparingly and balance with vanilla. Some people are genetically sensitive to mint — you can also use a mint-flavored liqueur in tiny amounts for a subtler profile.
Can I make this gluten-free?
Yes. Use gluten-free brownie mix (or make your own GF brownies) and gluten-free cookies/breadcrumbs. The structure holds up just fine.
How many servings does this yield?
In an 8×8 pan, you’ll get about 9–12 squares. In a 9″ springform, expect 10–12 slices depending on slice thickness.
Final thoughts — why this belongs in your dessert rotation
This Thin Mint Cheesecake combines the comfort of Homemade Cakes with the elegance of a special-occasion dessert. It’s flexible, forgiving, and scales—from a quiet family treat to a plated dessert at a dinner party.
It’s one of those Quick Easy Desserts that looks intentional and complex, but it rewards you with minimal fuss and maximum payoff. So: ready to turn those Girl Scout memories into something even richer? Grab your favorite mint cookies, fire up the oven for that brownie base, and get ready to impress.
Follow me on Pinterest for daily new recipes.

Thin Mint Cheesecake — An Easy Desserts to Make
- Prep Time: 20 minutes
- Cook Time: 25 minutes
- Total Time: 45 minutes
- Yield: 14 Slices 1x
- Category: Dessert
Description
A decadent two-layer dessert: a fudgy brownie base topped with a minty, cookie-studded cheesecake and finished with a silky chocolate glaze and cookie accents.
Ingredients
Brownie base
- 1/2 cup unsalted butter, melted
- 1/4 cup Dutch-process or dark cocoa powder
- 2 large eggs
- 1 cup granulated sugar
- 1 teaspoon vanilla extract
- 1/2 teaspoon salt
- 3/4 cup all-purpose flour
- 1/4 teaspoon baking powder
- 3/4 cup chocolate chunks
Mint cheesecake layer
- 1 (8 oz) package cream cheese, softened
- 1/2 cup powdered (confectioners’) sugar
- 1/2 teaspoon mint extract
- 1/2 teaspoon vanilla extract
- 1 (8 oz) tub whipped topping (thawed), divided
- a few drops green gel food coloring, optional to tint
- 21 chocolate-mint cookies (such as Thin Mints), divided
Chocolate topping
- 1/2 cup semi-sweet chocolate chips
- 1/4 cup heavy whipping cream
- green sprinkles, for decoration
Instructions
- Preheat the oven to 350°F (175°C). Line the bottom of a 9-inch springform pan with parchment and lightly spray the sides with nonstick spray.
- In a medium bowl whisk the melted butter together with the cocoa until smooth. Set aside to cool slightly.
- In a separate bowl beat the eggs with the sugar and vanilla until the mixture is pale and slightly thickened. Stir the cocoa-butter mixture into the egg mixture.
- Gently fold in the flour, salt, and baking powder until just combined. Fold the chocolate chunks into the batter.
- Spread the brownie batter evenly into the prepared pan and bake for about 25 minutes, until the top is set. Remove from the oven and cool completely on a rack.
- Once cooled, run a knife around the edge, remove the parchment, place the brownie back into the springform base, and secure the ring around it again so you can build the cheesecake layer on top.
- For the cheesecake filling, beat the softened cream cheese with the powdered sugar until silky. Mix in the mint and vanilla extracts until evenly distributed.
- Gently fold about two-thirds of the whipped topping into the cream cheese mixture until light and smooth. If you want a mint-green color, stir in a tiny amount of green gel coloring until you reach the shade you like.
- Roughly chop about 15 of the mint cookies and fold them into the cheesecake batter. Spread the mint cheesecake gently over the cooled brownie, smoothing the top. Chill in the refrigerator for at least 1 hour to set.
- Make the chocolate ganache by placing the chocolate chips and the cream in a microwave-safe bowl. Heat in 20–30 second bursts, stirring between, until the chocolate melts and the mixture is glossy. Let the ganache cool a few minutes so it thickens slightly but remains pourable, then spread it evenly over the chilled cheesecake.
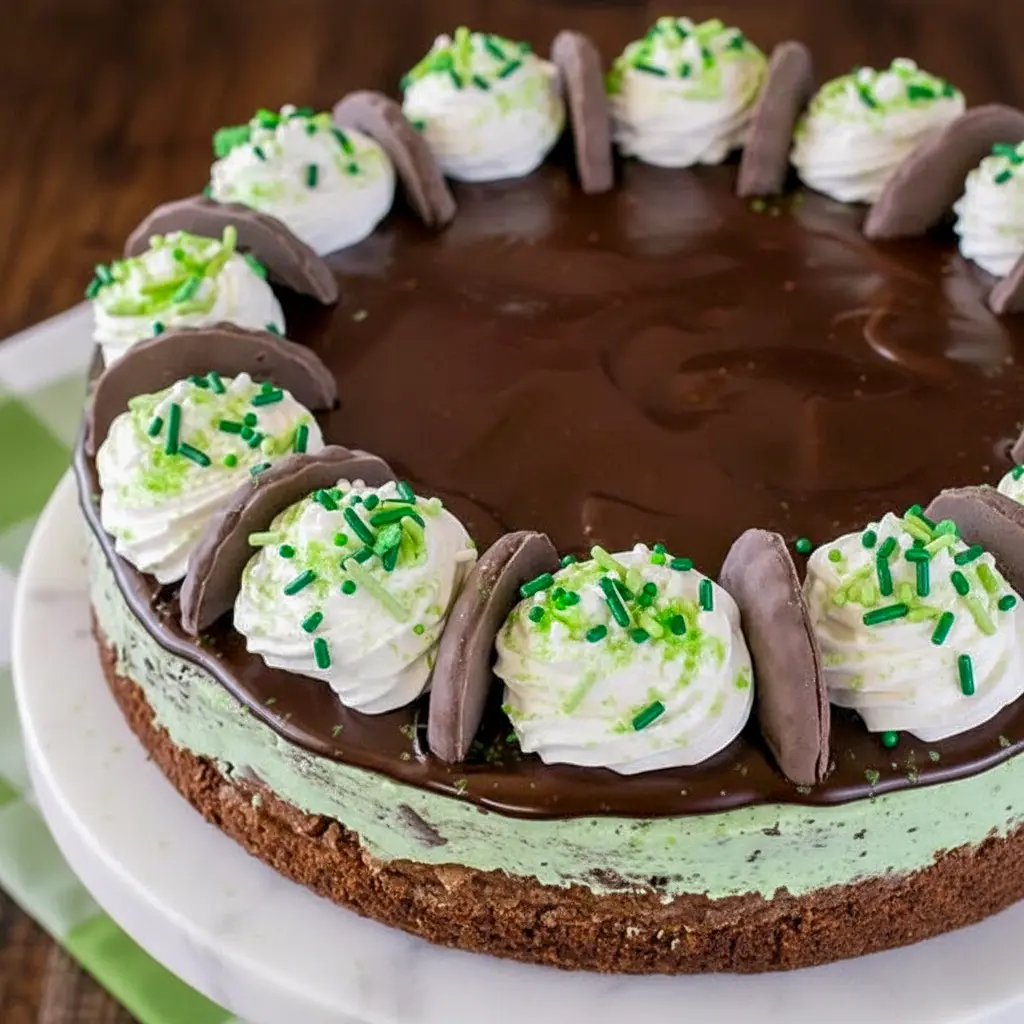
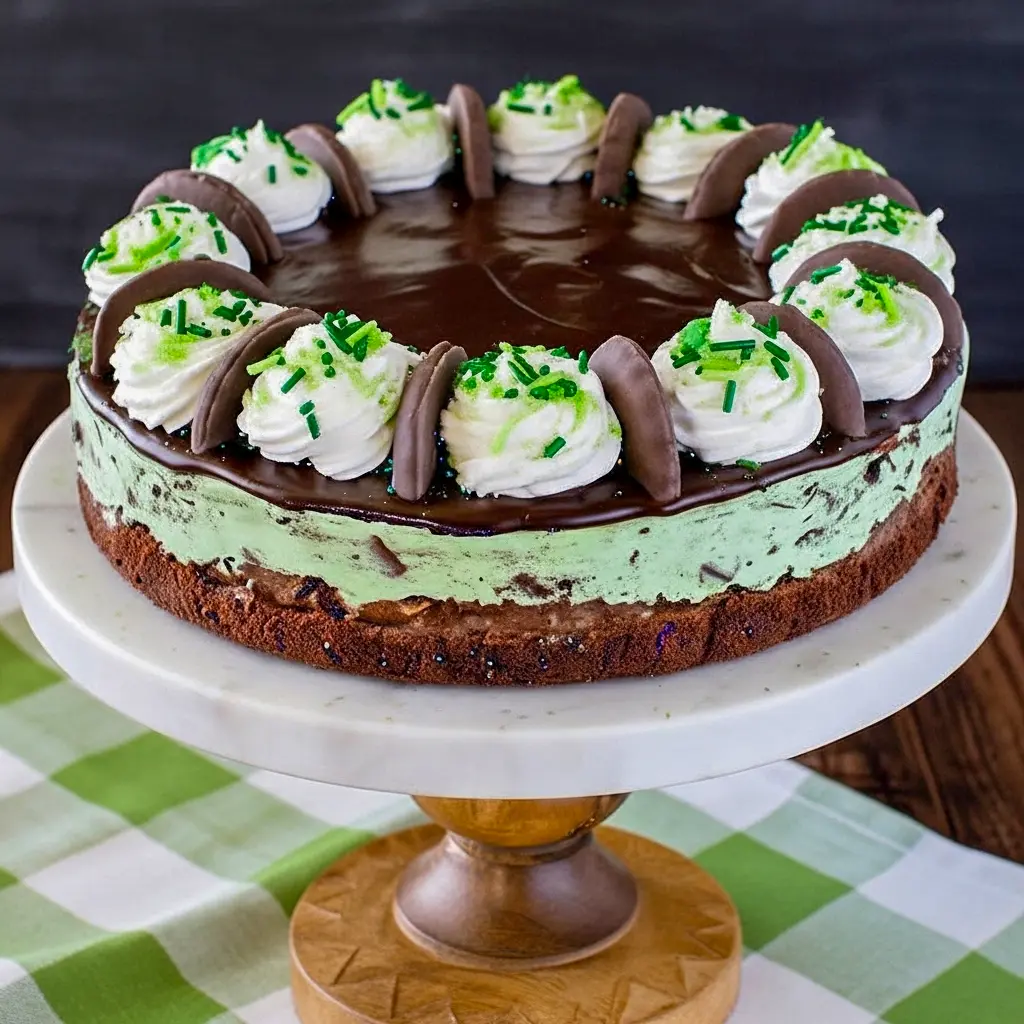
- Halve the remaining cookies and arrange the halves around the perimeter of the cake. Use the reserved whipped topping to pipe small rosettes between each cookie half if desired, and finish with a scattering of green sprinkles.
- Before serving, loosen the springform ring by running a thin knife around the inside edge. Slice with a clean, warm knife for neat pieces.
Notes
- Refrigerate leftovers in an airtight container for 3–4 days.
- You may freeze the undecorated cake (wrapped tightly) for up to one month; thaw overnight in the fridge before adding the ganache and decorations.
- If you prefer to avoid Cool Whip, a stabilized homemade whipped cream works well as a substitute (use in the same quantity).
Nutrition
- Serving Size: 1 serving
- Calories: 424
- Sugar: 36g
- Sodium: 173mg
- Fat: 26g
- Saturated Fat: 17g
- Unsaturated Fat: 8g
- Trans Fat: 0g
- Carbohydrates: 45g
- Fiber: 1g
- Protein: 5g
- Cholesterol: 69mg