Easy Homemade Christmas Desserts — Salted Peppermint Chocolate Bark (Irresistible, Giftable & Totally Simple)
If you’re compiling a shortlist of Easy Homemade Christmas Desserts, this Salted Peppermint Chocolate Bark deserves a top spot — it’s no-bake, gorgeous, and tastes like winter in a bite.
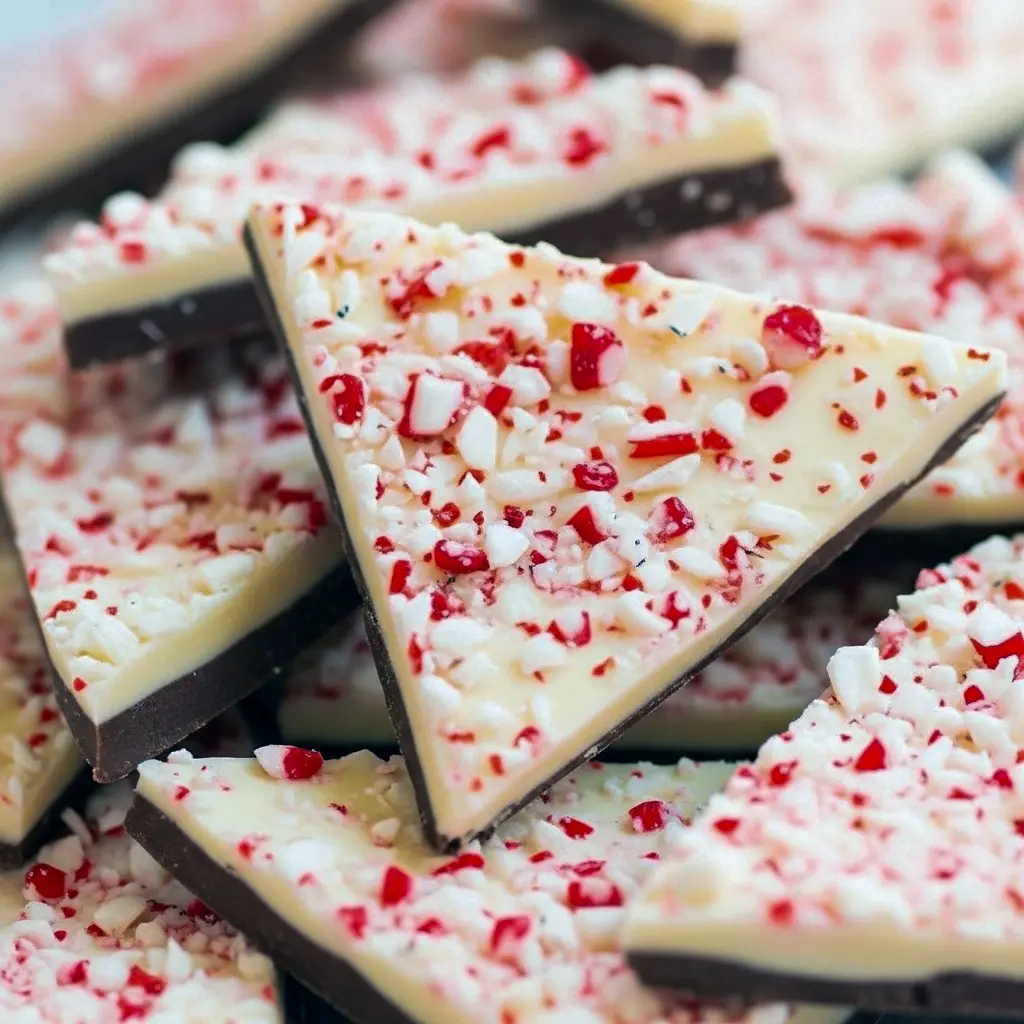
Short and sweet: this recipe layers rich dark chocolate, silky white chocolate, crunchy crushed peppermint, and a flake of sea salt for a perfect sweet-and-salty finish. It needs only a handful of ingredients, zero candy-making gadgets, and delivers huge holiday payoff. Sound like a win? Let’s dig in.
Why you’ll fall for this bark
- No oven, no fuss. Melt and pour — that’s it.
- Big batch, small effort. Make a tray to gift and still have plenty for the cookie plate.
- Kid-friendly to make, adult-level to gift. Everyone can help crush candy canes or scatter the salt.
- Versatile. Dress it up for neighbors, pack it for a potluck, or tuck it into a pretty tin.
And honestly, who doesn’t love peppermint + chocolate? That little pop of mint with crisp chocolate and a briny saltflake? Chef’s kiss.
The story behind my version
I first fell head-over-heels for peppermint bark at a holiday market — you know, the one where every sample tastes like nostalgia? I wanted something similar but with a punchier salty finish. After a few playful experiments (and more than one chocolate-stained sweater), I settled on the two-tone approach: sturdy dark chocolate base, white chocolate top, and a shower of crushed peppermint plus sea salt. Doubling up the white chocolate over the dark really makes a difference — it binds better, looks luxe, and keeps the pieces from separating when you break them. FYI: it’s become my go-to for teacher gifts and last-minute hostess treats.
Ingredients & what they do (quick blurbs)
- Good dark chocolate (6–8 oz): Forms the flavor backbone; pick a quality bar or chips.
- White chocolate (6–8 oz): Adds creaminess and contrast — opt for real white chocolate or melting wafers.
- Crushed peppermint (¾–1 cup): Candy canes, peppermint bark, or chopped Andes pieces all work.
- Sea salt flakes: Big flakes give that satisfying crunch and a beautiful visual finish.
- Optional: a teaspoon of peppermint extract: For extra oomph if your candy isn’t ultra-minty.
Substitutions: Use milk chocolate if you prefer sweeter bark. Swap crushed pretzels or toffee for peppermint for a different salty-sweet angle. These quick swaps make this a champion among Holiday Theme Desserts.

How to Make Salted Peppermint Chocolate Bark — Step-by-step
Simple steps, maximum merry.
- Line a sheet pan. Cover a rimmed baking sheet with parchment. That’s your canvas.
- Melt the dark chocolate. Use the microwave (30-second bursts, stir) or a double boiler until smooth. Pour and spread into a flat, even layer on the parchment. Aim for about ¼-inch thickness.
- Partially set. Let the dark chocolate cool until it’s just tacky but not fully hardened — about 8–12 minutes at room temp. This is critical to help the layers adhere.
- Melt the white chocolate. Again, microwave in short bursts or use the double boiler. Stir in a whisper of peppermint extract if using.
- Pour the white on top. Spoon the white chocolate over the dark layer and gently spread. Don’t worry about perfection — swirls look gorgeous. If you want a marbled look, drag a skewer through both layers a few times.
- Scatter crushed peppermint. Press the pieces lightly so they sink a bit into the white chocolate. Sprinkle sea salt flakes across the top. Salt is optional, but it elevates the whole thing.
- Chill to set. Let the bark set at room temperature or pop it in the fridge for 10–20 minutes if you’re impatient.
- Break into shards. Use a sharp knife or just snap into rustic pieces. Package, gift, or pile on a platter.
Bold tip: Pour the white chocolate while the dark is partially set — this prevents the layers from separating and makes clean, attractive pieces.
How to melt chocolate (no drama)
- Microwave method: Chop chocolate if using bars. Heat 30 seconds, stir; then 15-second bursts stirring each time until silky.
- Double boiler: Fill a saucepan with an inch of water, heat to a gentle simmer, and place a bowl over the pot (don’t let the bowl touch the water). Stir chocolate until melted.
- Avoid steam or water in the chocolate — even a tiny drop will seize it. If chocolate gets grainy, stir in a small piece of unmelted chocolate off heat to smooth it out.
Pro tips for fail-proof bark
- Choose quality chocolate. It tastes better and sets nicer.
- Work quickly but calmly. Chocolate can go from glossy to grainy if over-heated.
- Use sea salt flakes for visible texture and flavor — grinders set to coarse work great.
- Let bark set fully at room temp to reduce the risk of color running if you refrigerate. Patience pays.
- Want cleaner breaks? Press parchment into the chocolate after it sets and chill briefly; the chill helps snap crisp pieces.
- For pretty bars, pour in an offset pattern and create gentle swirls with a skewer.
Variations to try (playful & giftable)
- All dark chocolate: Swap white chocolate for extra dark and top with crushed salted pretzel for an ultra-sophisticated bark.
- Swirled bark: Pour ribbons of white into dark and swirl for a marbled effect.
- Add-ins: Fold in chopped toffee, chopped nuts, dried cherries, or crushed ginger cookies.
- Spiked bark: Add a tablespoon of orange liqueur to melted dark chocolate for grown-up flair.
- Pretzel-toffee bark: Replace peppermint with crushed pretzels and toffee bits for a salty crunch.
These tweaks make the recipe a standout among Festive Baking Ideas and keep it interesting if you make it every season.
Best ways to serve & gift
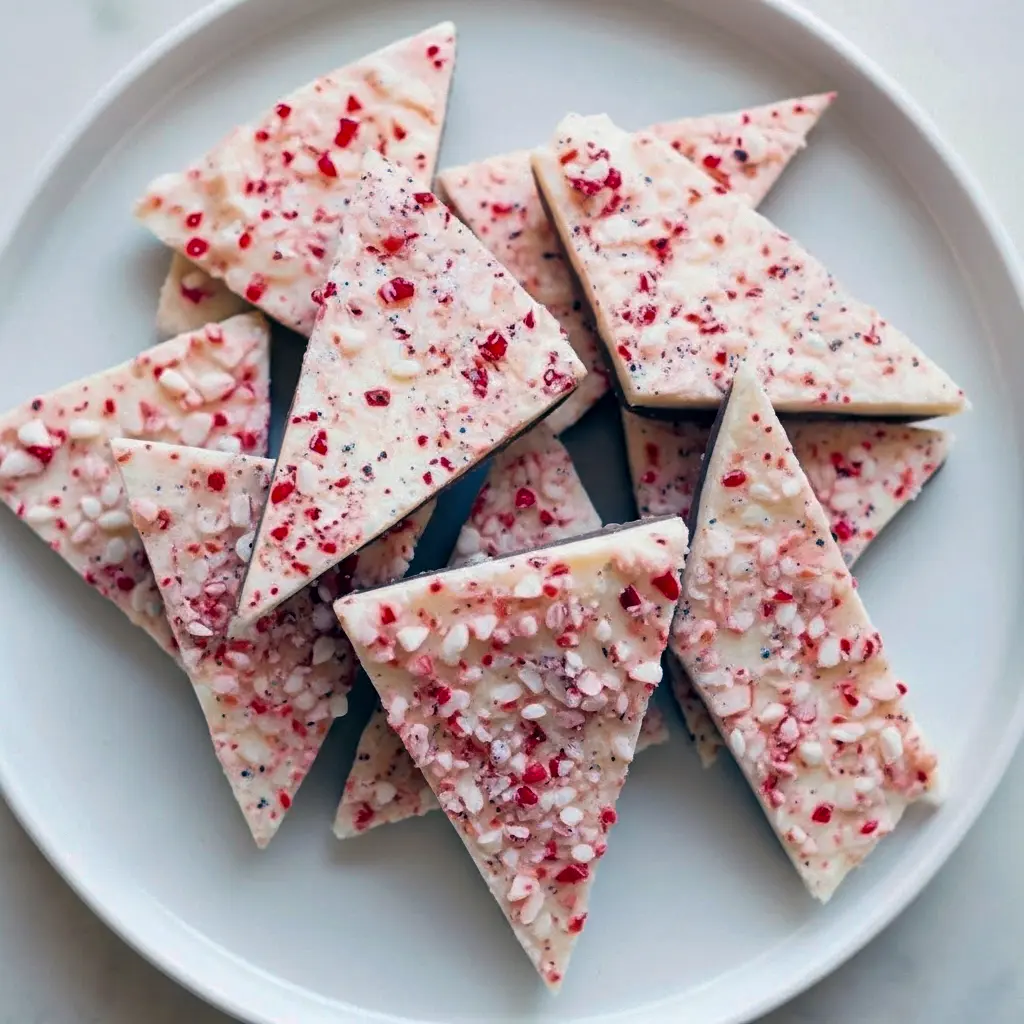
- Simple platter: Arrange shards on a white platter with pine sprigs for a classic look.
- Gift tins: Stack in parchment, tie with twine — perfect for Christmas Treat Ideas For Neighbors.
- Cellophane bags: Fill small cello bags with bark and add a ribbon and a handwritten tag. Great for teachers and co-workers.
- Dessert boards: Add to a holiday chocolate board with cookies, nuts, and fruit for parties.
Packaging idea: Use clear boxes or mason jars and a custom label — works wonders for Desserts For Gifts and Christmas Gift Baked Goods Easy Recipes.
Storage and shelf life
- Room temperature: Keep in an airtight container in a cool, dark spot for several weeks.
- Refrigerator: If your house is warm, chilling helps—but expect a small risk of subtle bloom (white streaks) and color run from moisture. Let pieces come to room temp before serving.
- Freezer: Freeze wrapped in layers for up to 3 months. Thaw slowly to avoid condensation.
Quick tip: Store between parchment layers to prevent stickiness and keep presentation tidy.

FAQs (quick answers)
Why did my layers separate?
Usually because the bottom layer hardened completely before you poured the top. Pour the white while the dark is tacky for best adhesion. Also, avoid extreme temperature differences when breaking the bark.
Can I use candy melts?
Yes — candy melts simplify melting and setting but can taste sweeter. I prefer real chocolate for flavor.
Is peppermint extract necessary?
No — crushed candy provides plenty of mint flavor. Add extract only if your candy is mild and you want extra punch.
How do I prevent my white chocolate from streaking?
Don’t overheat. Cool white chocolate slightly before pouring, and work on a room-temperature surface.
Why this belongs in your holiday rotation
Look, I get it — the holidays need stuff that looks like effort but requires minimal time. This bark checks both boxes. It’s visually stunning, scalable, and totally giftable. Slip it into a tin, add a handwritten tag, and you’ve created a present that feels handmade and luxe. That’s the magic of Baking For The Holidays without burning out.
If you want to make a spread of treats, pair a batch with other candies and cookies — it complements buttery shortbread, sticky toffee, and nutty biscotti. Want to plan a giveaway? This fits perfectly into Holiday Treat Packaging Ideas and stacks well for adorable neighbor or teacher gifts.
Quick wrap-up & final thoughts
Salted Peppermint Chocolate Bark may be one of the simplest Easy Homemade Christmas Desserts, but don’t confuse simple with boring. It delivers bold flavor, beautiful presentation, and endless gifting potential. Whether you’re assembling care packages, contributing to Christmas Pot Luck Desserts, or crafting edible gifts for friends, this bark offers maximum holiday cheer for minimal effort.
So: ready to melt some chocolate? Gather your bars, crush your candy canes, and clear a sheet pan. You’ll have a tray of showstopping bark in less time than a holiday movie. Need printable gift tags or a cute label for jars? I can make those next. Happy melting — may your chocolate stay glossy and your salt flakes be perfectly plump. 🎄🍫✨
P.S. If you’re looking for more ideas, this bark pairs fabulously with other Holiday Theme Desserts and slides right into lists like Christmas Treat Ideas For Neighbors, Christmas Baking Recipes, and Holiday Cookie & Candy spreads. Consider it your go-to for Desserts For Gifts this year.
Follow me on Pinterest for daily new recipes.

Irresistible Salted Peppermint Chocolate Bark — Easy Homemade Christmas Desserts
- Prep Time: 3 minutes
- Cook Time: 10 minutes
- Total Time: 13 minutes
- Yield: 48 servings 1x
- Category: Dessert
Description
Looking for a showstopper that’s quick to make and perfect for gifting? Salted Peppermint Bark delivers crunchy peppermint, glossy chocolate, and a flake of sea salt in every bite.
Ingredients
- 24 oz light cocoa candy melts (or substitute chocolate chips)
- 20 oz white almond bark (or white chocolate chips / melting wafers)
- 1 tsp oil-based peppermint extract
- 3 oz crushed peppermint (candy canes, peppermint bark, or Andes pieces)
- 1½ tsp sea salt flakes
Instructions
- Prep the pan. Line a rimmed sheet with parchment or wax paper and set it on the counter.
- Melt the dark layer. Warm the light cocoa melts in a double boiler or microwave, stirring frequently until the chocolate runs smooth. Pour the melted chocolate onto the prepared sheet and spread it to a roughly ¼-inch thickness.
- Let it firm up slightly. Wait until the chocolate becomes tacky but not fully hard — about 8–12 minutes at room temperature. This step helps the layers adhere.
- Melt the white chocolate. Heat the white almond bark the same way, then stir in the peppermint extract. Taste carefully — a little extract goes a long way.
- Top and finish. Spoon the white chocolate over the tacky dark layer and smooth it. Immediately scatter the crushed peppermint over the top and finish with the sea salt flakes. Press gently so pieces sink a touch into the white chocolate.
- Set and break. Let the bark cool until fully firm (room temperature or a short chill). Use a sharp knife or simply snap by hand into irregular shards.
Notes
- Pro tips
- Pour the white chocolate while the dark layer is only partially set — this prevents separation and gives clean, bonded layers.
- Use sea salt flakes (or a coarse grinder setting) for visible texture and real crunch.
- Avoid getting water into the chocolate — even one drop can seize it. Dry utensils only.
- If you need to crush candy canes, pop them in a zip bag and roll with a rolling pin. Easy.
- FYI: real white chocolate tastes better than most candy melts, but melts set faster.
- Variations & swaps
- Swap dark for milk chocolate if you prefer sweeter bark.
- Stir in chopped nuts, toffee, or dried fruit for a twist.
- Replace peppermint with crushed pretzels for a salty-sweet version.
- Storage
- Keep the bark in an airtight container in a cool, dark spot for several weeks. If your kitchen runs warm, refrigerate, but let pieces come to room temperature before serving to avoid condensation. You can also freeze wrapped layers for up to three months — thaw slowly.
- Final note
- Want it gift-ready? Stack shards in a cello bag, tie with ribbon, and add a festive tag. Who would complain about edible confetti that looks this good? 😉
Easy Homemade Christmas Desserts, Christmas Treat Ideas For Neighbors, Holiday Theme Desserts, Christmas Gift Baked Goods Easy Recipes, Holiday Treat Packaging Ideas, Christmas Pot Luck Desserts, Festive Baking Ideas, Baking For The Holidays, Desserts For Gifts