Russian Napoleon Cake is one of those desserts that looks fancy, tastes unforgettable, and somehow makes people think you spent half your life in the kitchen. Spoiler: you did not have to. What you really need is patience, a love for buttery layers, and the willingness to accept that yes, pastry cream absolutely counts as a personality trait in this dessert.
This cake sits in that wonderful zone between celebration dessert and comfort food. It feels refined enough for a special occasion, but it also has the kind of old-world charm that makes you want to sneak a forkful straight from the fridge at 10 p.m. And honestly? That is completely fair.
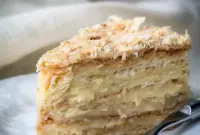
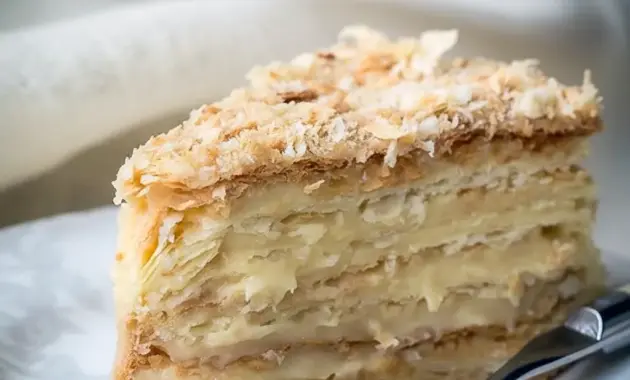
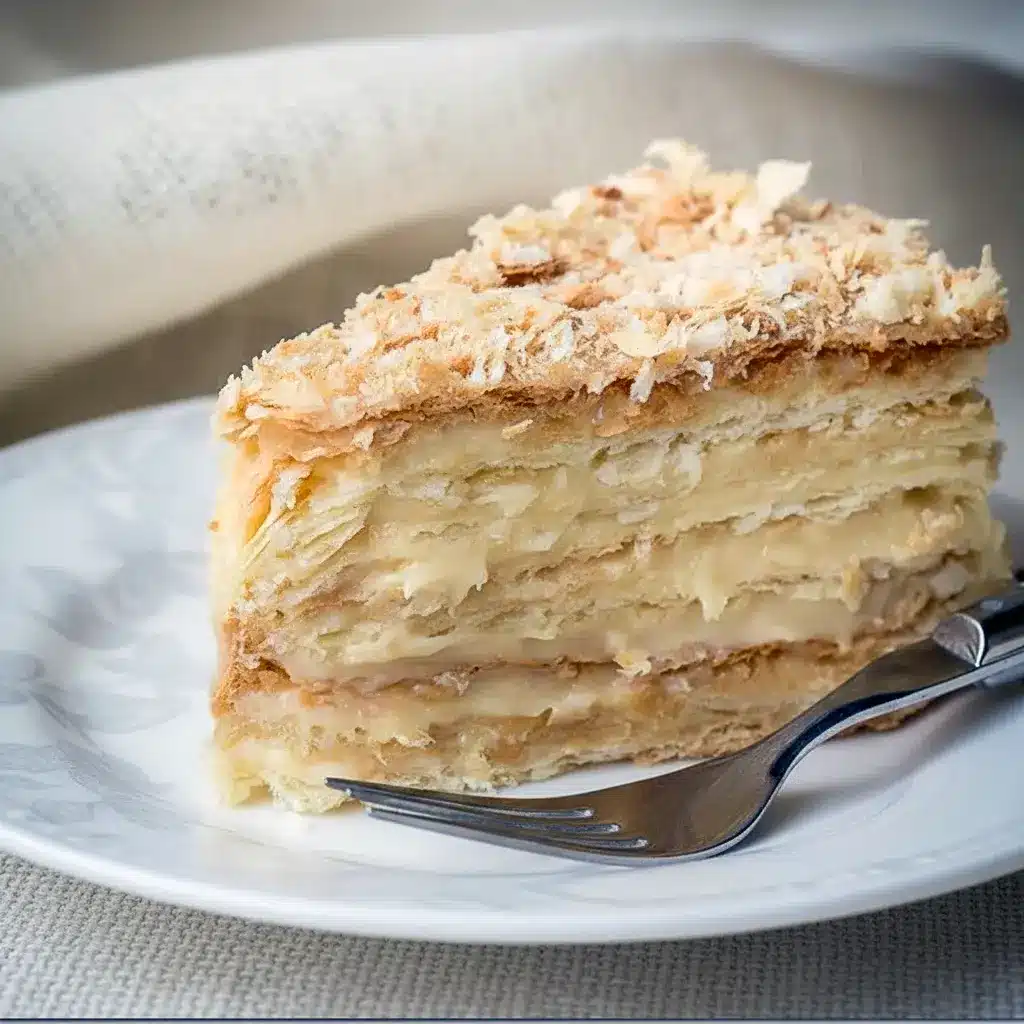
At first glance, this cake may seem simple: crisp pastry, rich cream, repeat. But the magic of Russian Napoleon Cake comes from the contrast. Every bite gives you flaky crunch, silky custard, and that tender-but-not-soggy texture that makes people pause mid-chew and say, “Okay, wow.”
If you have ever wondered why this dessert has such a devoted following, or why so many people consider it one of the most beloved Russian Desserts, the answer is pretty easy: it delivers. Big time.
What Is Russian Napoleon Cake?
The classic Napoleon Cake traces its roots to the French mille-feuille, which is built from multiple layers of puff pastry and pastry cream. The French version usually stays crisp and refined, with a polished look and a more structured finish.
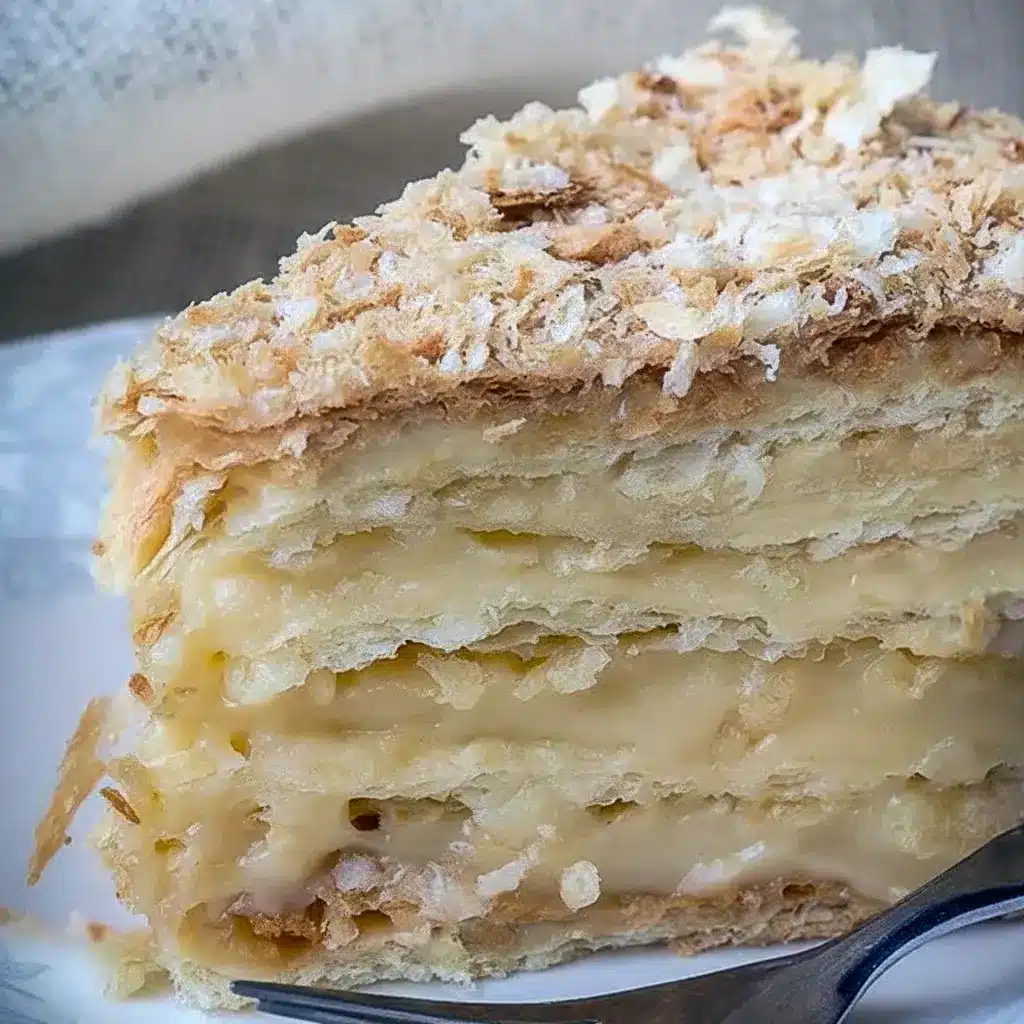
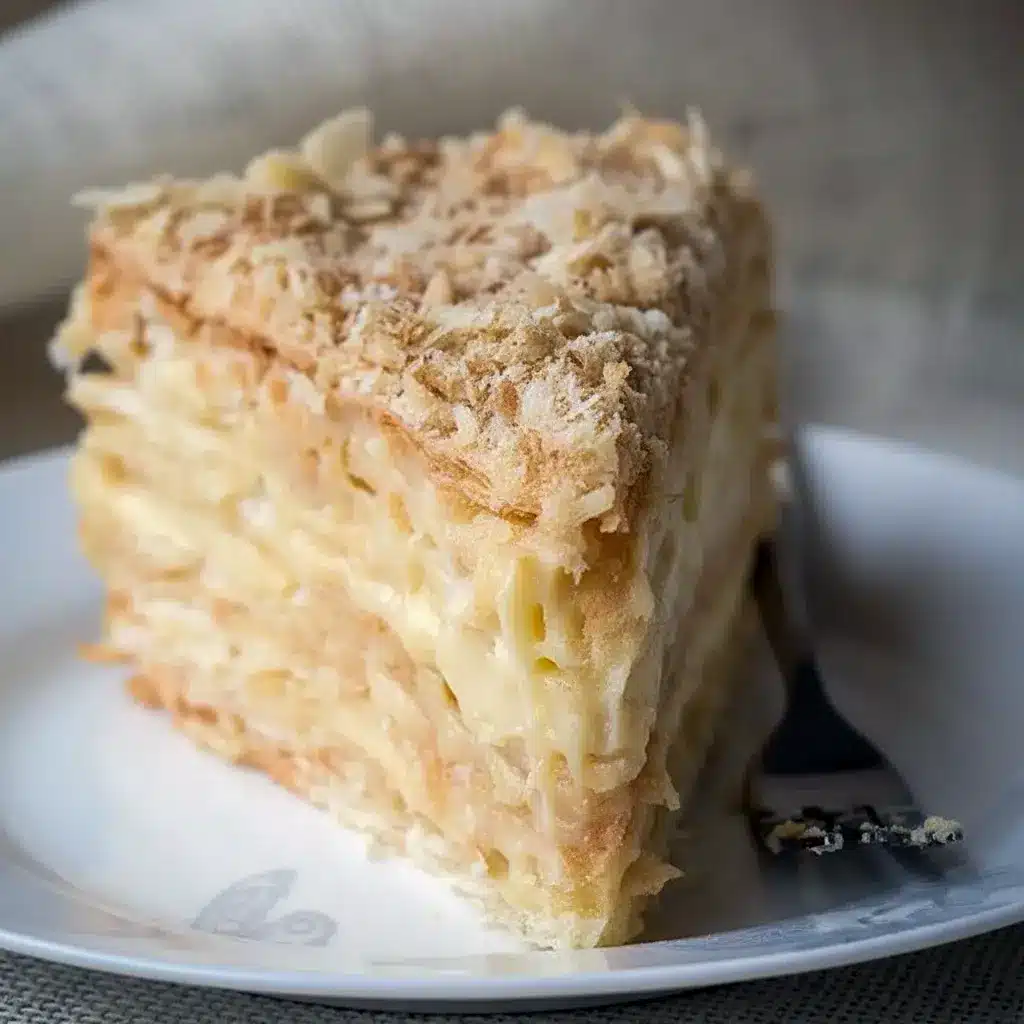
Russian Napoleon Cake, on the other hand, takes a different path. It uses many thinner pastry layers, often baked until lightly golden, then stacked with pastry cream so the layers soften over time. That produces a cake that feels more tender, more unified, and honestly, more deeply satisfying. It is a little less dainty and a lot more deliciously dramatic.
So yes, both versions belong to the same dessert family. But the Russian style leans into softness, richness, and that “let’s let these layers get acquainted” energy. That is where the dessert really comes alive.
And this recipe? It follows that Russian technique, but with one very important twist: you do not have to wait 24 to 48 hours before eating it. You can, of course. But you do not have to. That makes a big difference, especially if you are impatient, hungry, or both. FYI, I would count those as valid reasons.
Why You’ll Love This Napoleon Dessert
There are plenty of reasons to fall hard for this cake, but here are the big ones.
- First, it has texture. Real texture. Not one-note texture. Not “everything tastes the same because the filling took over.” This cake gives you a little crunch, a little cream, and a little melt-in-your-mouth softness depending on when you serve it.
- Second, it feels special without being impossible. The pastry layers take some time, yes, but the process stays manageable. You do not need professional pastry training or a culinary school diploma mounted on the wall.
- Third, it tastes even better than it looks. That is saying something, because the layered slices of Russian Cakes like this one tend to look pretty impressive already. When you cut into it, the layers reveal themselves like a small edible performance. Very satisfying. Very extra. We love that for us.
- Finally, this dessert gives you options. Want it crisp? Serve it sooner. Want it soft and tender? Let it rest longer. That flexibility makes it one of the most practical Pastries Recipes Dessert fans can keep in their back pocket.
The Key Ingredients (and Why You Need Them)
Below I break down the main ingredients, without the exact amounts — those belong in the printable recipe card. This part helps you understand what each ingredient does, so you can work with the recipe instead of blindly following it like a scared intern.
For the Quick Puff Pastry
- Butter gives the pastry its rich flavor and flakiness. Keep it cold. Very cold. Warm butter turns into a regrettable situation.
- Eggs help bind the dough and contribute to structure.
- Cold water keeps the dough from warming too fast and helps the pastry stay tender.
- All-purpose flour provides the body for the dough. It keeps the layers sturdy enough to roll, bake, and stack.
- Vodka or cognac adds moisture without developing too much gluten, which helps the pastry stay more tender. If you cannot use it, skip it. The cake will still work.
- White vinegar helps relax the dough a bit and supports tenderness.
- Salt sharpens the flavor and keeps the pastry from tasting flat.
For the Custard
- Egg yolks create the richness and body of the pastry cream.
- Sugar adds sweetness and balances the butter and milk.
- Milk gives the custard its smooth, creamy base.
- Vanilla extract brings warmth and depth.
- Sifted all-purpose flour thickens the custard.
- Butter adds silkiness and a soft, luxurious finish.
Together, these ingredients create the kind of custard that makes Napoleon Cake memorable. It should taste rich, smooth, and just sweet enough without crossing into candy territory.
How to Make It
This is where the dessert starts to come together.
Make the Quick Puff Pastry
Start by whisking the eggs and salt in a large bowl. Stir in the cold water, vinegar, and vodka if you are using it.
Add the flour to the food processor, then cut in the cold butter and pulse until the mixture looks like pea-sized crumbs. You want visible butter pieces because those are what create the flaky layers later. Do not overwork it.
Add the egg mixture and process just until the dough starts clumping together. It should not become a smooth ball in the machine. That is not the goal.
Turn the dough out onto a work surface and bring it together by hand. Handle it gently. The warmth of your hands can soften the butter too much, and that can make the pastry less flaky.
Shape the dough into a log, cut it into four equal pieces, then roll each into a ball. Wrap them and chill for 1 to 2 hours.
Make the Custard
Whisk the egg yolks and sugar together in a bowl. Add a little milk to loosen the mixture.
Whisk in the flour until the mixture turns smooth and lump-free. Add a bit more milk if needed.
Heat the rest of the milk until it reaches a boil, stirring so the bottom does not scorch.
Now temper the egg mixture by slowly pouring in the hot milk while whisking constantly. This step matters. Pour too fast, and you get scrambled eggs. Nobody wants dessert that doubles as breakfast sabotage.
Pour everything back into the pot and cook over medium heat, stirring constantly, until the custard boils. Keep stirring for 2 to 3 minutes so it thickens properly.
Remove from the heat, stir in the vanilla, then add the butter and let it melt into the custard.
If the custard looks lumpy, run it through a fine sieve or use an immersion blender. You want it smooth and glossy.
Let the custard cool at room temperature. Cover it with plastic wrap so it touches the surface and prevents a skin from forming. Do not refrigerate it right away. Room-temperature cooling works better here.
Bake the Layers
Preheat your oven to 400°F and position the rack in the center.
Roll out one dough ball on the back of a jelly roll pan or large baking sheet until it reaches about 12.5 inches. Dust with flour as needed.
Prick the dough all over with a fork so it bakes evenly. This prevents weird puffing in random spots. Bake for 5 to 7 minutes, until lightly golden.
Repeat with the remaining dough to make all 8 layers.
As each layer comes out of the oven, place an 11-inch plate or lid on top and trim around it. Save the scraps in a separate bowl. Those scraps matter later.
Crumble the scraps and set them aside.
Assemble the Cake
Place a small dab of frosting on your serving platter to anchor the first layer.
Set the first pastry round on top and press it lightly to stick.
Place a cake ring around the layer and secure it with a ribbon or cake strip if needed. That helps keep everything neat while you build.
Spread a generous portion of custard over the first layer. Keep going layer by layer until you use everything up.
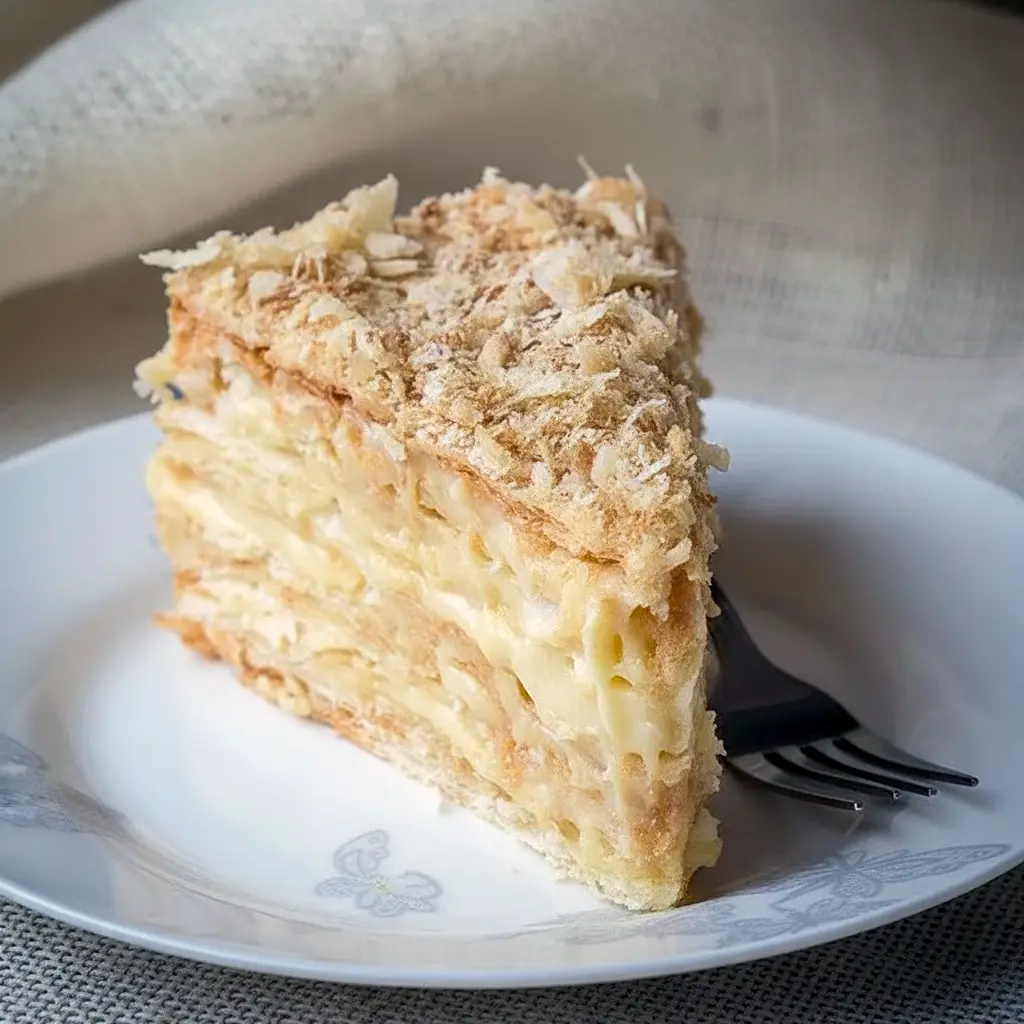
Sprinkle a little bit of the cake crumbs on top, then remove the ring after running a knife around the edge.
Press the remaining crumbs onto the sides of the cake. Finish with more crumbs on top.
That crumb coating is not just decoration. It also helps protect the custard and keeps the surface from drying out.
Chill the cake before serving, or cut into it sooner if you want the crisp version.
Russian Napoleon Cake Tips for Perfect Results
This cake is not difficult, but it does reward attention. A lot. Here is how to get the best outcome.
- Keep the butter cold at all times when making the pastry. That is the easiest way to preserve the flaky texture.
- Do not overmix the dough. Overworking it develops gluten and makes the pastry tougher.
- Roll the layers evenly. Thin, even layers bake better and stack more neatly.
- Stir the custard constantly. This is not the moment to check your phone. One distracted minute can create lumps or scorching.
- Cool the custard properly. A warm, loose custard can slide around and make the cake unstable.
- Assemble with intention. If you want the crispier version, assemble and serve sooner. If you want the softer version, let the cake rest longer.
- Use the scraps. They add flavor, texture, and visual charm. Also, wasting buttery pastry crumbs feels a little rude.
Variations to Try
One of the best things about Russian Napoleon Cake is how adaptable it can be.
You can add a light splash of rum or brandy to the custard for a warmer flavor. You can also finish the top with a dusting of powdered sugar if you want a more classic French-style look.
Some bakers like to add a little lemon zest for brightness. That gives the cream a slight lift without turning the cake into a citrus dessert.
You could also play with the pastry crumbs on top. Some people keep them rustic and craggy; others press them on for a more polished finish. Either way works.
And if you love heritage-style bakes, this dessert belongs right alongside other old-fashioned Russian Cakes and celebratory Russian Desserts that bring people to the table fast.
Best Ways to Serve Napoleon Cake
Serve this cake chilled, but not ice-cold. A short rest outside the fridge before slicing can help the custard soften slightly and make the layers easier to cut.
This dessert shines on its own, but it also pairs beautifully with strong coffee or tea. The richness of the custard and the crisp pastry balance nicely with a hot drink.
If you are serving it for guests, slice it with a sharp knife and wipe the blade between cuts for cleaner layers. That way, every slice looks intentional instead of like it survived a small pastry disaster.
This cake also makes a stunning centerpiece for holidays, birthdays, and family gatherings. It has that old-school “special occasion” energy people love.
Storage and Leftovers
Store the fully assembled cake covered in the refrigerator. That keeps it from drying out and helps prevent fridge odors from sneaking in. Nobody wants custard that tastes like onions. Hard pass.
If you prefer the softer texture, the cake can rest for up to 48 hours after assembly. That gives the pastry time to absorb moisture from the cream.
If you prefer the crisp version, try to eat it within a few hours of assembly. That is when the contrast between pastry and cream feels strongest.
Leftovers keep well for a couple of days in the fridge, though the pastry will continue to soften. That is normal. It still tastes fantastic.
FAQs About Russian Napoleon Cake
What makes Russian Napoleon Cake different from French Napoleon cake?
The Russian version uses many thinner pastry layers and more rest time, which softens the layers and gives the cake a tender, creamy texture. The French version usually stays crisper and more structured.
Can I make this cake ahead of time?
Yes. For a crispier finish, bake the layers and make the custard the night before, then assemble within a few hours of serving. For a softer cake, assemble it up to 48 hours ahead.
Do I have to use vodka or cognac?
No. It helps with texture, but you can leave it out if needed.
Is this the same as a Napoleon Dessert?
Yes, in the broad sense. This recipe is a Russian-style version of the classic Napoleon Dessert, with a more tender, softened texture and many thin layers.
Can I make this into a Simple Cake Recipe In Russian style?
Absolutely. If you want a simpler approach, focus on the basic structure: thin pastry layers, pastry cream, and chill time. That still gives you the essence of the dessert without extra flourishes.
Is this similar to a Sweet Cake Recipe In Russian for holidays?
Very much so. This cake fits right into the category of rich, celebratory, homemade desserts that people associate with special occasions and family tables.
Where does this fit among Puff Pastry Recipes Dessert ideas?
Right near the top. If you love layered pastry, custard-filled bakes, and desserts that look more complicated than they are, this one belongs in your favorites folder immediately.
Can I make it less sweet?
Yes. Reduce the sugar slightly in the custard if you prefer a subtler finish. Just do not slash it too aggressively, or the filling may taste flat.
Final Thoughts
Russian Napoleon Cake is one of those desserts that rewards both patience and curiosity. It looks elegant, tastes rich, and gives you control over the final texture depending on when you serve it. That makes it a little unusual, a little old-world, and very, very lovable.
Whether you serve it while the pastry still has a crisp edge or after the layers have softened into a tender, cream-soaked slice, it delivers the kind of satisfaction that keeps people coming back for “just one more piece.” Sure, okay. That “one more piece” usually turns into two. We have all been there.
If you love classic layered desserts, this recipe deserves a spot at the top of your baking list. It brings together everything people adore about Napoleon Cake: flaky layers, custard richness, and that irresistible homemade charm that makes a dessert feel truly special.
And if someone tells you they are “just going to have a small slice,” smile politely. We both know how that ends.
Follow me on Pinterest for daily new recipes.

Russian Napoleon Cake — Elegant Layered Pastry Dessert
- Prep Time: 1 hour 30 minutes
- Cook Time: 1 hour
- Total Time: 2 hours 30 minutes
- Yield: 24 servings 1x
- Category: Dessert
- Cuisine: Russian
Description
A showstopping Russian Napoleon cake made with ultra-thin homemade puff pastry layers and a rich egg yolk custard. It bakes up crisp, then softens beautifully depending on how long you let it rest.
Ingredients
Quick Puff Pastry
- 1 3/4 cups unsalted butter, cold or frozen and cubed
- 2 eggs
- 2/3 cup cold water
- 6 cups sifted all-purpose flour (about 650 g)
- 3 tbsp vodka or cognac, or replace with water if needed
- 2 tbsp white vinegar
- 1/8 tsp kosher salt
Egg Yolk Custard
- 7 egg yolks
- 6 cups whole milk
- 2 cups granulated sugar
- 1 tbsp vanilla extract
- 2/3 cup sifted all-purpose flour
- 1 3/4 sticks unsalted butter
Instructions
Make the quick puff pastry
- In a large bowl, whisk the eggs with the salt. Stir in the cold water, then add the vinegar and vodka or cognac. Set the mixture aside.
- Add the flour and cold butter to a food processor. Pulse until the butter breaks down into pea-sized pieces.
- Pour in the egg mixture and pulse again just until the dough begins to clump together. It should look rough, not smooth.
- Turn the dough out onto a work surface and gently bring it together with your hands. Work it as little as possible so the butter stays in small pieces. That is what creates the flaky layers later.
- Divide the dough into 4 equal portions. Shape each piece into a ball, flatten slightly into a disk, wrap well, and chill for 1 to 2 hours. You can also refrigerate it for several days if making ahead.
Make the egg yolk custard
- In a large 6-quart pot, whisk the egg yolks and sugar together. Add a little milk if needed to loosen the mixture. Whisk in the flour until smooth and lump-free, adding a splash more milk if necessary.
- Heat the remaining milk in a saucepan over medium heat until hot and steaming, or boil it gently in the microwave if you prefer.
- Slowly stream the hot milk into the egg mixture while whisking constantly to temper it.
- Return the mixture to the pot and cook over medium heat, whisking nonstop, until it comes to a boil and thickens. Continue cooking for 2 to 3 minutes, or until the custard no longer tastes floury.
- Stir in the vanilla and butter until fully melted and smooth.
- If needed, strain the custard through a fine sieve to remove any lumps.
- Transfer the custard to a rimmed baking sheet and cover it with plastic wrap pressed directly onto the surface to prevent a skin from forming. Let it cool. If making ahead, refrigerate it covered for up to 3 days.
Bake the pastry layers
- Preheat the oven to 400°F and position a rack in the center.
- Flip a 12 x 16-inch baking sheet upside down and place it on a damp kitchen towel so it does not slide while you roll the dough.
- Take one chilled dough ball and cut it in half. Roll each half into a very thin 12 1/2-inch circle on the back of the baking sheet, dusting lightly with flour as needed.
- Prick the dough all over with a fork every 1 to 2 inches so it bakes evenly.
- Bake for 5 to 7 minutes, or until lightly golden. These layers bake fast, so keep an eye on them.
- The moment each layer comes out of the oven, place an 11-inch plate, lid, or stencil on top and trim it into a neat round with a sharp knife or pizza cutter. Save the scraps in a separate bowl.
- Repeat until you have 8 baked layers total.
- Crumble the scraps into fine crumbs and set them aside for the outside of the cake.
Assemble the cake
- Divide the custard into 8 roughly equal portions. As it cools, it will thicken, which makes it easier to portion.
- Place a small dab of custard on the serving plate, then add the first pastry layer and press gently to secure it.
- Set a cake ring around the first layer and fasten it with a ribbon or cake strip if you have one. This is optional, but it helps keep the edges tidy.
- Spread one portion of custard evenly over the layer. Repeat with the remaining layers and custard, ending with some custard on top.
- Scatter a layer of cake crumbs over the top so the custard does not dry out.
- Carefully run a thin knife between the cake and the ring, then remove the ring.
- Spread the remaining custard around the sides in an even layer, then press the remaining crumbs onto the sides until fully coated. Add any leftover crumbs to the top.
- Gently tap the plate to shake loose extra crumbs, clean the edges, and chill the cake until ready to serve.
Notes
- Serving Options
- For a crisp version: Serve the cake soon after assembly. The pastry stays crisp for about 1 to 2 hours, giving you that delicate crunch against the cream.
- For a soft version: Refrigerate the assembled cake for 24 to 48 hours. The pastry will soften and become tender, and the cake will slice much more easily. Bring it to room temperature before serving for the best texture.
- Important: If you cut into the cake somewhere between those two stages, the layers can feel a little gummy and harder to slice. So either serve it fresh or give it enough time to fully soften.