These delicious No-Bake Mango Cheesecake Cups are like a blend of mango ice cream and cheesecake! They’re creamy, light, and let the mango flavor shine through. Plus, they look fantastic with minimal effort, making them perfect for hosting and large gatherings.
COMPONENTS OF NO-BAKE MANGO CHEESECAKE
These No-Bake Mango Cheesecake Cups have four main components:
- The Crust: Made with Nilla wafers and melted butter. You can also use graham crackers and skip the butter for a crumbly texture instead of a firm crust.
- The Mango Cheesecake Filling: This is a soft-set filling made with cream cheese, a small amount of sugar, vanilla, mango pulp, whipped cream, and gelatin. You can make your own mango pulp if you have good fresh mangoes by blending and straining them. Otherwise, canned Kesar mango pulp is a great alternative.
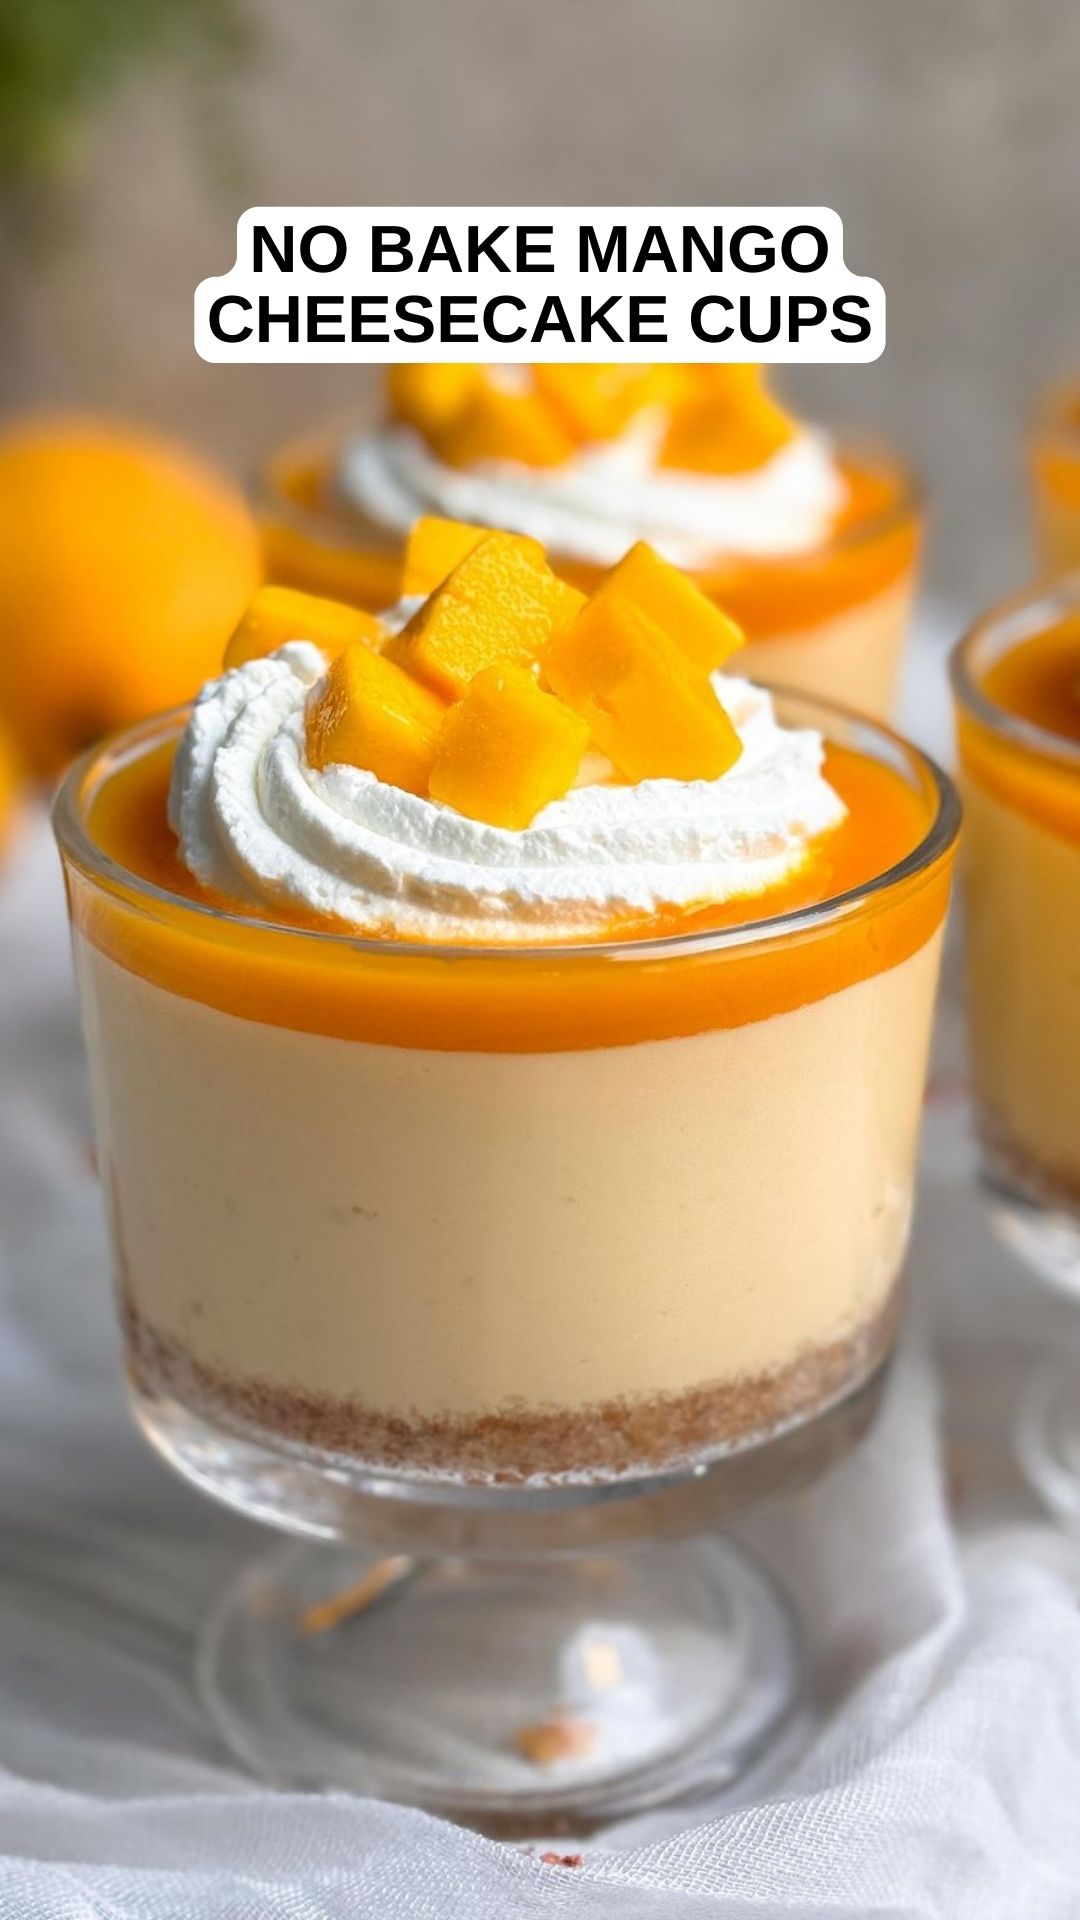
- Mango Pulp: More mango pulp is layered on top of the cheesecake cups after they have set, adding a stronger mango flavor and a decorative touch.
- Decoration: I like to decorate with whipped cream and fresh chopped mangoes, but feel free to get creative!

No Bake Mango Cheesecake Cups
- Yield: 8 1x
- Category: Dessert
Ingredients
Scale
#### Crust:
- 1 1/2 cups Nilla wafers (about 40 wafers)
- 3 tbsp unsalted butter (melted)
#### Mango Cheesecake Filling:
- 2 tbsp cold water + 2 tsp gelatin powder
- 16 oz cream cheese (2 blocks, room temperature)
- 1/2 tsp vanilla
- 2–4 tbsp sugar (to taste, depending on the sweetness of mangoes)
- 3/4 cup mango pulp (strained)
- 1/2 cup heavy cream (chilled)
#### Decoration:
- 3/4 cup mango pulp
- 1/2 cup heavy cream (whipped)
- 1–2 mangoes (chopped into small cubes)
Instructions
#### Crust:
- Blitz the Nilla wafers in a food processor until they form fine crumbs. Add the melted butter and gently mix.
- Divide the crumbs evenly between the dessert cups. Lightly press them down using the bottom of a glass. The crust should not be packed too tightly, so it’s easy to break with a spoon.
- Place the cups in the fridge while you work on the filling.
#### Mango Cheesecake Filling:
- Add 2 tbsp cold water to a small bowl, sprinkle over 2 tsp gelatin powder, and place in the fridge for 5-10 minutes.
- In a large bowl, whisk the cream cheese, sugar, and vanilla on medium speed for 2-3 minutes until creamy. Scrape the edges and bottom of the bowl with a rubber spatula halfway through.
- Strain in the mango pulp and whisk until just combined. Do not overmix.
- Remove the gelatin from the fridge and stir. Microwave for 10-15 seconds until the gelatin dissolves in the water.
- Add the dissolved gelatin to the cheesecake filling and whisk on low speed until just combined.
- In a separate bowl, whisk the chilled heavy cream on high speed until stiff peaks form.
- Gently fold the whipped cream into the cheesecake filling until just combined. The batter should be light and fluffy.
- Divide the batter evenly between the cups with the crust inside, and tap them so the filling spreads out evenly.
- Place in the fridge overnight to set (at least 6 hours recommended).
#### Decoration:
- When ready to serve, add 1-2 tbsp of mango pulp on top of each cheesecake cup, and tilt the cups to spread it out.
- Whip cold heavy cream until it forms stiff peaks. Transfer to a piping bag with any tip you like, and pipe onto the cheesecake cups.
- Cut a mango into small cubes and place them on top of the cups.
- Serve and enjoy!
Notes
- **Butter:** You can omit the butter in the crust for a crumbly texture instead. If doing this, double the amount of Nilla wafers and layer the crumbs and cheesecake filling in each cup to create a mango cheesecake parfait.
- **Gelatin:** Using 2 tsp of gelatin bloomed in 2 tbsp water results in a soft-set texture. For a firmer set, double the amount of gelatin and water, but this is not typically recommended.
- **Mango Pulp:** Fresh mangoes can be used to make your own mango pulp by blending and straining the flesh. Canned Kesar mango pulp also works great.


