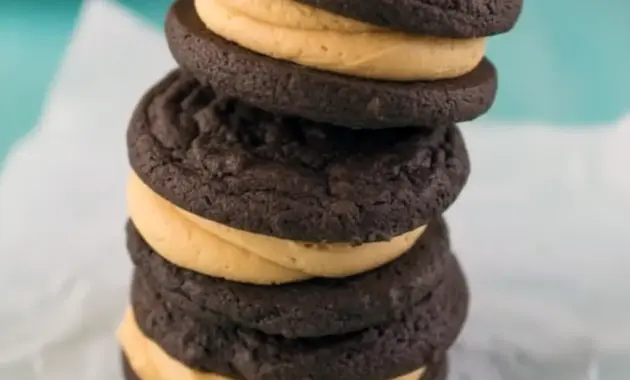
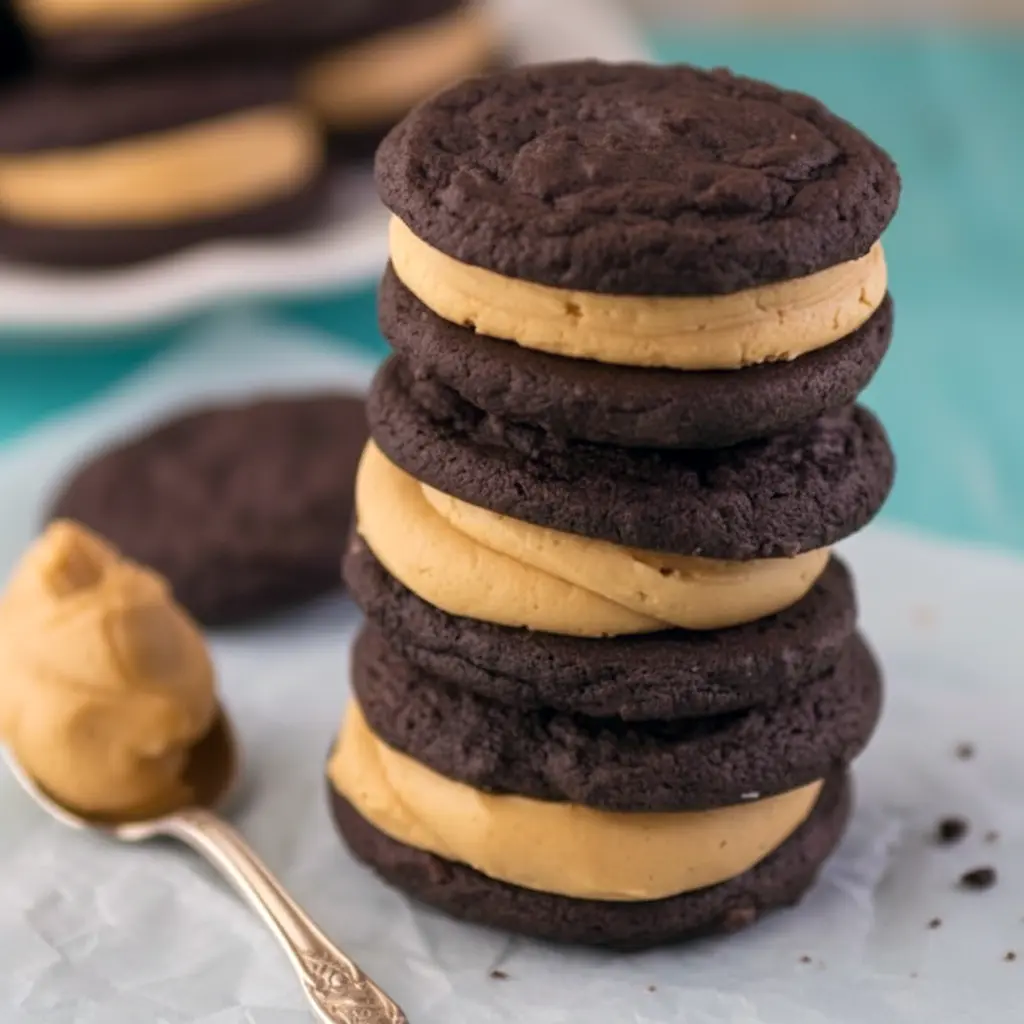
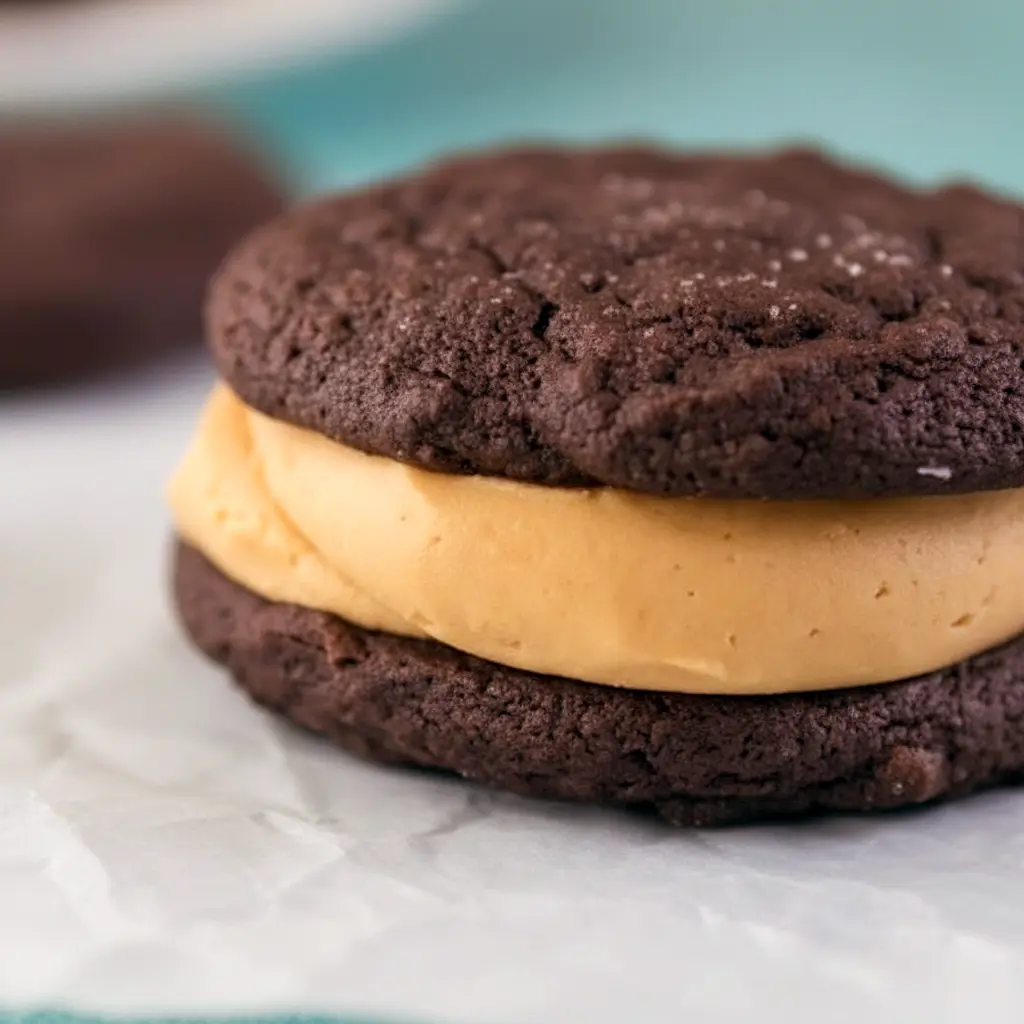
Homemade Peanut Butter Oreos are what happens when a classic sandwich cookie gets a serious glow-up and stops pretending plain chocolate is enough. Two soft, dark chocolate cookies plus a rich peanut butter filling? That is not a cookie anymore. That is a full-on dessert event.
If you have ever bitten into a store-bought Oreo and thought, “Okay, but what if this were softer, thicker, and loaded with peanut butter?” then congratulations, this recipe understands you. These cookies bring that nostalgic sandwich-cookie feeling, but with a richer texture and a filling that tastes like the best part of the cookie aisle decided to get serious.
And the best part? You do not need bakery-level skills to pull them off. These Homemade Peanut Butter Oreos are simple, fun, and wildly satisfying to make. They also happen to be the kind of treat people mysteriously “just taste one of” and then circle back for three more. Very suspicious behavior. Very normal for this recipe.
Why You’ll Love These Homemade Peanut Butter Oreos
There is a lot to love here, but let us start with the obvious: these cookies are soft. Not crisp, not dry, not crumbly in a way that ends up on your shirt and your lap and somehow also the floor. Soft. Pillowy. Rich.
That texture alone makes these Homemade Peanut Butter Oreos feel special. They are softer than the packaged version, and the peanut butter filling gives them a creamy, salty-sweet center that keeps every bite interesting. The cocoa cookie brings the deep chocolate flavor, while the filling adds that classic peanut butter magic people never seem to get tired of. Fair enough.
This is also one of those desserts that looks impressive without requiring a dramatic amount of work. You bake, you whip, you sandwich, and suddenly you have a tray of Peanut Butter Oreo Cookies that look like you spent your afternoon in a fancy pastry kitchen instead of your own kitchen. Love that for us.
If you enjoy an Oreo Cookie Butter Recipe Easy enough to actually make on a weeknight, this one fits the vibe. It is approachable, reliable, and deeply snackable. And yes, it absolutely counts as a valid excuse to make coffee or milk.
The Key Ingredients (and Why You Need Them)
Below I list the main ingredients without measurements so you can see what each one does in the recipe. The printable card has the exact amounts, but this section helps explain why each ingredient matters and how it shapes the final cookie.
- Dark cocoa powder gives these cookies their classic Oreo-style color and flavor. Hershey’s Special Dark works especially well because it creates that deep chocolate taste without making the cookie bitter. If you need to swap, Dutch-process cocoa or even black cocoa can work too, depending on how bold you want the chocolate flavor.
- Butter adds richness and gives the dough its soft, tender structure. It also helps the cookies spread just enough without turning into thin little pancakes of despair.
- Brown sugar plays a big role in the texture. It adds moisture, keeps the cookies soft, and brings a subtle caramel note that balances the cocoa beautifully. The higher ratio of brown sugar here is a smart move.
- Granulated sugar adds sweetness and helps with structure. Together with brown sugar, it creates a cookie that stays soft but still holds its shape enough for sandwiching.
- Egg binds everything together and helps the cookies bake up with a tender center. It gives the dough stability without making it dense.
- Flour builds the cookie body. It keeps the dough manageable and lets the cookies bake into soft, sturdy rounds that can hold the filling without collapsing like a badly stacked spreadsheet.
- Baking soda helps the cookies rise just enough and supports that soft texture. You do not want too much lift here. These are sandwich cookies, not little chocolate pillows trying to escape the tray.
- Salt sharpens the flavor and keeps the sweetness in check. A little salt makes the cocoa taste deeper and the peanut butter filling taste even better.
- Peanut butter is the star of the filling. Use a no-stir peanut butter, not the natural kind, for the best texture. This helps the filling stay smooth, stable, and easy to pipe.
- Powdered sugar sweetens and thickens the filling. It gives the peanut butter center that fluffy frosting-like consistency people expect in Oreo Cookies With Peanut Butter Filling.
- Heavy whipping cream is the secret to the texture. Just a little creates a whipped, creamy filling that spreads beautifully and tastes rich without becoming greasy.
- Vanilla extract rounds out the filling and adds warmth. It may not seem flashy, but it does important work behind the scenes.
How to Make It
If you are wondering How To Make Peanut Butter Oreos, the answer is: with a simple cookie dough, a whipped peanut butter filling, and a little patience while everything cools. Nothing wild. Nothing fussy. Just good dessert logic.
- Start by creaming the softened butter with the sugars until the mixture looks light and fluffy. This step matters because it helps create that soft cookie texture later. Do not rush it. Let the mixer do the job.
- Add the egg, cocoa powder, baking soda, and salt, and mix until you have a sticky chocolate dough. At this stage, the dough will look dark, rich, and slightly intense. That is exactly what you want.
- Mix in the flour until the dough comes together smoothly. It should be thick enough to scoop but not dry or crumbly. If it looks suspiciously loose, give it a moment before adding anything extra. Cookie dough has opinions.
- Scoop the dough onto lined baking sheets. You can make smaller cookies or go bigger depending on how dramatic you want the final sandwich to be. Just remember that these cookies spread, so leave space between each one. They are not fans of personal boundaries.
- Bake them until they just lose their glossy sheen. That is the sweet spot. Not overly dry, not underbaked into puddles. When you remove them from the oven, tap the baking sheet gently on the stove or counter to flatten them slightly. A tiny baking ritual with surprisingly good results.
- Let the cookies cool completely before adding the filling. This part matters. Warm cookies and frosting are a mess waiting to happen, and not the cute kind.
- While the cookies cool, beat the peanut butter and butter together until smooth. Slowly mix in the powdered sugar and salt, then add the vanilla and heavy whipping cream. Beat until the filling turns light and fluffy. If it feels too thick, add a little more cream. If it feels too soft, give it a minute to settle. The texture should be spreadable but firm enough to hold its shape.
- To assemble, use a piping bag or spoon to place a generous dollop of filling onto the flat side of one cookie. Set another cookie on top, top-side facing out, and press gently so the filling spreads to the edges. That is how you get the classic sandwich-cookie look without having to overthink it.
And there you have it: Homemade Peanut Butter Oreos with soft chocolate cookies and a creamy, dreamy filling that tastes like dessert and childhood memory had a very successful reunion.
Pro Tips for the Best Homemade Peanut Butter Oreos
- Do not overbake the cookies. This is probably the biggest tip in the whole recipe. Pull them from the oven when they just lose their glossy finish. If you wait until they look deeply set and dark around the edges, they may end up firmer than you want.
- Leave enough room on the baking sheet. These cookies spread, and they spread with confidence. Give them space or they will merge into one giant chocolate situation.
- Tap the pan after baking. It sounds a little odd, but it helps flatten the cookies slightly and gives them that classic sandwich-cookie shape.
- Use no-stir peanut butter. Natural peanut butter tends to separate and can make the filling oily or loose. This filling works best when the peanut butter stays smooth and consistent.
- Pipe the filling if you can. A piping bag gives you better control and helps the filling look neat and bakery-style. Not mandatory, but very satisfying.
- Chill the filling briefly if needed. If your kitchen feels warm or the filling seems too soft, a short chill can help it firm up before assembly.
- Taste the filling before sandwiching. This is the fun part. Adjust the sweetness, salt, or vanilla if needed. Dessert deserves a little quality control, right?
Variations to Try
This recipe gives you a strong base, but it also leaves room to play around a little.
- For a Peanut Butter Oreos twist with extra richness, add a small amount of melted chocolate drizzle over the tops. It looks polished and tastes great.
- For a Peanut Butter Oreo Parent Trap Cookies style spin, make the cookies slightly bigger and give them a thicker filling layer. That nostalgic, over-the-top sandwich-cookie look? Very on brand.
- For a Nutella version, swap the peanut butter filling for chocolate-hazelnut spread mixed with a little butter and powdered sugar. Suddenly you have a whole new cookie sandwich with very little extra effort.
- For a cream cheese version, blend softened cream cheese with powdered sugar and vanilla for a tangy filling that pairs beautifully with the dark cocoa cookies.
- For a chocolate buttercream variation, use a classic cocoa frosting in the center. That makes the sandwich even richer and more decadent.
- For mint lovers, add a tiny splash of peppermint extract to the filling. Just go easy. Mint can take over fast and start acting like the main character.
These Peanut Butter Oreo Cookies are flexible enough to carry different flavors, which makes them even more fun to make again and again.
Best Ways to Serve Them
These cookies shine all on their own, but a few simple serving ideas make them feel even more special.
- Serve them with a cold glass of milk for the classic route. That pairing never fails, and honestly, it never needs improvement.
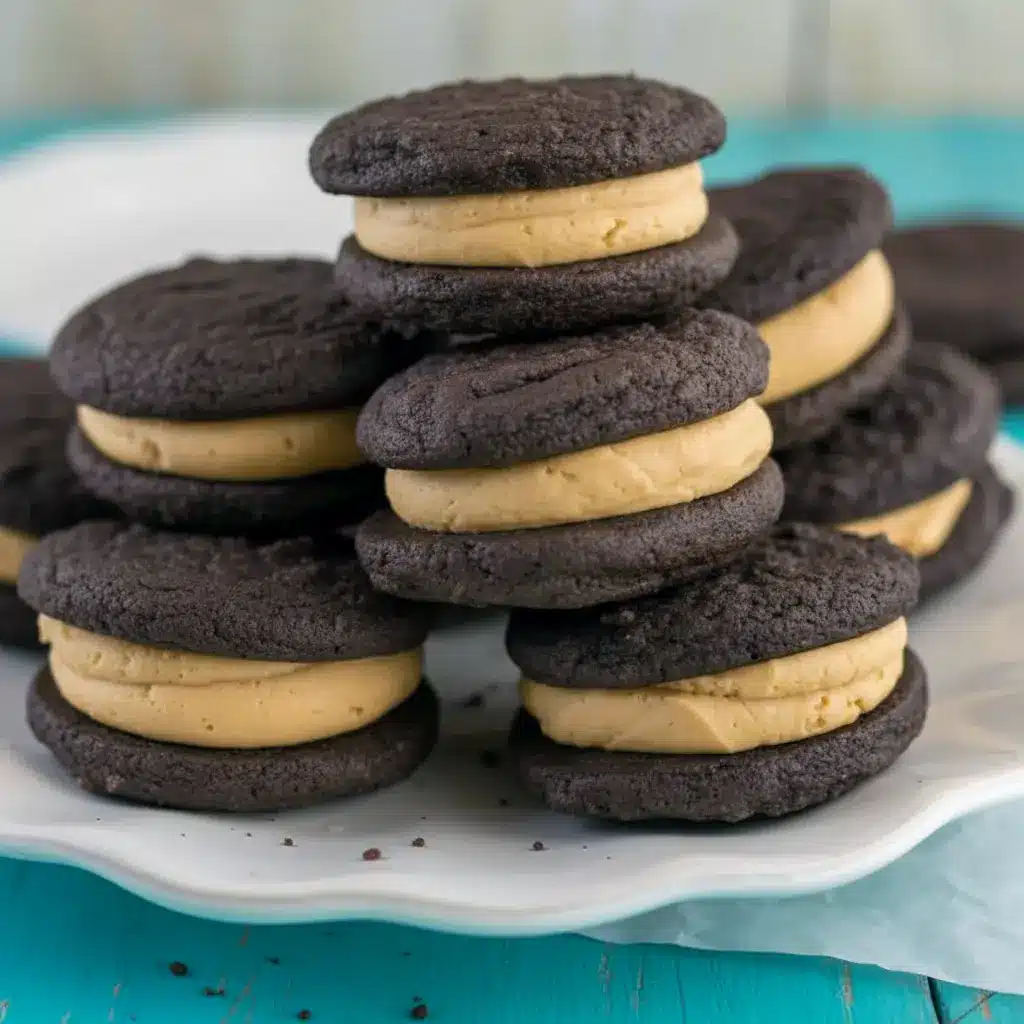
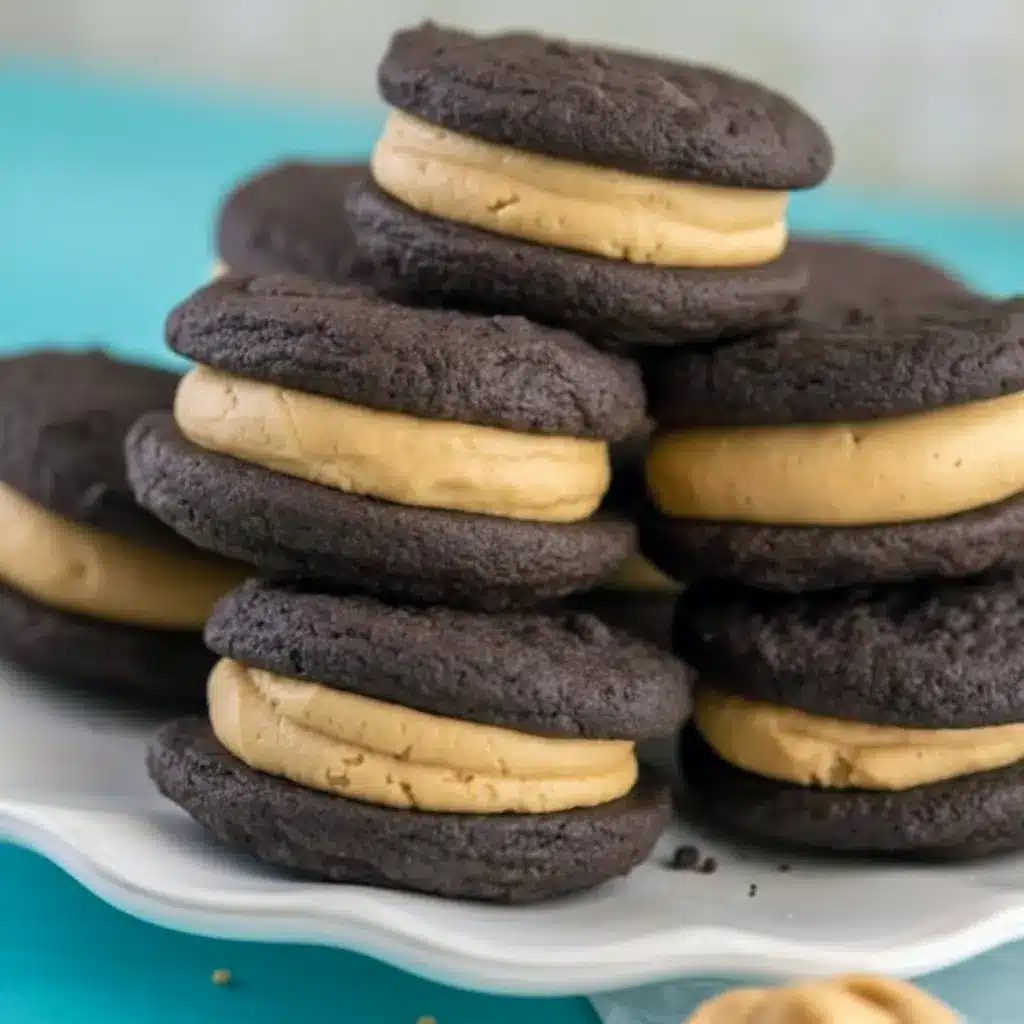
- Add them to a dessert platter with brownies, bars, and other soft cookies for parties or holiday trays. They fit right in and disappear quickly.
- Pack them into lunchboxes or picnic containers for a sweet treat that travels well. They hold together nicely once assembled, so they are practical as well as delicious.
- You can also serve them after dinner with coffee or hot chocolate. That makes the whole dessert feel a little more elevated, especially if you are feeding adults who claim they are “just having one.” Sure.
These Homemade Peanut Butter Oreos also work beautifully for bake sales, potlucks, or anytime you want a dessert that looks homemade in the best possible way.
Storage and Leftovers
Store the assembled cookies in an airtight container in the refrigerator. They will keep well for up to four days. Chilling helps the filling stay firm and keeps the cookies fresh.
If you want to freeze them, separate the sandwiches with parchment paper and store them in a freezer-safe bag or container. They can keep for up to two months. That makes them a strong make-ahead option.
When you are ready to eat frozen cookies, let them thaw in the refrigerator or at room temperature for a bit before serving. That way the filling softens back up and the cookies taste their best.
If you store the cookies at room temperature for too long, the filling may soften too much. So yes, refrigeration is the smarter move here. Cookies can be dramatic, but they do better with structure.
FAQs
Are these cookies soft or crunchy?
These Homemade Peanut Butter Oreos are soft cookie sandwiches. If you want a crisp cookie, this is not that recipe.
Can I freeze peanut butter Oreos?
Yes. Freeze them for up to two months with parchment between layers to prevent sticking.
Do I need to refrigerate them?
Yes. Store them in an airtight container in the fridge for up to four days.
Can I use natural peanut butter?
It is not the best choice. A no-stir peanut butter gives you a smoother, more stable filling.
Can I make the cookies smaller or larger?
Absolutely. You can use 1-tablespoon or 2-tablespoon scoops depending on how big you want your sandwiches. Just keep in mind that larger cookies need more room to spread.
Can I use a different filling?
Yes. This cookie base works well with many fillings, including chocolate buttercream, cream cheese frosting, or even mint-flavored filling.
Do these taste like store-bought Oreos?
They are inspired by that classic flavor, but they taste richer, softer, and more homemade in the best way. Basically, they win.
Final Thoughts
These Homemade Peanut Butter Oreos take everything people love about sandwich cookies and make it softer, richer, and more satisfying. The chocolate cookie base brings that familiar cocoa flavor, while the peanut butter filling adds the creamy center that makes every bite feel complete.
They are simple enough for a casual baking day but impressive enough to serve to guests. That balance is exactly why people keep coming back to recipes like this. You get the comfort of a familiar cookie and the upgrade of a homemade version that tastes fresher and more indulgent.
So yes, make the cookies. Make extra filling. Maybe even pretend you are sharing. These Peanut Butter Oreo Cookies are the kind of treat that turns a normal afternoon into a very good one.
And honestly, that is what dessert should do.
Follow me on Pinterest for daily new recipes.

Homemade Peanut Butter Oreos — Rich, Creamy & Irresistible
- Prep Time: 30 minutes
- Cook Time: 15 minutes
- Total Time: 45 minutes
- Yield: 16 sandwiches 1x
- Category: Dessert
- Cuisine: American
Description
These Soft Homemade Peanut Butter Oreos are rich, chocolatey sandwich cookies filled with a smooth peanut butter cream. They bake up tender, taste far better than store-bought, and make an easy treat for cookie lovers who want a soft, creamy bite.
Ingredients
Cookies
- 1 ¼ cups all-purpose flour
- ¼ teaspoon salt
- ½ teaspoon baking soda
- ⅓ cup unsweetened dark cocoa powder
- ½ cup unsalted butter, softened
- ⅔ cup packed brown sugar
- ¼ cup granulated sugar
- 1 large egg
- 1 teaspoon vanilla extract
Peanut Butter Filling
- ¼ cup unsalted butter, softened
- ½ cup peanut butter
- ¼ teaspoon salt
- 1 ½ cups powdered sugar
- ½ teaspoon vanilla extract
- 1 to 3 tablespoons heavy whipping cream
Instructions
- Heat the oven to 350°F and prepare baking sheets with parchment paper or silicone mats.
- In a medium bowl, combine the flour, salt, baking soda, and cocoa powder. Whisk well and set aside.
- In a separate bowl, beat the butter with both sugars until the mixture looks smooth and fluffy. Scrape down the bowl as needed.
- Mix in the egg and vanilla. Then add the dry ingredients gradually, mixing just until a soft dough forms. The dough will be sticky.
- Scoop the dough into 1- or 2-tablespoon portions and place them on the prepared baking sheets, leaving room between each one.
- Bake the smaller cookies for about 8 to 11 minutes, or the larger ones for about 12 to 15 minutes, until the tops lose their shine. Let them cool on the pan before moving them.
- To make the filling, beat the butter, peanut butter, and salt together until smooth. Add the powdered sugar slowly, then mix in the vanilla and 1 tablespoon of cream.
- Beat until the filling becomes thick, creamy, and easy to spread. Add up to 1 more tablespoon of cream if needed.
- Pipe or spread the filling onto the flat side of half the cookies, then top with the remaining cookies to make sandwiches.
- Store in an airtight container for up to 3 days, or freeze for up to 1 month.
Notes
- Use a small or larger scoop depending on your preference. Just remember that these cookies spread, so give them plenty of space on the tray.
- Do not overbake them. Pull them out when the tops are no longer shiny for the softest texture.
- Tap the baking sheet lightly after baking. This helps the cookies settle and flatten slightly.
- Try different fillings. Nutella, mint frosting, cream cheese frosting, or chocolate buttercream would all work beautifully.
Nutrition
- Serving Size: 1 cookie
- Calories: 263kcal
- Sugar: 24g
- Sodium: 150mg
- Fat: 14g
- Carbohydrates: 34g
- Fiber: 1g
- Protein: 4g
- Cholesterol: 34mg