Indulge in some Heart-Shaped Cheese Danish this Valentine’s Day! These delightful pastries are a breeze to whip up and will surely impress your loved one.
Last year, I discovered the joy of making cheese danishes from scratch, and I’ve been hooked ever since. They’re surprisingly easy to make but taste like something straight out of a fancy bakery. Treat your sweetheart to these adorable heart-shaped cheese danishes this Valentine’s Day—they’ll be smitten!
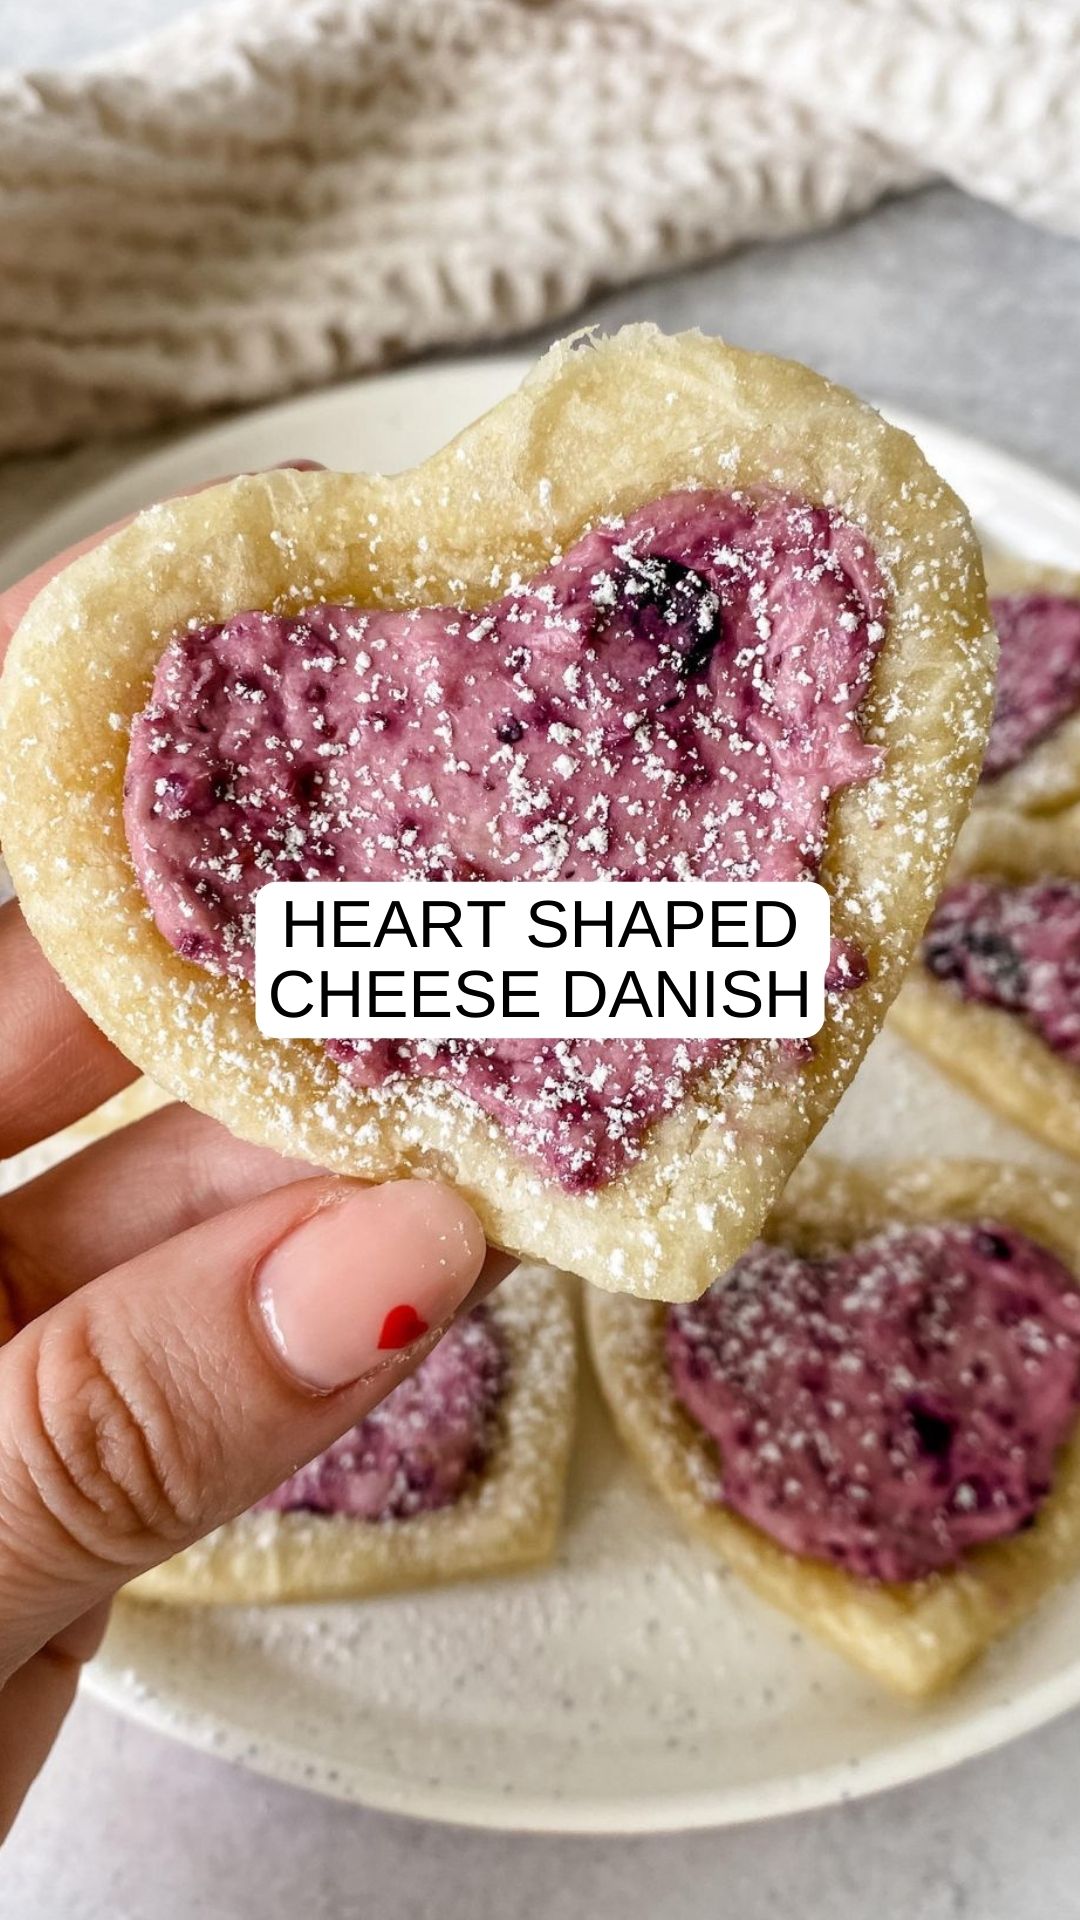
These heart-shaped cheese danishes are light, fluffy, and bursting with a delightful mix of tangy and sweet cheese filling. I’ve added a dollop of homemade chia seed jam and a sprinkle of cane and powdered sugar on top for the perfect touch of sweetness.

Heart Shaped Cheese Danish
- Prep Time: 45 minutes
- Cook Time: 20 minutes
- Total Time: 1 hour
- Yield: 14 CHEESE DANISHES 1x
- Category: Dessert
Ingredients
- 1 package of puff pastry (2 sheets)
- 8 oz cream cheese
- 1/4 cup jam
- 1 tsp vanilla extract
- 1/4 cup sugar (optional if using store-bought jam)
- Avocado oil spray or egg wash
- Powdered sugar for dusting
Instructions
- Begin by thawing the puff pastry on the counter for 30-45 minutes.
- Preheat your oven to 350°F and line a baking sheet with parchment paper.
- Roll out the puff pastry on a clean surface and use a heart-shaped cookie cutter to cut out the heart shapes. Place them onto the prepared baking sheet.
- Using a knife, create an indent in the center of each heart with a smaller heart shape. This will be the space for the cheese filling.
- In a mixing bowl, blend together the softened cream cheese, jam, vanilla extract, and sugar (if using) until smooth. Fill each heart shape with this creamy mixture.
- Brush the edges of the pastries with an egg wash or spray them with avocado oil.
- Bake for 16-20 minutes or until the edges turn golden brown.
- Allow the danishes to cool slightly, then sprinkle them with powdered sugar before serving.
Notes
Store your cheese danishes in the refrigerator and enjoy them within 3-4 days for maximum freshness.