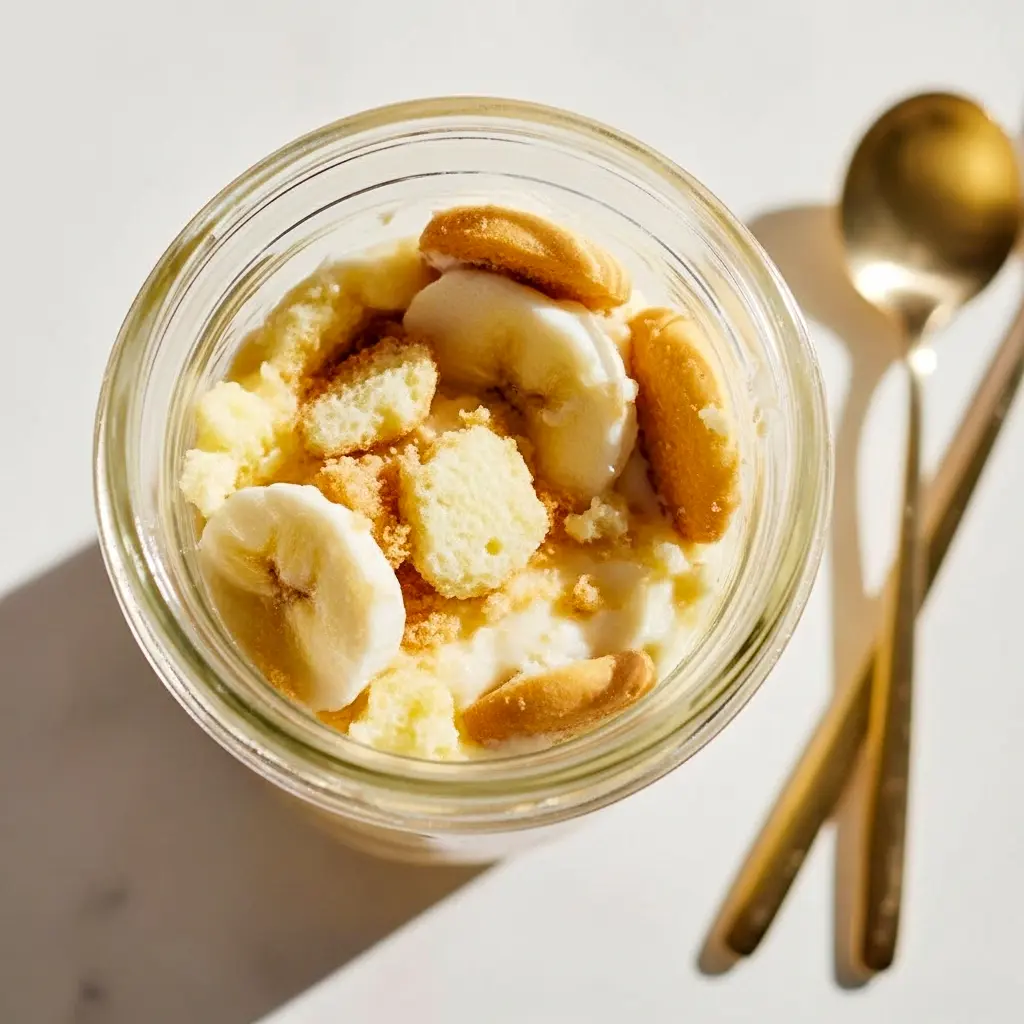
Healthy And Easy Desserts — Protein Banana Pudding (No-Bake)
Healthy And Easy Desserts don’t have to taste like cardboard — especially not this creamy, layered Protein Banana Pudding. It’s a no-fuss, no-bake treat built from Greek yogurt, vanilla protein powder, sugar-free banana pudding mix, crunchy wafers, and fresh banana slices. The result tastes indulgent but stays lean, making it a perfect pick for breakfast, snack, or a guilt-free dessert.
Brief introduction to the recipe
This Protein Banana Pudding swaps condensed milk and added sugar for a protein-packed custard that still delivers classic banana cream flavor. It layers a thick vanilla protein dessert recipe custard with gluten-free (or keto) vanilla wafers and ripe bananas, then chills so every bite becomes a cool, spoonable delight. No oven required. Minimal prep. Big payoff.
Why you’ll love this
Why reach for this instead of a sugar-laden pudding or a store-bought snack? Because it checks practical boxes: it’s quick to assemble, easy to portion into jars, and robust enough to function as a post-workout snack or a balanced mini-dessert. It’s also a friendly way to sneak protein into a familiar flavor profile for picky eaters or those who miss creamy treats while cutting sugar.
Big plus: it doubles as one of those Healthy Individual Desserts that look pretty and travel well. Need something cheap and nutritious? This hits the Cheap Healthy Desserts sweet spot, too.
The story behind the bowl
Honestly? I hadn’t touched banana pudding for ages. Then I imagined a version that wouldn’t cave to condensed milk or sugar — instead one that used protein powder and Greek yogurt to keep things creamy and higher in protein. I made it one afternoon, ate it twice the next day, and my husband (a serious banana-pudding fan) gave it two enthusiastic thumbs up. That’s the real test, right?
The Key Ingredients (and Why You Need Them)
Here’s a short, practical breakdown of what makes this pudding work — without recipe amounts. Think of it as the why, not the how.
- Greek Yogurt — The base for the protein custard. It gives the pudding body, tang, and a serious protein bump. Use nonfat for fewer calories or full-fat for a richer mouthfeel.
- Vanilla Protein Powder — This is your primary sweetener and protein source; it flavors the custard while keeping added sugar out. Look for a clean whey or plant-based powder you enjoy. This is the heart of the Vanilla Protein Dessert Recipes angle.
- Sugar-Free Banana Instant Pudding Mix — Adds banana flavor and thickening power without sugar. It delivers the signature pudding taste.
- Unsweetened Almond Milk (or other milk) — Thin and smooths the custard. Add slowly to control consistency.
- Vanilla Wafers (or gluten-free/keto wafers) — The crunchy layer that gives the pudding textural contrast. If you prefer, use crushed graham crackers or baked oats for a wholesome swap.
- Fresh Bananas — This keeps the flavor honest and adds natural sweetness and texture. Ripe but not overly brown is ideal.
- Optional: a touch of sweetener — If your protein powder isn’t sweet enough for you, add a little stevia or monk fruit to taste.
How to Make It
This section gives you the step-by-step so you can copy/paste the method directly into your post or recipe card.
- Whisk the base. In a medium bowl, combine Greek yogurt, vanilla protein powder, and the sugar-free banana pudding mix. Start whisking while slowly adding almond milk — add a little at a time until you reach a thick, custard-like consistency. You want it spoonable, not runny.
- Test sweetness and texture. Taste the custard. If it needs sweetness, add a pinch of stevia or monk fruit and whisk again. If it’s too thick, thin with another tablespoon of milk. Tip: go slow — it’s easy to over-thin.
- Prep layering elements. Crush vanilla wafers into coarse crumbs and slice bananas into even rounds. Keep everything within arm’s reach.
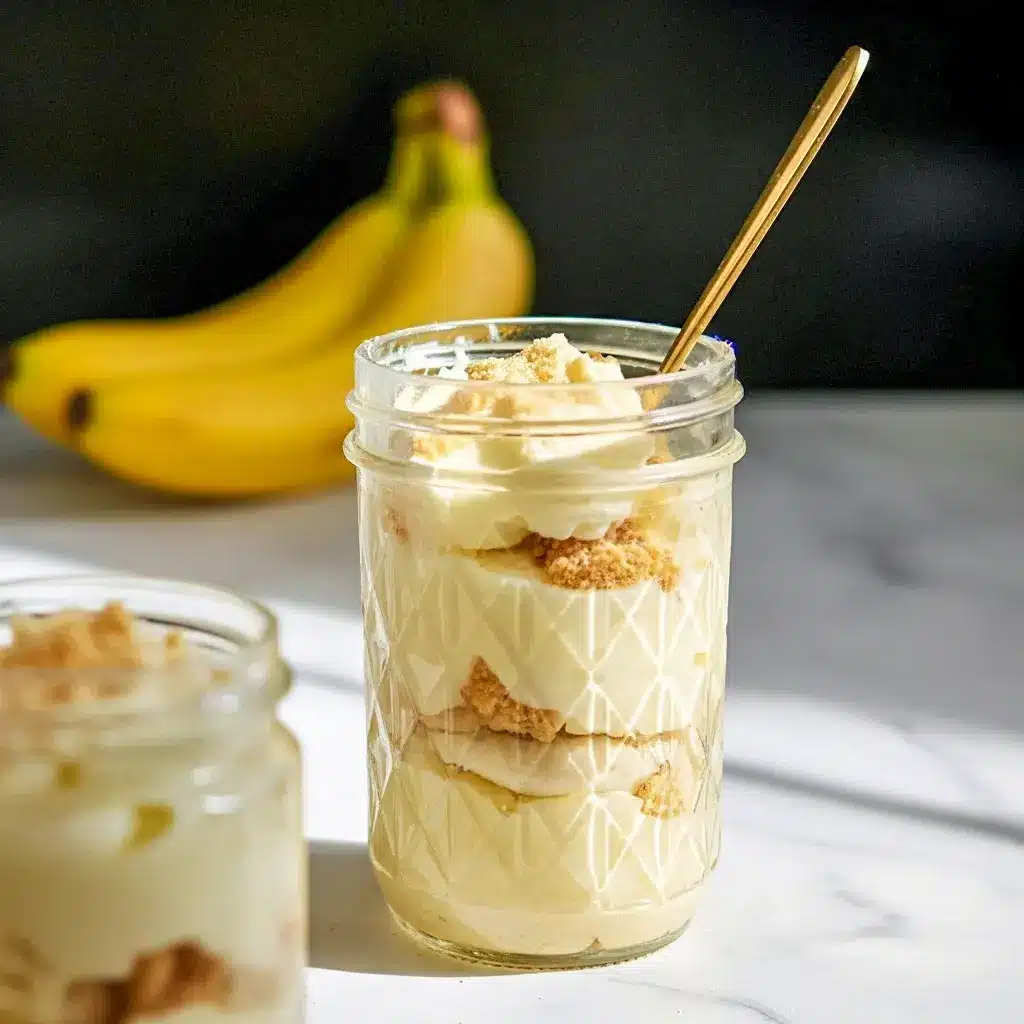
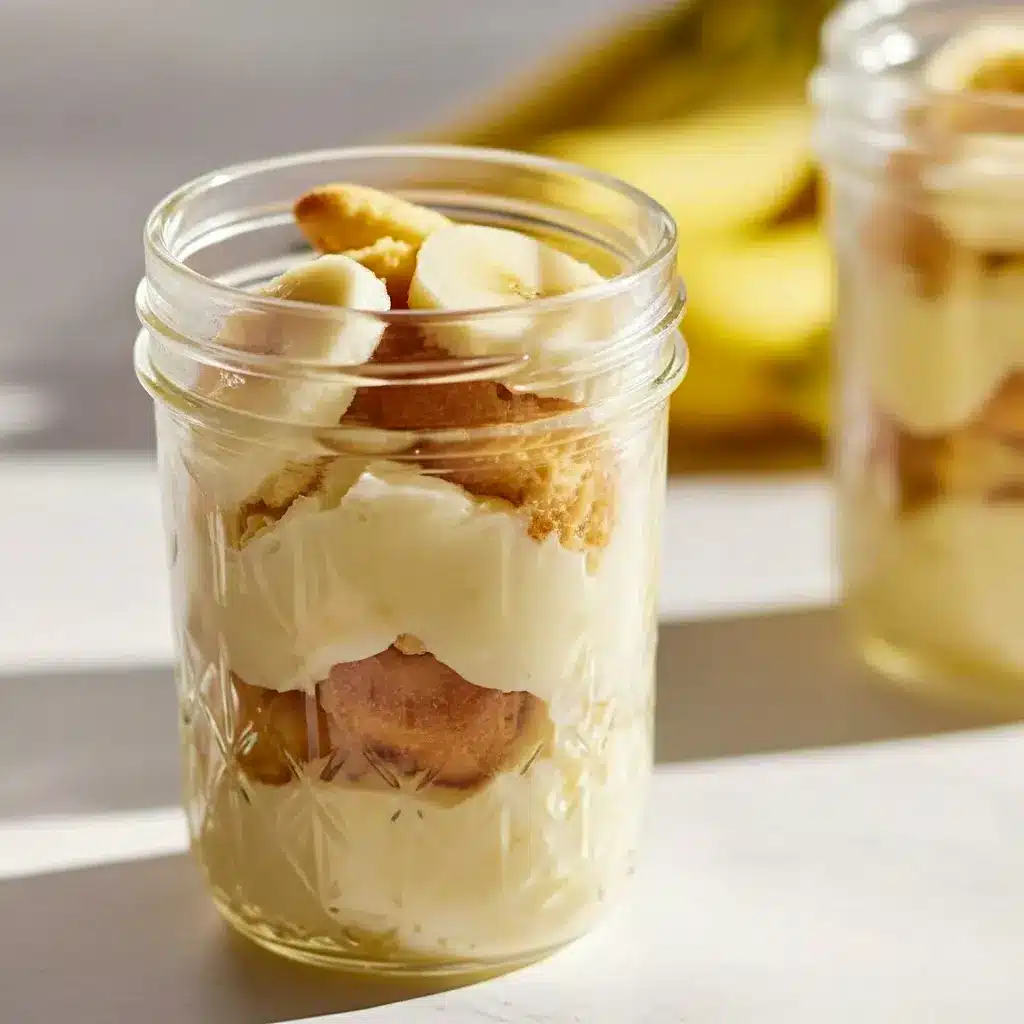
- Assemble jars or a dish. Spoon a layer of protein custard into the bottom of a jar or serving dish. Add a layer of crushed wafers, then a layer of banana slices. Repeat: custard, wafers, bananas, finishing with a thin custard layer on top. For presentation, place a banana slice and a few crushed wafer crumbs on the final layer.
- Chill. Refrigerate for at least 15–30 minutes (longer gives softer wafers). For best texture, chill 1–2 hours so the wafers soften slightly but still hold contrast.
- Serve. Grab a spoon and dig in — or seal the jars for a grab-and-go snack.
Pro tips for perfect results
- Use cold ingredients. Cold yogurt and milk make for a smoother custard.
- Add milk slowly. It’s easier to thin the custard than to fix an overly thin one.
- Opt for ripe-but-firm bananas. Too-ripe bananas turn brown and release extra liquid; not-ripe ones lack sweetness.
- Stir vigorously. Whisk until the custard is silky and lump-free — a minute or two will usually do it.
- Chill for texture control. Short chill = firmer wafers; longer chill = softer, truer pudding texture. FYI: if you like a soft spoonable pudding, aim for at least 1 hour.
- Layer strategically. Place wafers mostly in the middle layers to keep a bit of crunch on the top and bottom.
Variations to try
Want to switch things up? Here are fast, tested-friendly swaps that keep the concept intact.
- Frozen banana version: Use mashed frozen bananas blended into the custard for a creamier, cooler texture — think “banana ice-cream meets pudding.” This ties directly into Recipes For Frozen Bananas ideas.
- Keto-friendly: Use high-fat Greek yogurt, a keto-friendly vanilla protein, and low-carb wafers (or crushed nuts).
- Vegan: Choose a plant-based vanilla protein, coconut or almond yogurt, and a vegan pudding mix. Use agave instead of honey if needed.
- Layered parfait: Add a layer of toasted oats or granola between wafers for extra fiber and crunch.
- Spiced banana pudding: Add a pinch of cinnamon or nutmeg to the custard for warmth.
The health angle — why this fits your plate
This pudding works well within a Healthier Eating plan because it focuses on whole-food protein (Greek yogurt + protein powder), fresh fruit, and minimal added sugar. It’s also a strong entry in lists of Soft Healthy Foods and Soft Foods With Protein — great if you need something easy to chew but still nutritionally dense.
If you’re counting macros, this dessert supplies a respectable portion of protein per serving, which helps satiate hunger and supports muscle recovery after training.
Best ways to serve
- Single-serve jars make this an ideal meal-prep dessert or snack.
- Layer in a trifle dish for parties — it looks fancy and scales easily.
- Top with toasted coconut or a sprinkle of cacao nibs for a textural lift and visual contrast.
- Pair with coffee or a light green tea for a mid-afternoon pick-me-up.
Quick tips for storage & leftovers
- Fridge life: Store in an airtight container for up to 7 days. The texture will change slightly over time as the wafers soften.
- Avoid room temperature for long: Keep it chilled; it’s dairy-based. Leave out only for short serving windows.
- Freezing: You can freeze portions (without wafers) for up to one month; thaw overnight in the fridge and add fresh wafers at serving time.
- Meal prep note: Assemble jars without banana slices if you plan to keep them several days — add banana before serving to avoid browning.
FAQs
Can I use plain protein powder instead of vanilla?
Yes, but vanilla protein blends as your sweet component; with plain protein you may want to add a touch of sweetener or extra vanilla extract.
Will the wafers get soggy?
They soften, yes — that’s intentional. If you like crunch, add a small portion of crushed wafers right before serving.
Can I make this without protein powder?
Sure. Omit the powder and use an extra ½ cup Greek yogurt and a touch of sweetener to taste. Protein content will drop accordingly.
How many servings does this make?
Depending on jar size, this stretches to 4–6 single-serve portions.
Is vanilla instant pudding necessary?
It adds classic banana pudding flavor and helps thicken. You can experiment with a small amount of cornstarch plus banana extract, but results will differ.
Variations specifically for frozen banana lovers
If you’re exploring Recipes For Frozen Bananas, try blending frozen banana chunks with yogurt and protein powder for a thick base. Use that as the custard and layer with wafers and fresh banana slices for a cold, smoothie-meets-pudding experience. It’s refreshing and extra creamy.
Quick swaps for dietary needs
- Low-sugar: Keep sugar-free pudding and a low-carb protein. Use low-sugar wafers or toasted almond crumbs.
- Dairy-free: Use coconut or almond yogurt and plant protein.
- Higher-protein: Add a scoop more protein powder and reduce milk slightly to keep texture.
Final thoughts — the micro win that matters
This Protein Banana Pudding proves you can have a spoonable, creamy dessert without leaning on condensed milk, sugar, or complicated techniques. It’s friendly to busy lives, easy to scale, and flexible enough to be a snack, dessert, or post-workout treat. It’s also a solid entrant among Healthy No Bake Recipes that actually deliver satisfaction.
So next time you crave a classic banana pudding, try this protein-forward twist. It tastes like comfort, acts like fuel, and keeps things lean. What’s not to love?
Bold tip: If you want the best texture, assemble this at least an hour before serving. Trust me — patience pays off.
Follow me on Pinterest for daily new recipes.

Easy Protein Banana Pudding — Healthy And Easy Desserts for Busy Mornings
- Prep Time: 5 minutes
- Total Time: 5 minutes
- Yield: 2 servings 1x
- Category: Dessert
- Cuisine: American
- Diet: Vegetarian
Description
A lighter take on classic banana cream: creamy Greek yogurt blended with vanilla protein and sugar-free banana pudding mix, layered with crushed vanilla cookies and banana slices. No baking, no condensed milk, and no added sugar — just quick, spoonable goodness.
Ingredients
- 150 g (about 2/3 cup) nonfat Greek yogurt
- 30 g (≈1/3 cup) vanilla whey protein powder
- 11 g (about 4 teaspoons) sugar-free banana cream instant pudding mix
- 10 ml (≈2 teaspoons) unsweetened almond milk, plus more if needed
- 14 g (≈3–4) crushed vanilla wafer cookies (use sugar-free wafers if preferred)
- 60 g (about ½ medium) banana, thinly sliced
Instructions
- Whisk the custard base: In a medium bowl, combine the Greek yogurt, vanilla protein powder, and sugar-free banana pudding mix. Stir while gradually pouring in the almond milk until the mixture reaches a thick, spoonable pudding texture. Add the milk slowly — you want creamy, not runny.
- Taste and adjust: Give the custard a quick taste. If it needs a touch more sweetness or thinner consistency, add a dash more almond milk or a pinch of your preferred sweetener.
- Layer the jar: Start by spooning a generous layer of the protein custard into the bottom of a jar or serving cup. Sprinkle a layer of crushed vanilla wafers over the pudding, then top with a single layer of banana slices. Repeat once so you end with two layers of custard, wafers, and banana.
- Chill (optional): Pop the assembled jar in the refrigerator for 15–30 minutes if you prefer a cooler, slightly softened-wafer texture. Serve immediately if you like more crunch.
Notes
- Nutrition estimates were calculated using the product suggestions in the original post.
- For meal-prep, assemble jars without the banana slices and add fruit just before eating to prevent browning.
- Substitutions: swap Greek yogurt for plain plant-based yogurt, use a plant-based vanilla protein, or replace almond milk with any milk you prefer.
- Storage: keep refrigerated in an airtight container for up to 5 days; add fresh banana at serving time for best texture.
Nutrition
- Serving Size: 1serving
- Calories: 177 cal
- Sugar: 7.9g
- Fat: 1.9g
- Saturated Fat: 1g
- Carbohydrates: 20.9g
- Fiber: 1.2g
- Protein: 19.4g
Healthy And Easy Desserts, Soft Foods With Protein, Healthy Individual Desserts, Recipes For Frozen Bananas, Soft Healthy Foods, Healthy No Bake Recipes, Healthier Eating, Cheap Healthy Desserts, Vanilla Protein Dessert Recipes