
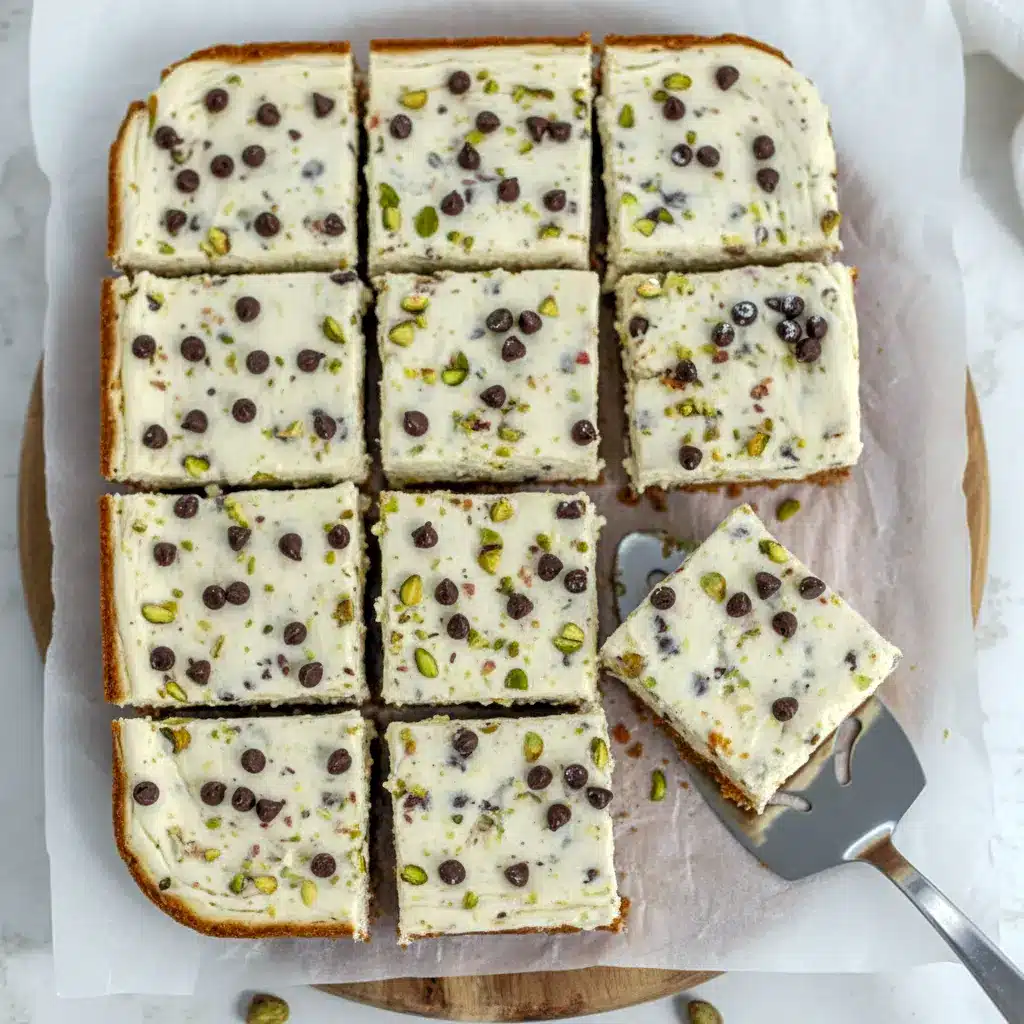
Cannoli Cheesecake Bars — Easy No-Bake Treats You’ll Actually Make
If you love that crunchy-shell, sweet-ricotta vibe, Cannoli Cheesecake Bars deliver all the good stuff in a pan — no frying, no piping, no stress. These bars merge a buttery cookie crust with an ultra-creamy ricotta-cream cheese filling studded with mini chocolate chips and pistachios. Trust me: they taste like the classic cannoli you dream about, but way easier to pull off.
Brief introduction to the recipe
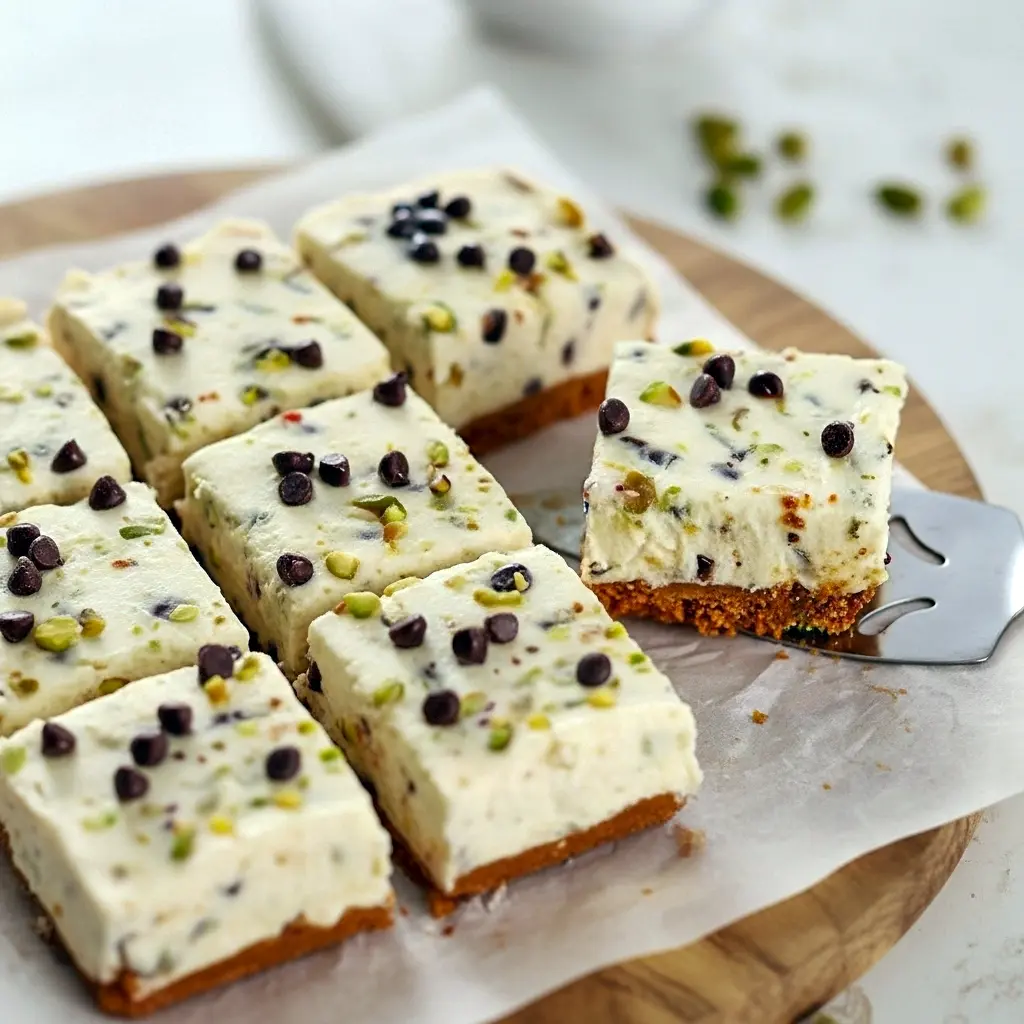
Imagine the essence of a crispy Italian cannoli turned into a sliceable, fridge-ready dessert. That’s this recipe. You get that sweet ricotta flavor married with cream cheese for silkiness, a whisper of lemon zest, a hint of cinnamon, and the joyful crunch of pistachios. The crust? A two-ingredient Biscoff crust that holds everything together and tastes like cookie-butter heaven.
Why you’ll love these bars
Why swap a traditional cannoli for a bar? Because they’re fast, forgiving, and portable. They work as Easy Pick Up Desserts for picnics, potlucks, or just when you want something impressive with minimal fuss. They chill firm, slice clean, and travel like a champ. Also — have you ever tried a fried cannoli without a deep fryer? No thanks. These let you skip that whole circus.
The story behind the recipe
I first got hooked on cannoli at a little bakery in Boston — the kind of place where you walk in for one pastry and somehow leave with a dozen. I loved everything about them: the crunch, the sweet ricotta, the little chips. But frying dough in my tiny kitchen felt… ambitious. So I took the core flavors, simplified the technique, and turned them into bars that hit the same nostalgic notes. Enter the Cannoli Magic Bars — a riff that shrugs off the fryer and embraces the fridge.
Ingredients breakdown — what each part does
Here’s the short scoop on the building blocks and why they matter.
- Biscoff cookies (crumbs): These make a buttery, slightly spiced crust. You can swap graham crackers, but Biscoff adds personality.
- Melted butter: Binds the crumbs and gives the crust its rich mouthfeel.
- Cream cheese: Adds structure and a smooth tang; it makes the filling decadently creamy. Room-temperature cream cheese blends more smoothly — don’t skip this.
- Ricotta cheese: Gives the filling that authentic cannoli texture and flavor. Part-skim or whole milk both work.
- Powdered sugar: Dissolves effortlessly in the filling for silky sweetness.
- Vanilla extract: A small splash amplifies all the flavors.
- Mini chocolate chips: Tiny pockets of melty chocolate in every bite.
- Pistachios: Provide color and crunch. Leave them out to keep the bars nut-free.
- Lemon zest & cinnamon (optional): A pinch of citrus brightens the ricotta; cinnamon plays nicely in the background.
Ingredient swap tip: If you want a nut-free crust, use graham crackers or plain shortbread crumbs instead of Biscoff.
Step-by-step: How to make the bars
Yes, you can totally do this in under an hour of hands-on time.
- Crush the cookies. Pulse Biscoff cookies in a food processor until fine. No processor? Toss them in a freezer bag and bash with a rolling pin.
- Make the crust. Stir the crumbs with the melted butter until the mixture feels like damp sand. Press it into an 8-inch square pan lined with parchment. Chill for at least 30 minutes to firm up.
- Mix the filling. Beat room-temp cream cheese with powdered sugar until smooth. Add ricotta, vanilla, lemon zest, and a dash of cinnamon. Whip until glossy.
- Fold in add-ins. Gently stir in mini chocolate chips and chopped pistachios so the filling stays airy.
- Assemble. Spread the filling over the chilled crust, smooth the top, and cover with plastic wrap. Refrigerate at least 4 hours — overnight is better.
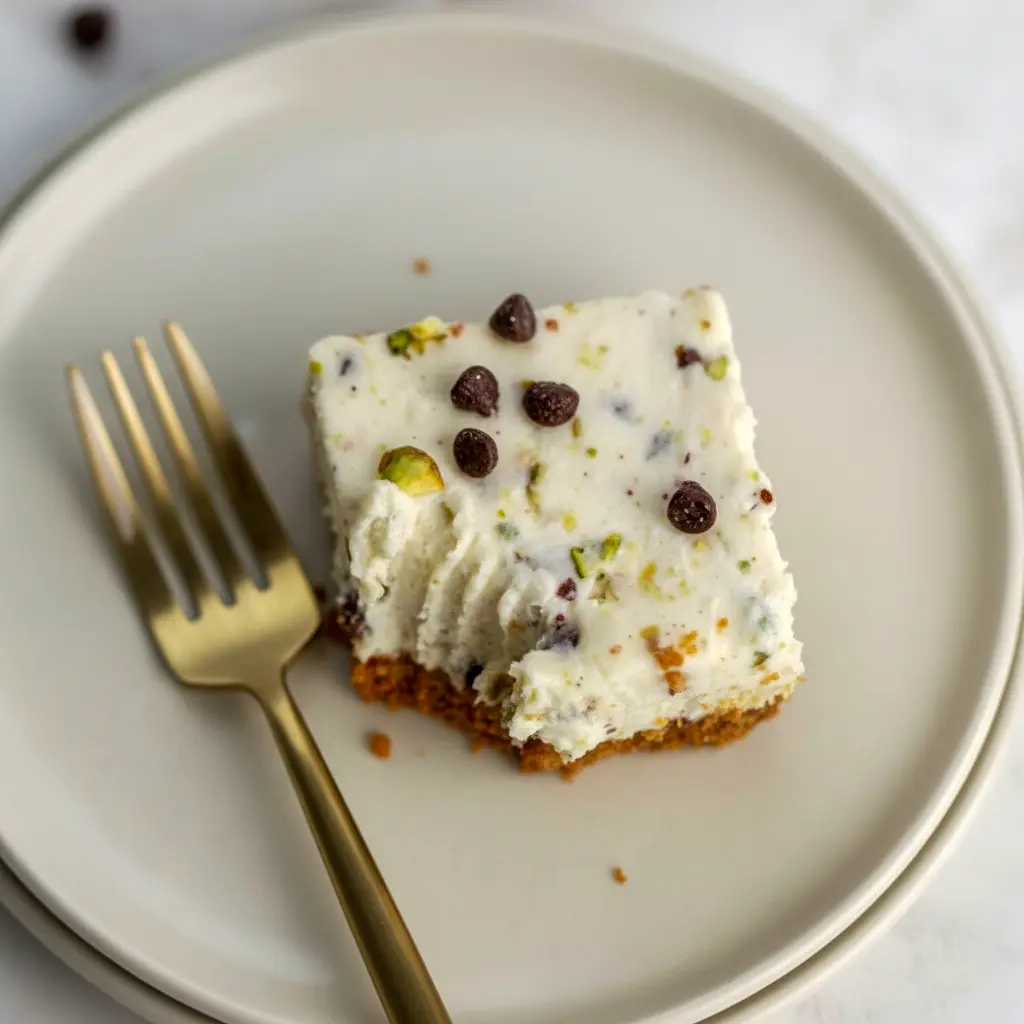
- Slice & serve. Lift the whole slab with the parchment, slice with a hot, wiped knife for clean edges, and garnish if you like.
Bold tip: Don’t skip the chill time. The filling firms up in the fridge and gives you those neat slices everyone loves.
Pro tips for perfect results
- Use room-temperature cream cheese — cold blocks make a lumpy batter.
- Press the crust firmly. A packed base keeps the bars from crumbling.
- Pulse, don’t overblend the cookies; too fine can make the crust gummy.
- Hot knife trick: Run your knife under hot water and dry it between cuts to get razor-clean slices.
- Parchment is your friend. Line the pan with an overhang so you can lift the bars out easily.
- If the filling feels runny, chill longer. It will set up as it cools.
- Go light on citrus. A little lemon zest brightens without turning these into lemon bars.
Variations to riff on the theme
Want to experiment? Here are easy swaps and upgrades.
- No Bake Cannoli Delight: Leave out pistachios for a nut-free version and add crushed amaretti for extra Italian flair.
- Chocolate crust: Use Oreo crumbs for a darker base — big flavor.
- Orange twist: Swap lemon zest for orange zest to lean into classic cannoli notes.
- Nutty swap: Use chopped almonds or walnuts instead of pistachios.
- Luxe mascarpone: Fold in a little mascarpone for extra silk if you want a No Bake Cannoli Cheesecake feel.
- Mini portions: Press into a muffin tin for individual Cannoli Magic Bars.
Best ways to serve
These bars shine in many settings. Try them:
- Chilled on a dessert platter for parties.
- In a picnic box as one of your Easy Pick Up Desserts — they travel well.
- Topped with a dusting of powdered sugar and a few extra pistachios for show.
- With espresso or a sweet dessert wine for a grown-up pairing.
Want to make them extra photogenic? Pipe a small dollop of sweetened ricotta or mascarpone on top and sprinkle with cocoa.
Make-ahead, storage, and leftovers
- Make-ahead power: These are brilliant as a Make-Ahead Dessert. Prepare a day ahead; chill overnight. Flavor improves and slicing becomes easier.
- Fridge: Store bars in an airtight container for up to 3 days.
- Freezer: Wrap tightly and freeze up to 1 month. Thaw in the fridge before serving.
- Transport tip: Keep bars chilled in a cooler or insulated bag for events.
Bold tip: Pull the bars out of the pan using the parchment sling — that makes slicing and plating 100x easier.
Quick FAQ
Can I use regular chocolate chips instead of mini?
Yes, but mini chips distribute more evenly and don’t overwhelm the filling.
Do I need to drain the ricotta?
Nope. You can use part-skim or whole milk ricotta straight from the tub.
How do I cut perfect squares?
Warm the knife under hot water, dry it, slice, then wipe and repeat.
Are these suitable for summer events?
Absolutely. They’re great for no-bake summer desserts and rank high on seasonal August Desserts lists.
Can I make these gluten-free?
Yes — use gluten-free cookie crumbs for the crust.
Why these count as a Cannoli Inspired Dessert
These bars keep the spirit of cannoli — sweet ricotta, chocolate, and a hint of citrus — but make them approachable. Traditional cannoli require piping, frying, and a careful shell. These bars deliver the same flavors in a low-effort format: perfect for folks who want the taste without the theater.
They also make an excellent addition to any dessert lineup. Need an easy showpiece? Slice a few and arrange with fresh berries. Looking for portable dessert bites? Cut into fingers and wrap in parchment. They’re versatile, tasty, and user-friendly.
Serving suggestions & pairing ideas
- Pair with strong espresso or cappuccino — the bitterness balances the ricotta’s sweetness.
- Offer alongside a citrusy sorbet for contrast.
- For a decadent plate, serve with a drizzle of chocolate ganache and a sprinkle of flaky sea salt.
- For a lighter presentation, top each bar with a few fresh raspberries.
Final thoughts — a no-fuss favorite
Whether you call them Cannoli Bars Recipe or Cannoli Dessert Ideas, these no-bake squares hit the sweet spot between tradition and convenience. They give you the nostalgic cannoli profile without deep frying or delicate shells. They work as a crowd-pleasing dessert, a reliable potluck item, or a personal win when you want pastry-shop vibes at home.
If you’re on the hunt for a show-stopping treat that doesn’t demand a full day in the kitchen, these bars are your answer. Make them for a brunch, tuck them into your dessert tray for a gathering, or keep a pan in the fridge for emergency sweet needs (we all have those). And hey — if you want to get fancy, sprinkle a few edible flowers on top. But honestly? A simple dusting of powdered sugar does the trick.
Ready to try? Crush the cookies, whip the ricotta, and let the fridge do the rest. You’ll have a sliceable, satisfying dessert that tastes like tradition and behaves like a weekday hero.
Follow me on Pinterest for daily new recipes.
Easy No Bake Cannoli Cheesecake Bars
- Prep Time: 20 minutes
- Total Time: 20 minutes
- Yield: 12 bars 1x
- Category: Dessert
- Diet: Vegetarian
Description
These no-bake cannoli bars turn classic cannoli flavors into an easy, make-ahead square. A cookie-butter crust holds a silky ricotta-and-cream-cheese filling studded with mini chocolate chips and chopped pistachios. No frying, no piping — just mix, chill, slice, and enjoy.
Ingredients
Crust
- 5 tbsp (≈70 g) unsalted butter, melted and slightly cooled
- 2 cups (≈200 g) crushed Biscoff cookies (or substitute graham cracker crumbs)
Filling
- 1 cup (≈248 g) ricotta (part-skim or whole)
- 16 oz (454 g) full-fat block cream cheese, softened to room temperature
- 1 1/3 cups (≈160 g) powdered sugar
- ¼ tsp ground cinnamon (optional)
- ½ tsp lemon zest (or swap orange zest)
- 2 tsp pure vanilla extract
- ½ cup (≈90 g) mini chocolate chips, plus extra for sprinkling
- 1/3 cup (≈40 g) shelled pistachios, chopped, plus extra for garnish
Instructions
- Prep the pan. Line an 8″ square pan with parchment, leaving a couple-inch overhang on two sides for a handy sling.
- Make the crust. Grind the Biscoff cookies to fine crumbs in a food processor. Stir in the melted butter until the crumbs hold together when pressed. (No food processor? Toss cookies into a zip bag and crush with a rolling pin, then combine with butter in a bowl.) Firmly press the mixture across the bottom of the lined pan and transfer the pan to the freezer for about 30 minutes to set.
- Whip the filling. In a large bowl, beat the room-temperature cream cheese and powdered sugar until smooth and lump-free. Add the ricotta, vanilla, cinnamon (if using), and citrus zest; continue beating until the mixture is silky.
- Add mix-ins. Fold in the mini chocolate chips and chopped pistachios just until evenly distributed.
- Assemble and chill. Spread the filling evenly over the chilled crust, smooth the top with an offset spatula, and press a few extra chips and nuts on top if you like. Cover tightly and refrigerate at least 4 hours — overnight gives the best texture.
- Slice and serve. Use the parchment sling to lift the slab from the pan. For tidy cuts, run a long, sharp knife under hot water, wipe it dry, then slice; repeat between cuts for clean edges.
Notes
- Notes & Substitutions
- Crust swaps: graham cracker crumbs or shortbread crumbs work well if you don’t have Biscoff.
- Nuts: use roasted or raw pistachios; almonds or walnuts are fine substitutes. Omit nuts to keep these nut-free.
- Ricotta: no need to drain; part-skim or whole milk ricotta both perform nicely.
- Cream cheese: use block-style, full fat, and make sure it’s softened — cold cream cheese makes a lumpy filling.
- Flavor tweaks: trade lemon zest for orange to echo traditional cannoli flavoring. A pinch of cinnamon adds subtle warmth.
- Make ahead: bars firm up as they chill, so they’re perfect to prepare a day early.
- Storage
- Refrigerate in an airtight container for up to 3 days.
- Freeze wrapped tightly for up to 2 months; thaw overnight in the fridge before serving.
- Quick tips
- Press the crust firmly so slices hold together.
- Warm-knife trick = cleaner slices every time.
- Parchment sling makes lifting the whole slab effortless.
Nutrition
- Serving Size: 1 bar
- Calories: 457kcal
- Sugar: 27g
- Sodium: 285mg
- Fat: 34g
- Carbohydrates: 35g
- Fiber: 1g
- Protein: 5g
- Cholesterol: 98mg
Cannoli Cheesecake Bars, Easy Pick Up Desserts, Cannoli Magic Bars, Cannoli Dessert Ideas, No Bake Cannoli Delight, No Bake Cannoli Cheesecake, Cannoli Inspired Dessert, August Desserts, Cannoli Bars Recipe


