
Sweet Holiday Treats: Irresistible Red Velvet Snowballs for Your Holiday Table
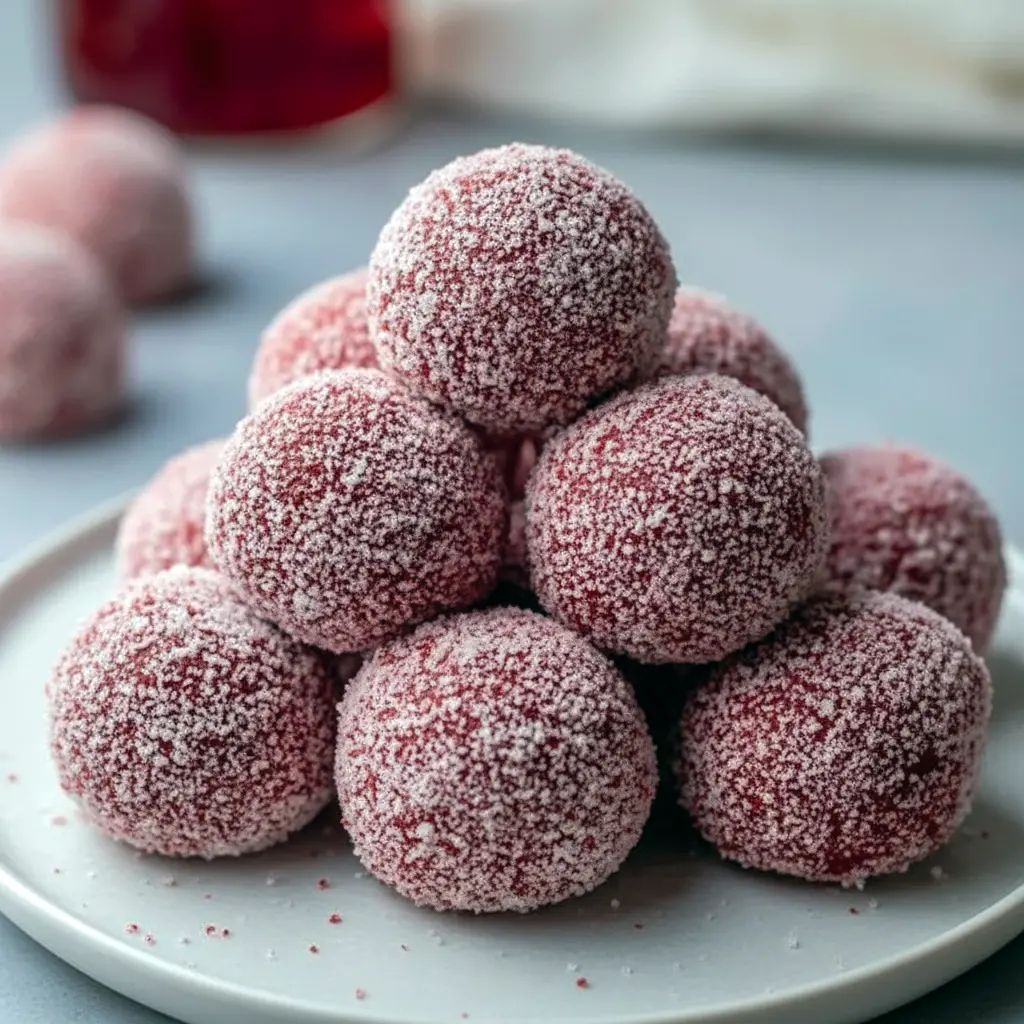
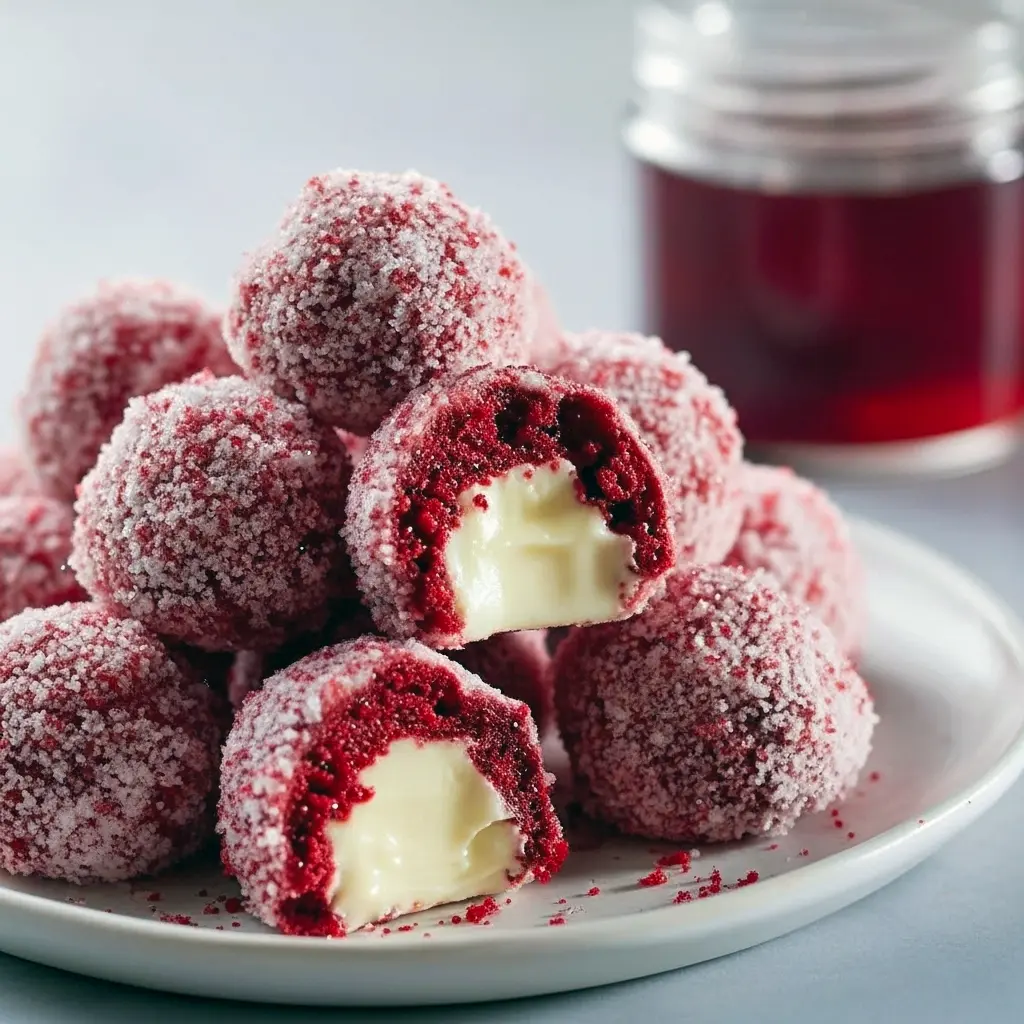
Sweet Holiday Treats set the mood for every festive gathering, and these Red Velvet Snowballs deliver looks, flavor, and nostalgia in every bite. They’re soft, slightly chocolatey, and dusted with powdered sugar so they look like tiny edible snowdrifts. Want a cookie that feels special but doesn’t melt your sanity? This is it.
Brief introduction to the recipe
Think soft red cookies that practically melt in your mouth, finished with a snowy coating. These Red Velvet Snowballs use simple pantry staples — flour, cocoa, butter, sugar, an egg, and a splash of red — to make a batch that looks way fancier than the effort. They work beautifully as Sweet Christmas Snacks or a showstopper on a tray of Christmas Sweets And Treats.
Why you’ll love this recipe
Why bother? Because these cookies check all the boxes: festive color, tender texture, and that satisfying powdered-sugar finish that screams holiday. They bake fast, travel well, and please both kids and adults. Need something for a bake sale or cookie swap? These shine among other Festive Christmas Desserts and slot right into trays of Christmas Desserts For A Party.
The story behind the snowballs
I first tested this riff on a whim when I needed a red-themed cookie for a neighborhood bake-off. The judges loved the color; my kid loved the soft center; I loved that I didn’t have to temper chocolate or sculpt fondant. These cookies feel nostalgic — like grandma’s kitchen with a merry modern twist. If you’ve ever wanted Red Velvet Christmas vibes without the fuss, this recipe delivers.
Ingredients breakdown — what each one does (short blurbs)
- 1 1/2 cups all-purpose flour — gives structure.
- 1/2 cup cocoa powder — provides the subtle chocolate backbone that makes red velvet, well, red velvet-adjacent.
- 1 tsp baking powder — lifts and lightens the cookies.
- 1/4 tsp salt — balances sweetness and amplifies flavor.
- 1/2 cup unsalted butter, softened — enriches and keeps the cookies tender.
- 1 cup granulated sugar — sweetens and gives a slight snap to the exterior.
- 1 large egg — binds and adds moisture.
- 1 tsp vanilla extract — rounds everything with warmth.
- 1 tbsp red food coloring — gives the festive pop (or use natural beet powder for a subtler tone).
- 1 cup powdered sugar for coating — the snowy finish that makes them irresistible.
Step-by-step — How to Make It (clear, short, and actionable)
- Preheat & prep. Heat the oven to 350°F (175°C). Line a baking sheet with parchment. Keep it simple.
- Combine dry stuff. Whisk the flour, cocoa, baking powder, and salt until evenly mixed. No clumps, please.
- Cream butter and sugar. Beat the softened butter with the granulated sugar until the mixture lightens and looks a touch fluffy. This traps air so the cookies stay tender.
- Add egg, vanilla, and color. Mix in the egg, vanilla, and the red food coloring until the batter looks uniform and festive.
- Fold in dry ingredients. Gradually add the dry mix. Stir just until everything comes together. Don’t overmix — that toughens cookies.
- Scoop & roll. Portion tablespoon-sized scoops, roll into neat balls, and place them on the prepared pan about 2 inches apart.
- Bake. Slide the tray into the oven for 10–12 minutes. You want them slightly soft in the center when you take them out — they finish firming up as they cool.
- Coat while warm. Roll each warm cookie in powdered sugar. Give them a second roll after they’re fully cool for that classic snowball look.
- Cool & serve. Transfer to a wire rack. Let them cool fully before stacking or packaging.
Pro tips for perfect results — pay attention to these
- Use room-temperature butter for easier creaming and a lighter cookie.
- Avoid overmixing the dough; stir until just combined. Overworking the dough = dense cookies.
- Pull them when slightly soft in the center. Cookies continue to set as they rest.
- Roll in powdered sugar while warm for the best, even coating — then roll again once cool for that classic snowy look.
- For deeper red, use gel food coloring rather than liquid; gel gives intense color without thinning the dough.
- Chill the dough for 15–30 minutes if your kitchen is warm — it helps prevent spreading.
- Swap pans if needed. Lighter-colored, heavy-gauge pans bake more evenly; dark pans can brown edges quickly.
Bold tip: If you crave a softer center, reduce bake time by a minute or two — but watch closely.
Variations to try — fun twists that keep things interesting
- Red Velvet Cake Balls: Crumble baked red velvet cake, mix with a little frosting, roll into balls, and dip in chocolate for Red Velvet Cake Balls (perfect if you want a truffle-style treat).
- White-Chocolate Drizzle: After coating in sugar, drizzle melted white chocolate for contrast and extra sweetness.
- Spiced Red Velvet: Add 1/4 tsp cinnamon and a pinch of nutmeg to the dough for a cozy, spiced edge.
- Gluten-Free: Use a one-to-one gluten-free flour blend and chill the dough a bit longer to stabilize.
- Nutty Crunch: Fold in 1/3 cup finely chopped pecans or almonds for texture (skip if you need nut-free).
- Mini Snowmen: Stack two baked snowballs with icing and add candy eyes for adorable Christmas Sweets And Treats that double as decorations.
Best ways to serve — make them pop
- Arrange on a tiered stand with sprigs of rosemary for a rustic-chic platter.
- Offer them on a dessert table labeled as Red Velvet Christmas bites so guests know what magic they’re about to eat.
- Pair with hot cocoa or espresso — the cocoa echo intensifies the red velvet note.
- Pack them in small boxes tied with ribbon for neighborly gifts or craft fair sales.
Quick tips for storage and leftovers
- Room temp: Store in an airtight container for up to a week. They’ll soften a touch but stay delicious.
- Refrigerate: For longer storage (up to 2 weeks), chill them — bring to room temp before serving.
- Freeze: Individually wrap in plastic, freeze in a sealed bag for up to three months. Thaw in the fridge, then rest at room temp before eating.
- Travel tip: Layer cookies between parchment in a tin to prevent smushing when transporting to parties.
FAQs — short and direct
Can I make these ahead of time?
Yes. You can roll the dough into balls and refrigerate for up to 48 hours before baking. Bake directly from chilled for minimal spread.
Do these count as Easy Christmas Baked Goods?
Totally — they’re straightforward, quick to mix, and require only basic skills. Perfect for last-minute baking sprints.
Can I reduce the food coloring?
Yes — reduce or omit for a more subtle hue. If you skip the color, they still taste like a soft cocoa cookie.
What if my cookies crack when rolling in powdered sugar?
That usually means they’re slightly overbaked. Pull them out sooner next time; for current batch, roll gently and then roll once more after they cool.
Is this a good cookie for a party dessert table?
Absolutely — these make excellent Christmas Desserts For A Party because they look festive and travel well.
Common mistakes and how to avoid them
- Overbaking: Watch the clock. Cookies continue to firm after removal. Pull them when centers still look soft.
- Too much mixing: Stop once the dry ingredients disappear. Overmixing develops gluten and toughens cookies.
- Skipping the roll-in while warm: Roll while warm for the best powdered-sugar coverage; the heat helps the sugar stick and melt slightly for a unified look.
- Crowding the pan: Leave space. Crowding causes uneven baking and weird shapes.
Pairings and party ideas
Want a themed dessert table? Combine these with:
- Chewy ginger cookies for spice contrast.
- Little cups of hot cocoa for dipping.
- A plate of peppermint bark for variety.
This mix creates a festive spread of Sweet Christmas Snacks that covers everyone’s craving spectrum.
Why these cookies fit holiday menus
These Snowballs bring color and texture to any platter. They read festive at first glance and taste cozy at first bite. They suit cookie swaps, holiday bake sales, and intimate family gatherings. They bridge the gap between Red Velvet Christmas novelty and classic crowd-pleaser.
Final thoughts — short and encouraging
These Red Velvet Snowballs feel like a seasonal treat made by someone who loves holidays but hates fuss. They look gorgeous, taste great, and need only a little patience and a sprinkle of powdered sugar. Ready to make your dessert table pop? Grab your mixing bowl and get rolling — your oven and your guests will thank you.
Follow me on Pinterest for daily new recipes.
Irresistible Red Velvet Snowballs — The Ultimate Sweet Holiday Treats
- Prep Time: 20 minutes
- Cook Time: 12 minutes
- Total Time: 32 minutes
- Yield: 24 cookies 1x
- Category: Dessert
Description
A festive bite-sized cookie with a tender, chocolatey crumb and a snowy powdered-sugar finish. Perfect for gatherings, cookie exchanges, or an afternoon treat with a mug of something warm.
Ingredients
Dry mix
- 1 1/2 cups all-purpose flour
- 1/2 cup unsweetened cocoa powder
- 1 teaspoon baking powder
- 1/4 teaspoon salt
Wet mix
- 1/2 cup unsalted butter, softened (soft but not melted)
- 1 cup granulated sugar
- 1 large egg
- 1 teaspoon vanilla extract
- 1 tablespoon red food coloring (for that classic hue)
For finishing
- 1 cup powdered sugar (for rolling the hot cookies)
Instructions
- Heat the oven to 350°F (175°C). Line a baking sheet with parchment or a silicone mat.
- In a medium bowl, sift or whisk together the flour, cocoa, baking powder, and salt until evenly combined.
- In a separate large bowl, cream the softened butter and granulated sugar until the mixture is smooth and lighter in color.
- Beat in the egg, then stir in the vanilla and red coloring until the batter is evenly tinted.
- Add the dry mixture to the butter mixture in batches, stirring just until the dough comes together. Avoid overworking the dough.
- Using a tablespoon or small scoop, portion the dough and roll each piece into a neat ball. Place them on the prepared sheet about 2 inches apart.
- Bake for 10–12 minutes. The centers should still be slightly soft to the touch when you remove them from the oven.
- While the cookies are warm (not piping hot), roll each one in the powdered sugar to coat completely. For a fuller “snowy” look, roll again once the cookies have cooled.
- Transfer to a wire rack and let them cool fully before stacking or storing.
Notes
- Serve with coffee, tea, or cold milk for a classic pairing.
- Keep cookies in an airtight container at room temperature for up to one week.
- To freeze, wrap individual cookies in plastic wrap or layer with parchment in a freezer-safe container; they’ll keep up to 3 months. Thaw at room temperature before serving.


