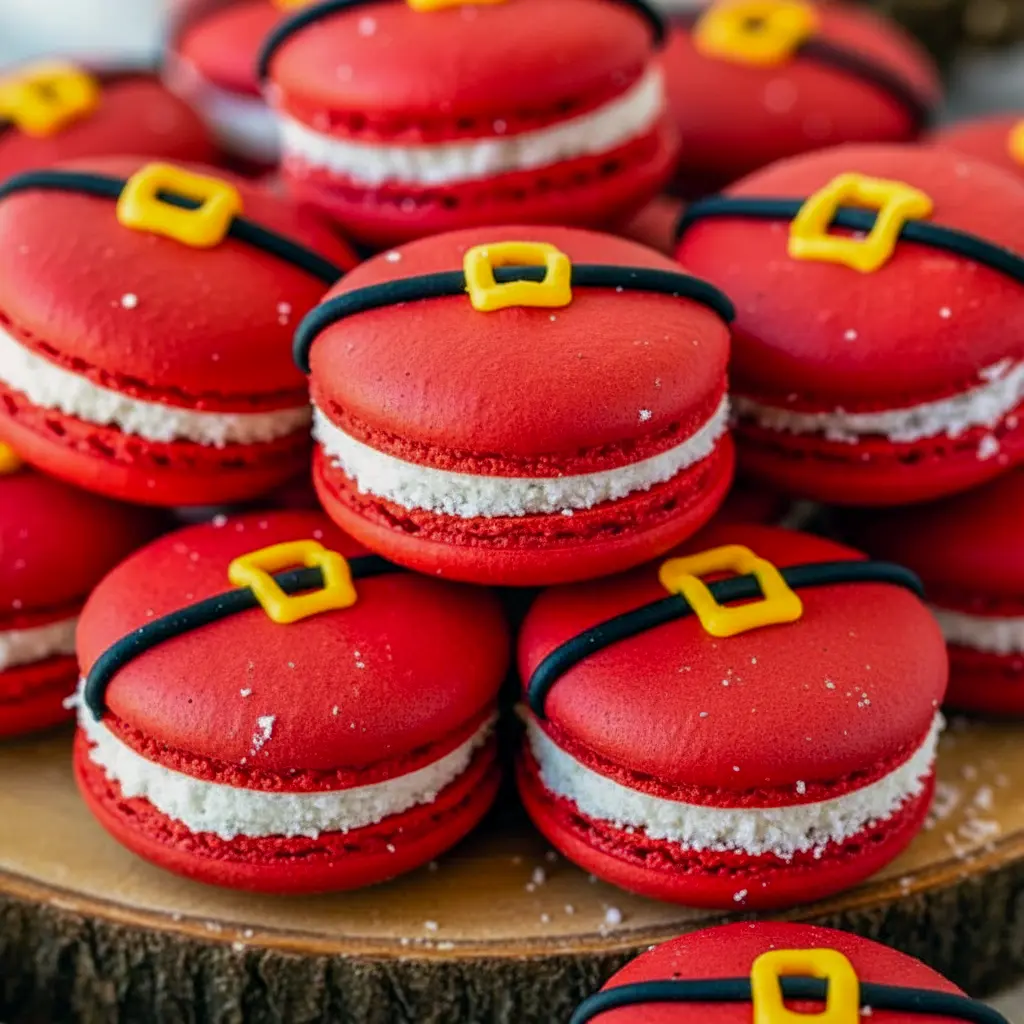
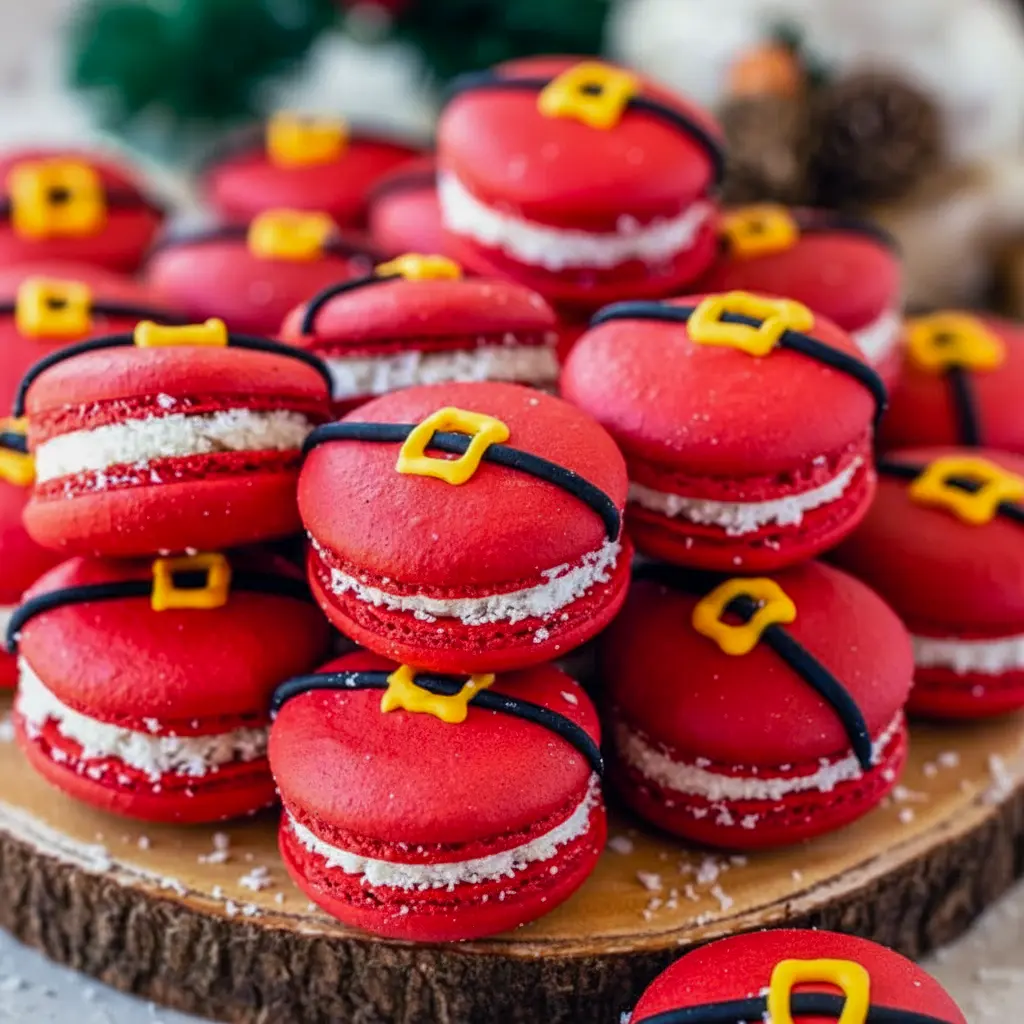
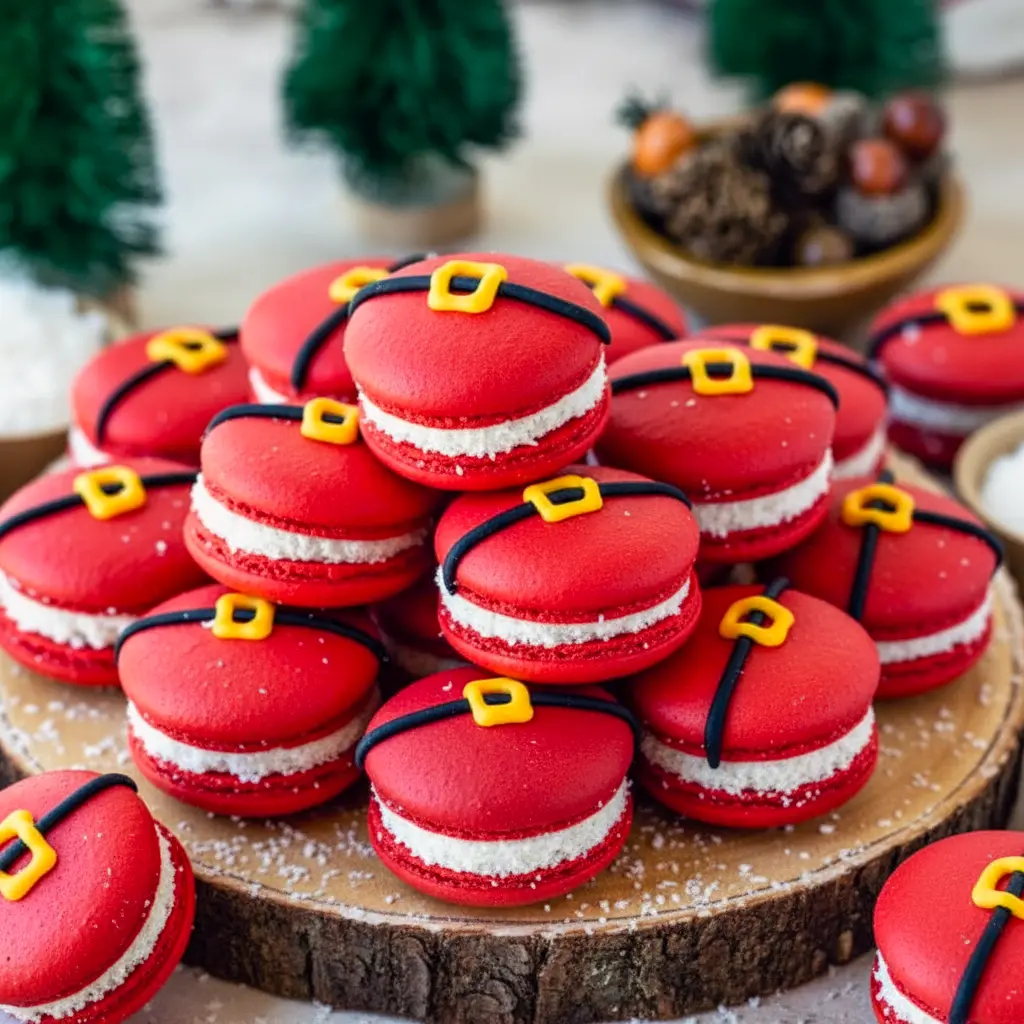
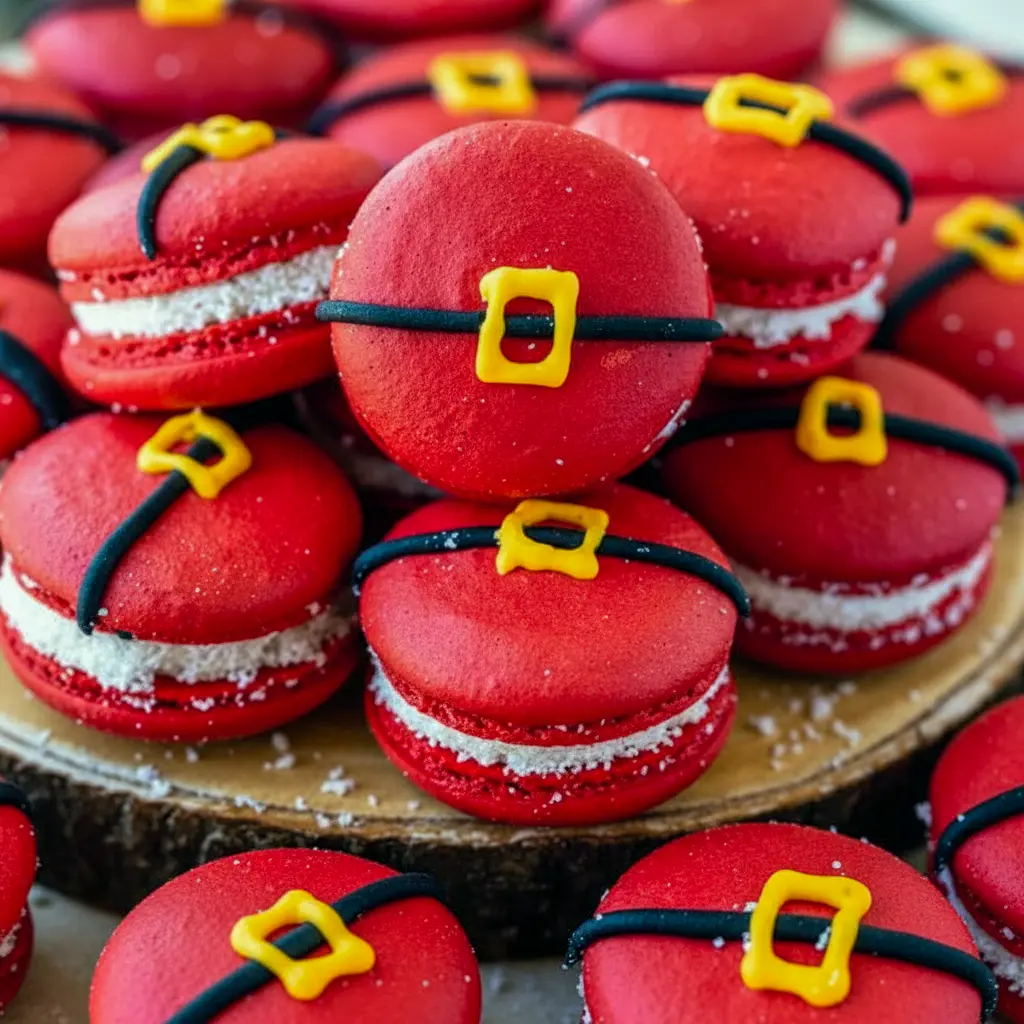
Santa Macarons Recipe — festive red sandwich cookies with a sugar-cookie heart
Santa Macarons Recipe: these bright red, belt-decorated macarons hide a sugar-cookie–style buttercream and a playful royal-icing buckle. They look fancy, taste dreamy, and come together with a bit of patience and a few technique tricks.
Why you’ll make them
These Red Christmas Macarons pop on holiday dessert tables. They feel special, photograph beautifully, and—bonus—freeze like champs. Want cute holiday bites that scream “Christmas”? These Santa Macarons deliver.
What you’ll need (ingredients)
For the shells
- 100 g granulated golden sugar
- 4 g powdered egg white (optional; helpful in humid climates)
- 100 g egg whites (about 3 large whites)
- 105 g almond flour
- 105 g powdered sugar
- ~1 tbsp red gel food coloring (or more if you want extra-vibrant Red Christmas Macarons)
- A pinch of patience
For the royal-icing belt & buckle
- 187 g powdered sugar (about 1½ cups)
- 1 tbsp meringue powder
- ~4 tbsp water (adjust to consistency)
- 2 drops black gel coloring
- 1 drop yellow gel coloring
For the sugar-cookie buttercream
- 63 g (½ cup) all-purpose flour (heat-treated; see notes)
- 113 g (½ cup) unsalted butter, room temp
- 50 g (¼ cup) golden sugar (or brown/granulated mix)
- 156 g (1¼ cups) powdered sugar
- 1 tsp vanilla extract
- 1/8 tsp almond extract
- ½ tbsp milk or cream (add more if needed)
Finish & garnish
- ~50 g (¼ cup) desiccated/shredded coconut (for rolling edges)
- Crushed freeze-dried raspberries or extra sprinkles (optional)
Tools & gear
- Food processor or sieve for dry ingredients
- Stand mixer or hand mixer for meringue & buttercream
- Piping bags fitted with a round tip (¼” recommended)
- Silpat or parchment-lined trays (macaron template helpful)
- Spatula, sifter, and a fine toothpick for popping bubbles
- Oven thermometer (macaron baking is oven-sensitive)
Quick overview — the workflow
Make meringue → fold in dry mix (macaronage) → pipe shells → rest until dry → bake shells → make royal icing and buttercream → pipe belt + buckle on half the shells → fill, assemble, roll sides in coconut → chill or freeze. Sounds long, but most steps move quickly once you get the rhythm.
Step-by-step: macaron shells (short, clear)
- Prep: Sift almond flour and powdered sugar together twice. Line trays and set a piping bag ready. Preheat oven and stabilize its temp (I run mine at 300°F for a while to avoid wild swings). If you use convection, try 270°F and test.
- Warm sugar (optional method): Place a metal bowl over a pot of barely simmering water. Add the golden sugar and egg white powder (if using). Whisk to dissolve and remove. Add the egg whites and whisk just until warm and smooth — you only want the sugar melted, not cooked.
- Whip the meringue: Transfer to the mixer. Start low briefly, then build to medium-high. Whip until glossy, stiff peaks form. Don’t overwhip—stiff, shiny peaks are your cue. This step can take 10–15 minutes depending on gear and humidity.
- Color: Fold in your red gel (and powder coloring if you have it) at this stage so the color integrates evenly. Bold tip: If you’re chasing vivid red, combine powdered red with gel—powder lays a stable base.
- Macaronage: Add your sifted dry mix to the meringue. Fold in gentle “J” motions, then press the batter against the bowl sides to deflate air. Stop when the batter flows in a thick, lava-like ribbon and takes ~10–15 seconds to settle back in. You should be able to draw figure-8s without the batter breaking—ready to pipe.
- Pipe: Fill the bag, hold 90° over each template circle, and squeeze gently for 3–5 seconds. Lift and twist to finish each dot. Tap the tray a few times on the counter. Pop any surface bubbles with a toothpick.
- Rest: Let shells dry until they form a skin—touch the surface; it should feel dry and not tacky. Because of the heavy red coloring, these may take longer; expect up to 2 hours in humid areas. Bold tip: A proper skin prevents cracking and helps develop feet.
- Bake: Bake one tray at a time. Times vary—start around 15 minutes and adjust per your oven. Finished shells have developed feet, don’t jiggle, and feel set when touched.
- Cool: Let shells cool fully on the tray before moving them.
Royal icing belt & buckle — quick method
- Combine powdered sugar and meringue powder. Beat slowly while adding water until the icing reaches a smooth, pourable-but-thick texture (think sweetened condensed milk).
- Split into two bowls. Tint one with black for the belt and the smaller portion yellow for the buckle. Fill piping bags—black in a size 3 tip, yellow in a size 2. Keep covered so it doesn’t crust.
- Pipe a black line across the center of half the shells to form Santa’s belt. Let that dry a little (a fridge helps speed things up). Then pipe a small yellow square in the middle for the buckle. Let dry completely before assembling. Bold tip: Royal icing gives a crisp, professional buckle—way easier than trying to build it from batter.
Sugar-cookie buttercream (safe-to-eat flour method)
- Heat-treat the flour: Spread the flour on a sheet and bake at 350°F for ~5 minutes, stirring once. Let cool. (This kills any bacteria and makes the flour safe to eat in frosting.)
- Beat butter and sugars until fluffy (4–5 min). Add cooled flour, vanilla, almond extract. Add milk ½ tbsp at a time until you reach piping consistency. If too loose, add more powdered sugar.
- Spoon into a piping bag with a round tip.
Bold tip: Golden sugar adds caramel-like depth—use it if you want cookie-dough vibes in the buttercream.
Assembly & finishing touches
- Pair shells by size. Pipe about 1–1.5 tsp of buttercream onto the flat side of a bottom shell.
- Gently press a decorated top shell (belt + buckle) onto the buttercream. Roll the assembled edge lightly in shredded coconut for a snowy rim.
- Place macarons on a tray, chill for at least 24 hours in the fridge if you can—this ages them and improves texture and flavor.
- Serve chilled or at cool room temp. Want them firm like little ice-cream sandwiches? Freeze briefly before serving.
Tips, tricks, and troubleshooting (short & useful)
- Color care: If you load lots of gel color, shells require a longer drying time. Don’t rush the skin formation.
- Humidity hack: Use powdered egg whites if it’s humid where you live. It stabilizes the meringue.
- Meringue look: Stop whipping when your meringue is glossy and forms stiff peaks—overwhipping causes hollow shells.
- Batter texture: If the batter runs like soup, you over-mixed. If it’s stiff and clumpy, keep folding. Aim for thick, steady flow.
- Buckle method: I tried batter-buckles and in-batter buckles—royal icing wins for clean, raised buckles every time. IMO, it’s the easiest route.
- Perfect rounds: Pipe, then after baking, pop a cookie cutter around the warm shell for perfect circles. Works wonders for presentation.
Variations & creative spins
- Swap red for green or mix marbling for Christmas-themed macarons.
- Fill with peppermint buttercream for peppermint lovers—think Peppermint Macarons vibes.
- Add a dusting of edible gold for fancy party trays or Disney Parks Gingerbread–inspired elegance.
- Make mini Santa faces by piping extra white icing for the beard and eyes—fun for kids’ parties.
- For Santa-themed macarons with chocolate lovers, use a dark chocolate ganache center instead.
Serving, storing & freezing
- Serve: Chill then serve straight from the fridge for crisp shells and creamy centers.
- Store: Keep in an airtight container in the fridge up to 5 days. Let sit 10–15 minutes before eating for best texture.
- Freeze: Freeze in a single layer on a tray, then bag. Use within 1–2 months. Thaw in the fridge overnight.
- Travel tips: Pack gently in tins with parchment layers. They travel well if chilled.
FAQs (short answers)
Do I need egg white powder?
No—only if you live in a humid area or want extra meringue stability.
Can I make the buckle from batter?
You can, but royal icing gives more consistent, raised buckles. Saves time and fuss.
How should I get vivid red?
Use a mix of powdered red (base) + gel (intensity). Add color early and plan for longer drying.
Can kids help?
Totally—have them pipe the buttercream and roll the edges in coconut. They’ll love it.
Final thoughts — holiday-ready bite-sized cheer
These Santa Macaron treats pack big holiday personality into dainty sandwiches. They fit right into cookie boxes, dessert platters, and gift tins—perfect if you crave festive Christmas Macaron projects. Try a batch, test one technique at a time, and don’t stress the first go; macarons reward practice. Who wouldn’t smile at a tray of tiny Santas lined up for snack time?
Follow me on Pinterest for daily new recipes.

Irresistible Santa Macarons Recipe — Red Christmas Macarons That Steal The Show
- Prep Time: 2 hours
- Cook Time: 40 minutes
- Total Time: 2 hours 40 minutes
- Yield: 22 macarons 1x
- Category: Dessert
Description
These bright, festive bites—Santa Macarons Recipe style—pair crisp red shells with a sugar-cookie buttercream and a tiny royal-icing belt. They look adorable and freeze/keep well.
Ingredients
For the shells
- 100 g golden granulated sugar
- 4 g egg white powder (optional — see notes)
- 100 g liquid egg whites
- 105 g almond flour, sifted
- 105 g powdered sugar, sifted
- Red gel (use as needed for vivid color)
For the royal icing (belt & buckle)
- 187 g powdered sugar (about 1½ cups)
- 1 tbsp meringue powder
- ~4 tbsp water (adjust for consistency)
- 2 drops black gel food color
- 1 drop yellow gel food color
For the sugar-cookie buttercream
- 63 g (½ cup) all-purpose flour (heat-treated)
- 113 g (½ cup) unsalted butter, room temp
- 50 g (¼ cup) golden sugar (or mix brown + granulated)
- 156 g (1¼ cups) powdered sugar
- 1 tsp vanilla extract
- 1/8 tsp almond extract
- ½ tbsp milk or heavy cream (more as needed)
Finish
- 50 g desiccated (shredded) coconut for rolling edges
Instructions
Method — shells
-
Prep everything. Sift almond flour with powdered sugar. Fit a piping bag with a ¼” round tip. Line trays with parchment or a macaron template.
-
Stabilize your oven. Preheat early — I like ~300°F (270°F if convection) and let it settle so temps don’t swing. Bold tip: Oven stability makes or breaks macarons.
-
Warm the sugar (optional): Place a heatproof bowl over simmering water, whisk sugar + egg white powder (if using), then add egg whites and whisk until sugar dissolves. Don’t let the bowl touch the water.
-
Whip meringue. Move mixture to a mixer. Start slow, ramp to medium-high and whip to glossy, stiff peaks. Do not overwhip — stop when peaks stand tall with a slight bend.
-
Color & fold. Fold in sifted dry mix and red gel. Use gentle “J” motions, then press against the bowl sides to deflate just enough. When batter flows in a thick ribbon and makes figure-8s without breaking, it’s ready. Bold tip: If you packed in lots of gel, expect a longer dry time.
-
Pipe rounds. Pipe straight down into the center of each template circle for 3–5 seconds; lift and twist to finish. Tap trays to release air bubbles; pop any surface bubbles with a toothpick.
-
Rest until dry. Let shells sit until they form a firm skin to the touch — this can take longer with heavy coloring (up to 2 hours). Bold tip: A proper skin prevents cracking and gives nice feet.
-
Bake one tray at a time. Time varies by oven; start around 15 minutes and adjust. Shells are done when they’ve formed feet and don’t jiggle. Cool completely before decorating.
Royal icing — belt & buckle
-
Whisk powdered sugar with meringue powder. Slowly add water while mixing until the texture is smooth and pourable—but not watery (think thick condensed milk).
-
Divide icing into two bowls. Tint one black, the other yellow. Fit piping bags (black = #3 tip; yellow = #2). Keep icing covered so it doesn’t crust.
-
Pipe a thin black stripe across the center of half the shells. Chill briefly to set. Pipe a little yellow square for the buckle. Let dry fully before assembling.
Sugar-cookie buttercream (safe to eat)
-
Heat-treat the flour: Spread flour on a tray and bake 4–6 minutes at 350°F, stirring once. Cool before using. Bold tip: Heat-treating makes the flour safe in no-bake frostings.
-
Cream butter with golden sugar until fluffy (4–5 minutes). Add powdered sugar, then the cooled flour, extracts, and a splash of milk. Adjust to piping consistency.
-
Transfer to a piping bag.
Assembly & finishing
-
Match shells by size. Pipe a round of buttercream onto a bottom shell. Top with a decorated shell, pressing gently until the filling reaches the edge.
-
Roll the macaron edge in shredded coconut for a snowy rim.
-
For best texture, age in the fridge 24 hours—they’ll taste even better the next day. Freeze for 1–2 months if you like.
Notes
- Storage
- Fridge: keep in an airtight container up to 5 days.
- Freezer: freeze on a tray, then bag for 1–2 months. Thaw overnight in the fridge before serving.
- Notes & tips
- Egg white powder: optional. Use it in humid climates for more stable meringue; skip if humidity is low (<30%).
- Color trick: For truly vivid red, combine red powder with gel. Add early and plan for longer drying.
- Don’t rush resting. If shells still feel tacky, they’ll likely crack. Patience matters.
- Tried-and-true buckle method: I tested batter buckles and in-shell buckles — royal icing wins every time for clean, raised decoration (IMO).
- Kid-friendly step: Let kids pipe the buttercream or roll the edges in coconut — they’ll love it.
Santa Macarons Recipe, Red Christmas Macarons, Santa Macarons, Christmas Themed Macarons, Disney Parks Gingerbread, Santa-themed Macarons, Santa Macaron, Santa Claus Macaron, Christmas Macaron


