Pumpkin Caramel Pie Recipe — Decadent Dulce de Leche Pumpkin Pie
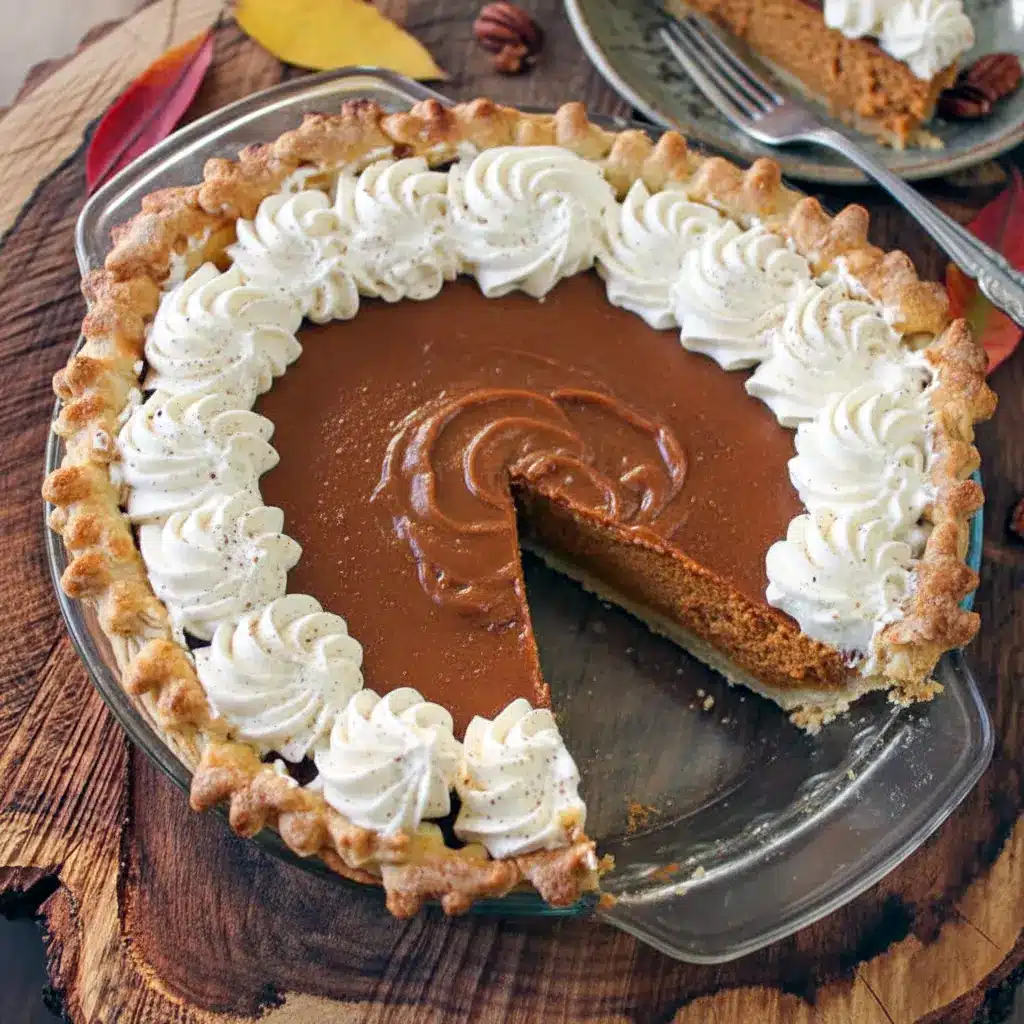
Pumpkin Caramel Pie Recipe meets Thanksgiving swagger in this silky, caramel-kissed pumpkin custard. Think classic pumpkin flavor but deeper, with buttery dulce de leche weaving a toffee-like richness through every bite. Ready to upgrade your holiday dessert? Let’s do this.
Brief introduction — what this pie is about
This is a Gourmet Pumpkin Pie that plays nice with tradition while nudging it toward something decadent. I swap sweetened condensed milk for dulce de leche, fold it into pumpkin puree, and get a custard that’s smooth, caramel-y, and somehow more grown-up than the usual pie. It’s still comforting; it just wears a nicer outfit.
Why you’ll love it
- Velvety texture: the dulce de leche makes the filling silkier than a standard custard.
- More depth, not more sweetness: caramel notes add complexity without clobbering the pumpkin spices.
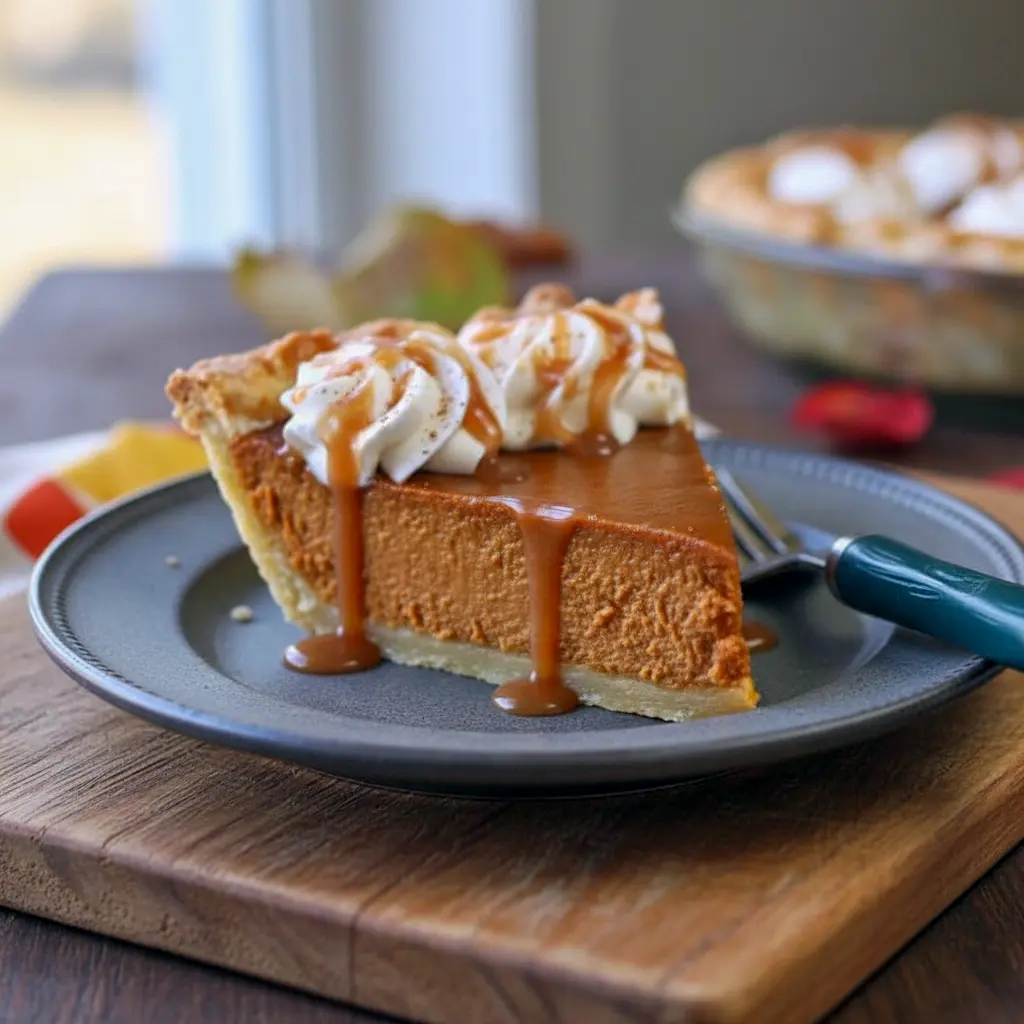
- Showstopper look: drizzle a bit of extra dulce on top and you’ve got a dramatic, almost Volcano Pie effect.
- Make-ahead friendly: bake now, serve later — it holds up in the fridge for days.
Who doesn’t want a pie that tastes like a treat and acts like a plan?
The story behind this twist
I’m famously picky about texture (no gloopy foods for me), but my other half loves a classic slice. I figured caramel could charm the situation: I swapped in Dulce De Leche Pie Recipe Easy-style for the condensed milk and discovered depth—caramelized sugar giving hints of toffee and butterscotch. The result converted skeptics. Moral: sometimes culinary compromise equals delicious victory.
Ingredients breakdown — what each part brings (short blurbs)
For the crust
- All-purpose flour — structure for a tender shell.
- Sugar — just a touch to round flavor.
- Butter + shortening — cold, cubed; keeps the crust flaky.
- Very cold water — binds the dough without melting the fats.
Why these? Cold fats create layers that bake into flakiness. Use a food processor or a good, fast hand to keep things cool.
For the filling
- Pumpkin puree (100%) — the base. Use canned or homemade.
- Dulce de leche — caramel backbone instead of ordinary condensed milk.
- Eggs — set the custard.
- Cinnamon + ginger — classic, warm spice notes.
- Vanilla + salt — vanilla perfumes; salt balances sweetness.
Why dulce de leche? It brings caramel depth and a silkier mouthfeel. If you can’t find it, read the notes below for a safe stovetop hack.
Step-by-step — How to make it
Make the pie crust (short, sharp steps)
- Combine dry stuff. Pulse flour, sugar, and salt in a food processor.
- Cut in fats. Add very cold, cubed butter and shortening. Pulse in short bursts until the mix looks like coarse crumbs. Do not overwork.
- Add water slowly. Pulse with half the water, then add more just until it clumps. Stop early—wet dough = tough.
- Chill. Turn out, form a disk, wrap, and chill for 1 hour (or longer).
- Roll & parbake. Roll to fit a 9-inch pan, crimp the edges, then freeze while you preheat. Blind-bake at 400°F with foil and weights for 20–25 minutes until edges just start to color. Remove weights and cool.
Bold tip: Keep everything cold. Cold butter = flaky crust.
Make the dulce-pumpkin filling
- Preheat oven to 350°F.
- Blend base. Whisk 15 oz pumpkin puree with 14 oz dulce de leche until silky. Use a whisk or an upright mixer on low.
- Add eggs & spices. Mix in eggs, cinnamon, ginger, vanilla, and salt until totally smooth. Taste—adjust spices if you want more heat.
- Fill the par-baked shell. Pour the custard into the cooled crust and smooth the top.
Bake and finish
- Bake at 350°F for ~50 minutes. You want a jiggle in the center, not liquid—edges should be set. If the crust edges brown too quickly, shield with foil.
- Cool slowly. Turn off oven, crack door, let the pie rest 30 minutes before moving to the counter. Then chill 4+ hours; overnight is ideal.
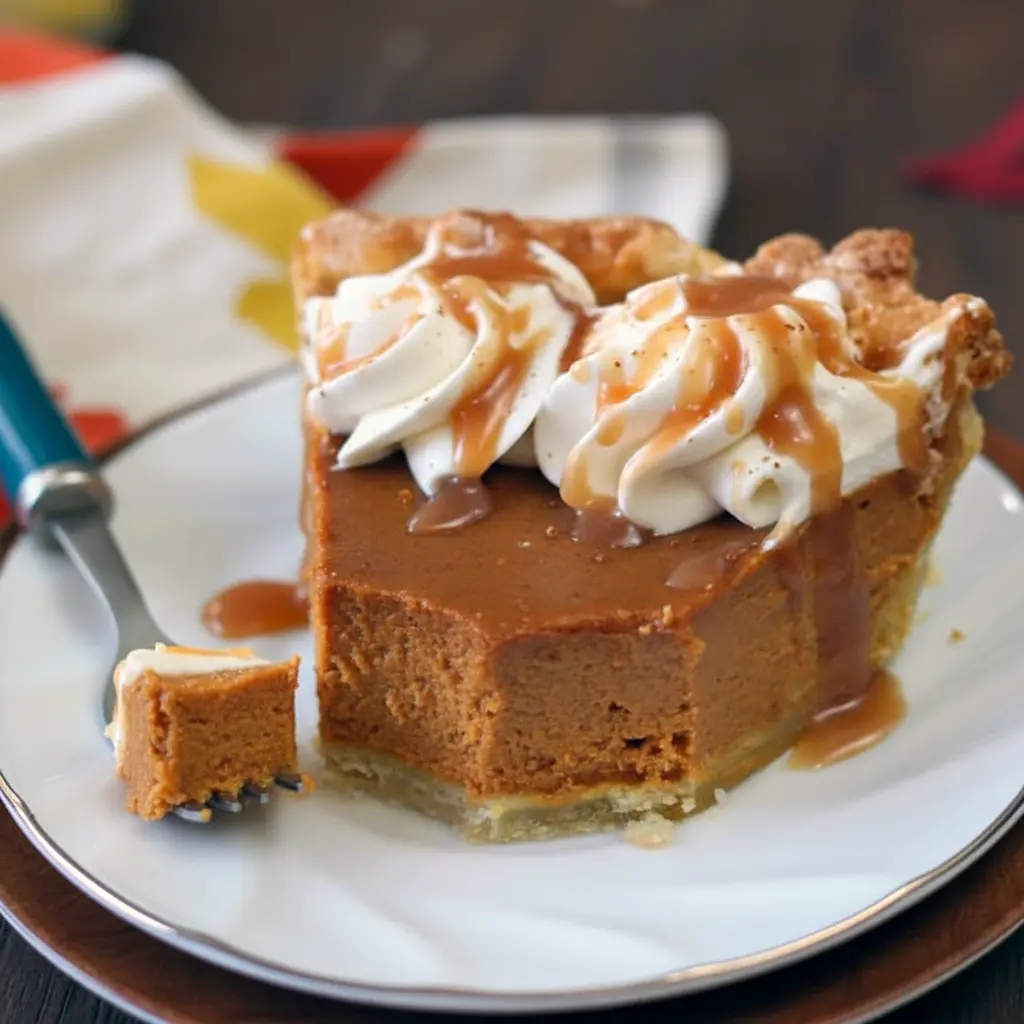
- Optional luxe finish: thin extra dulce de leche with a splash of milk and warm it; drizzle across the pie in a glossy stream. Want drama? Pile a small funnel of extra dulce in the center and coax it outward like a tiny Volcano Pie. (Yes, really.)
Bold tip: Chill fully before slicing—custard sets and slices neater.
Pro tips for perfect results
- Measure by weight if you can—precision matters in pastry. Using a scale reduces guesswork.
- Blind-bake the crust so the bottom doesn’t get soggy. Brush with an egg wash or melted chocolate for extra protection if you like.
- Don’t overbeat the filling; incorporate ingredients until smooth but stop. Over-mixing pulls in air and can cause cracks.
- Use full-fat dulce de leche for best texture; lighter versions can thin the custard.
- Avoid over-baking. A slight jiggle in the center at 50 minutes = perfect. It firms as it cools.
Bold reminder: Slow cooling helps prevent cracks and sinking.
Variations to try (fun riffs)
- Salted caramel swap: Turn this into a Salted Caramel Pumpkin Pie by flaking Maldon over the top and switching half the dulce to salted caramel sauce. Yum.
- Spicy Mexican vibe: Make a Mexican Pumpkin Pie by adding a pinch of ancho chili, ½ tsp ground allspice, and a splash of evaporated milk for richness.
- Volcano Pie drama: Heap extra dulce in the center and torch lightly or pour warm dulce to make a bubbling-looking top—this is the playful Volcano Pie take.
- Pecan swirl: Fold toasted pecans into a ribbon or press them around the rim for texture contrast.
- Mini pies: Make the Dulce De Leche Pie Recipe Easy by using pre-made tart shells for faster prep.
Best ways to serve
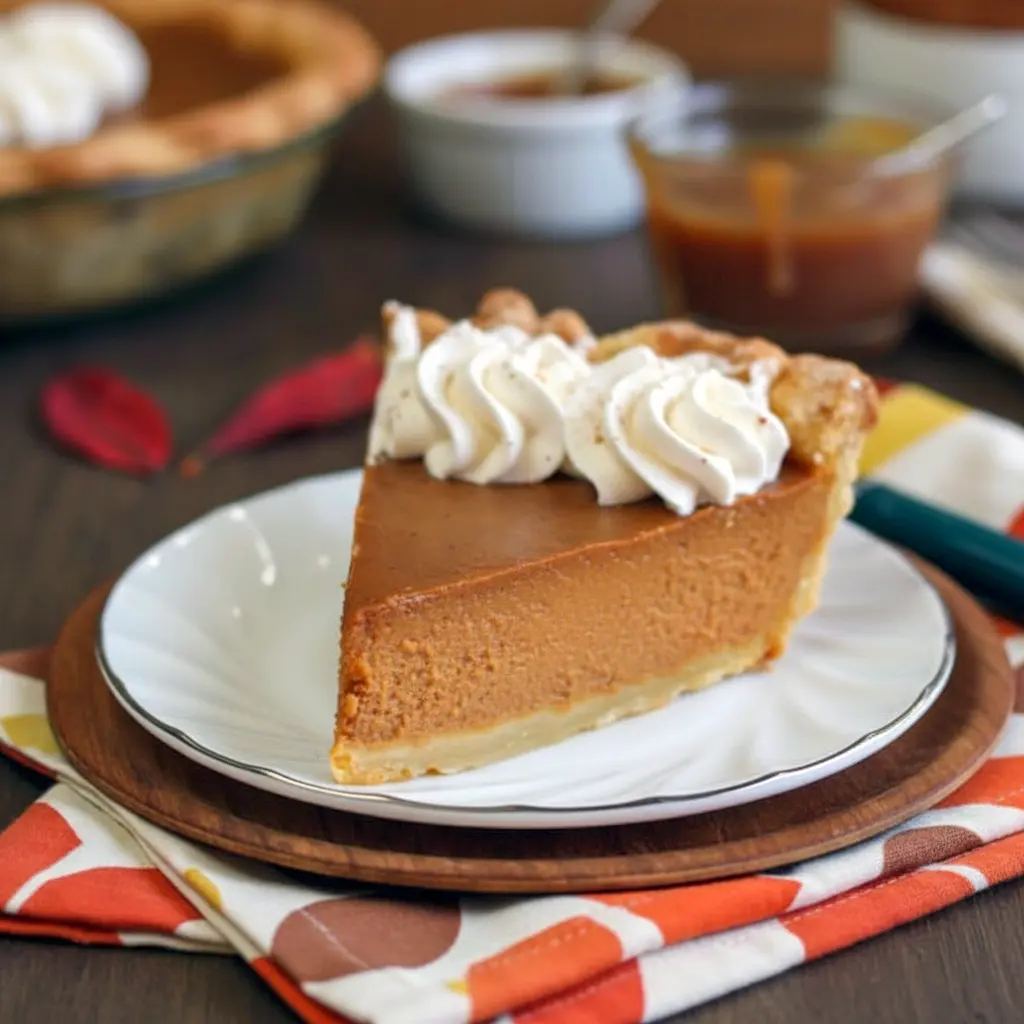
- Classic: A generous dollop of unsweetened whipped cream or a lightly sweetened mascarpone. The cream cools the caramel warmth.
- Fancy: A drizzle of reduced cinnamon syrup (or espresso syrup) and a shower of toasted pepitas.
- Simple: Serve with a scoop of vanilla gelato—contrast of hot pie and cold ice cream = bliss.
- Sharing: Cut into neat slices and serve on warmed plates; the heat helps the caramel pour elegantly.
Rhetorical Q: Want applause at Thanksgiving? Serve this one.
Storage & leftovers — quick tips
- Refrigerator: Store covered for up to 4 days. The caramel deepens with time.
- Freezer: Wrap well and freeze slices up to 3 months. Thaw overnight in the fridge.
- Reheat: Warm a slice in a 300°F oven for 6–8 minutes for a just-baked vibe; don’t nuke it or you’ll ruin the texture.
Bold tip: Make this pie a day ahead—it tastes better after the flavors settle.
FAQs — quick answers to common questions
Can I use sweetened condensed milk instead of dulce de leche?
Yes. Use it as-is for a more classic pie. Or DIY dulce by simmering a can of condensed milk in a water bath for 3–4 hours—just be careful and cool fully before opening.
Is this pie too sweet?
Not usually. The Pumpkin Caramel Pie flavor balances spice, pumpkin, and caramel. If you worry, add a pinch more salt into the custard or use less dulce drizzle on top.
Can I skip the homemade crust?
Absolutely. Use a store-bought shell or refrigerated dough for Dulce De Leche Pie Recipe Easy convenience.
Why did my pie crack?
Over-baking or too rapid cooling causes cracks. Cool it gradually; a small crack won’t affect taste. (Cover with whipped cream and pretend it’s rustic.)
How do I make this a Gourmet Pumpkin Pie?
Use high-quality vanilla, a pinch of flaky sea salt, and a homemade crust from cold European butter. Little upgrades = big payoff.
Final thoughts — wrap-up and encouragement
This is a Pumpkin Pie With A Twist that respects the classic while adding a caramel-rich personality. It’s comforting, elegant, and reliably delicious. Whether you call it Pumpkin Caramel Pie or a Dulce de Leche Pumpkin Pie, it’s a dessert that turns holiday tables into memory-makers.
Bold send-off: Make it ahead, chill it well, and decorate boldly. Serve slices with cream, watch people pause, then repeat.
Follow me on Pinterest for daily new recipes.

Decadent Dulce de Leche Pumpkin Pie — A Showstopping Pumpkin Caramel Pie Recipe
- Prep Time: 30 minutes
- Cook Time: 1 hour 30 minutes
- Total Time: 2 hours
- Yield: 12 servings 1x
- Category: Dessert
Description
This version keeps the same flavors and proportions but uses fresh wording and clearer steps. It produces a flaky, buttery crust and a silky pumpkin filling enriched with dulce de leche.
Ingredients
Crust
- 1½ cups (about 6.5 oz) all-purpose flour
- 2 tablespoons (1 oz) granulated sugar
- ½ teaspoon salt
- 5 oz unsalted butter, very cold, cut into small cubes and frozen for at least 30 minutes
- 1.25 oz vegetable shortening, chilled and cut into cubes (keep it cold)
- ¼ cup very cold water (you may not use every drop)
Filling
- 15 oz (1 can) pumpkin purée
- 14 oz (1 can) dulce de leche — store-bought or homemade (see note)
- 2 large eggs
- 1 teaspoon ground cinnamon
- ¼ teaspoon ground ginger
- 1 teaspoon vanilla extract
- ½ teaspoon salt
Instructions
Make the crust
-
In a food processor, combine the flour, sugar, and salt and pulse a few times so everything is evenly mixed.
-
Add the frozen cubes of butter and shortening. Pulse in short bursts until the mixture resembles coarse crumbs with some pea-sized bits of fat remaining. Avoid over-pureeing.
-
With the motor off, drizzle in about half the cold water and pulse in five-second bursts. Add more water a little at a time only until the dough just starts to hold together when pinched. Stop before the dough becomes wet or sticky.
-
Turn the dough onto a lightly floured surface and bring it together gently — only enough to finish any dry pockets. Shape into a disk, wrap tightly in plastic, and chill in the refrigerator for at least 1 hour. (You can make this dough a few days ahead and keep it chilled.)
Roll, blind-bake, and cool
5. Lightly flour your work surface and roll the chilled dough into a circle large enough to fit a 9-inch pie plate. Transfer the dough to the pan and trim/crimp the edges as desired. Return the shell to the freezer while you preheat the oven to 400°F (200°C).
6. Line the crust with foil or parchment, spray the foil lightly so it won’t stick, and fill with pie weights, dried beans, or rice. Bake for 20–25 minutes, until the rim is just beginning to color and the center looks set. Remove the weights and foil. If the bottom has puffed, press it down gently. Let the par-baked crust cool to room temperature before filling.
Prepare the pumpkin-dulce filling
7. Lower the oven temperature to 350°F (175°C). In a mixing bowl, whisk the pumpkin purée and the dulce de leche together until smooth and homogeneous — no lumps.
8. Add the eggs, cinnamon, ginger, vanilla, and salt. Whisk until the mixture is completely blended and silky.
Assemble and bake
9. Pour the filling into the cooled par-baked crust and smooth the surface. Bake at 350°F for about 50 minutes, or until the center barely jiggles when the pan is tapped. If the pastry edge darkens too quickly, wrap a strip of foil around the rim.
10. Remove the pie from the oven and allow it to cool gradually at room temperature. Once it has cooled, refrigerate the pie for several hours (or overnight) to let the custard fully set.
Notes
- Serving & storage
- Serve chilled or at room temperature. A lightly whipped cream or a thin drizzle of extra dulce de leche makes a lovely finish.
- Keep leftovers in the refrigerator for several days. For longer storage, wrap slices and freeze; thaw overnight in the fridge before serving.
- Notes & shortcuts
- Shortcuts: Use a purchased pie shell or refrigerated pie dough if you want a quick version.
- Make dulce de leche at home: Place an unopened can of sweetened condensed milk upright in a deep pot. Cover it completely with water and simmer gently for about 3–4 hours, keeping the can submerged (top off the pot with water as needed). Turn off the heat and let the can cool completely before opening. Safety tip: never open a hot can — let it cool fully to avoid splatters.
- If you can’t or don’t want to make dulce de leche, you may use sweetened condensed milk instead for a more traditional pumpkin pie flavor.
- Don’t overwork pastry: handling the dough too much warms the fat and develops gluten, which makes the crust tough. Cold fats = flaky layers.
- Par-baking is crucial: blind-baking the shell prevents a soggy bottom once the custard goes in.
- Measuring advice
- Baking behaves best when measured precisely. If you have a kitchen scale, weigh ingredients rather than relying solely on cups — our recipe is developed with weight measurements in mind. (Note: weight and volume aren’t interchangeable; 8 oz by weight does not always equal 1 cup.)
Nutrition
- Calories: 199kcal
- Sugar: 3g
- Sodium: 208mg
- Fat: 13g
- Saturated Fat: 7g
- Carbohydrates: 17g
- Fiber: 1g
- Protein: 3g
- Cholesterol: 52mg


